
Play
Part 1 - Step by Step
- InstructInstruct students that they are going to work in groups to test each of the remaining Coder cards. First, they will predict what behavior they think will happen based on the Coder card name and symbol. Then they will insert the card in the Coder and start the project to observe the behavior of the 123 Robot. Make sure students can verbally describe the goal of the activity. View the animation below to see an example of this testing process done by swapping out Turn Left and Turn Right cards and observing the result.
Video file
Students will test each of the following Coder cards: "Turn left", "Turn right", "Play honk", "Act crazy", and "Drive 1". They should keep the "When start 123" card in the topmost slot of the Coder throughout the Lab.
Coder Cards Needed - ModelModel the process of predicting then testing each of the Coder cards. Explain that each Coder card causes a specific behavior.
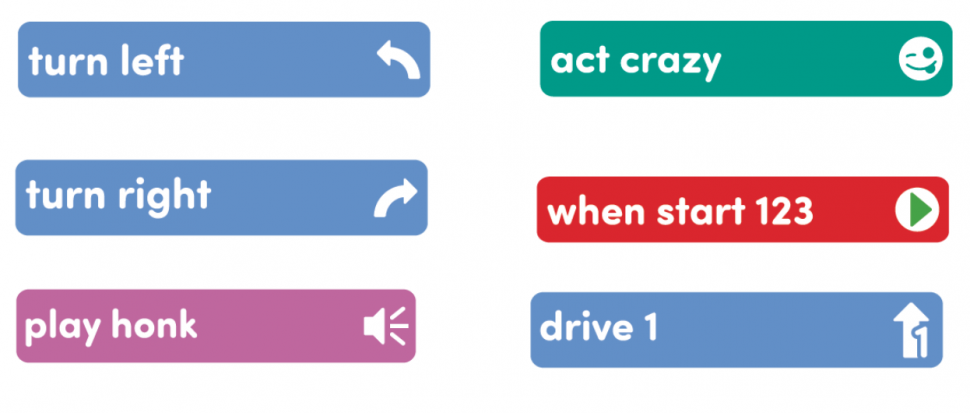
- Each group will need a 123 Robot, Coder, and access to a 123 Field or flat surface to test the Coder card behaviors. They will also need one of each of the following Coder cards pictured above:
- "When start 123", "Turn left", "Turn right", "Play honk", "Act crazy", and "Drive 1"
- If necessary, model how to test the Coder cards with the 123 Robot as they did in the Engage section. (If students have a solid understanding of the process, have them start testing with their group)
- Ask students what they think the "Turn left" Coder card will do.
- Once students have predicted what they think will happen, have students insert the "Turn left" card into the Coder beneath the "When start 123" card.
- Then, model how to connect the 123 Robot to the Coder.
- First, wake the 123 Robot by pushing the wheels along a surface until you hear the startup sound.
- Then, turn on the Coder by pressing the Start button.
- Once the Coder and the 123 Robot are turned on, connect the 123 Robot to the Coder. Do this by pressing and holding the Start and Stop buttons on the Coder, and the Left and Right buttons on the 123 Robot for at least 5 seconds, until you hear the connected sound, and the indicator lights flash in time, as shown in the animation below. Turn on sound for this animation.
- For more information about the Coder, see the Using the VEX 123 Coder VEX Library article.
Video file- Have students continue to predict and test each of the cards.
- If groups finish early, have them create a dance move for the 123 Robot by sequencing two or three Coder cards in the Coder. Then, they can test their project on the 123 Field and watch the 123 Robot dance!
- Each group will need a 123 Robot, Coder, and access to a 123 Field or flat surface to test the Coder card behaviors. They will also need one of each of the following Coder cards pictured above:
- FacilitateFacilitate discussions with students as you circulate through the room. Encourage students to share their thinking with questions such as:
- Did your prediction match the behavior of the 123 Robot? If not, how was it different?
- What do you look at on the card to make your predictions?
- How far does the 123 Robot move when you use the "Drive 1" Coder card? Which direction does it move?
- RemindRemind students that testing takes time and patience. They will need to take each card out of the Coder after they test, insert the next card, then continue the testing process.
- AskAsk students what jobs they know that require people to plan and test before acting. How is that similar to what they did with the Coder and Coder cards?
Mid-Play Break & Group Discussion
As soon as every group has tested each Coder card provided, come together for a brief conversation.
- Did your predictions match the 123 Robot behaviors?
- What was similar or different?
- Show students the "Drive 2" card. Ask them what they think the 123 Robot will do if you use this card in the Coder.
- How will the 123 Robot move?
- Is distance further or shorter than the "Drive 1" card? How do they know that?
- Put the "Drive 2" card in the Coder to test the students' predictions.
- When might the "Drive 2" Coder card be more useful than the "Drive 1" card?
Part 2 - Step by Step
- InstructInstruct students that they will create a project for the 123 Robot to drive in a 1x1 square on a 123 Field. They will need to plan the project with the Coder cards first. Then, they will test their projects. If the 123 Robot doesn't move the way they intended, they will have to troubleshoot, revise their project, and try again. Make sure the students are able to verbalize the intention of the project. View the animation below for an example of how to make the 123 Robot drive in a square using a series of Drive 1 and Turn Right cards.
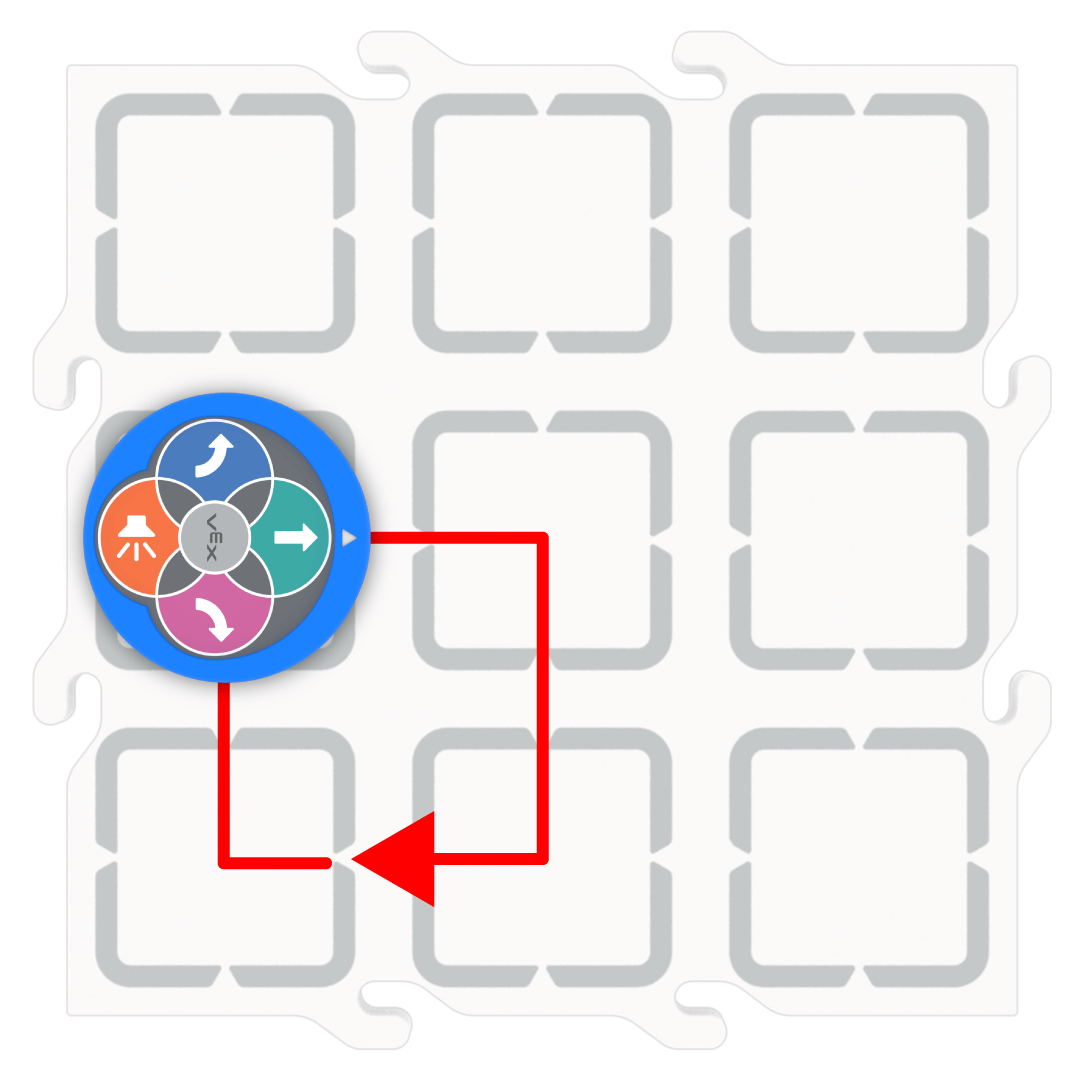
In this animation, the Coder on the left begins with a When start 123 Coder card, then has four sets of Drive 1 and Turn right Coder cards in slots 1 through 8. To the right, the robot begins in the bottom center square on the Tile, facing left.When the project is started, the robot drives in a square.
Video file- Let students know that they should pay close attention to the sequence (or order) in which the Coder cards are placed. Remind students that sequence is important in projects. However, projects may look different. There is more than one way to code the 123 Robot to drive in a square.
123 Robot Moving in a Square - ModelModel how to plan and create a project using the cards provided, then start and revise the project if necessary.
- In addition to a 123 Robot, Coder, students will need access to a 123 Field or flat surface to test their projects. Each group will also need the following Coder cards:
- One "When start 123"
- Four "Drive 1"
- Four "Turn left" OR "Turn right"
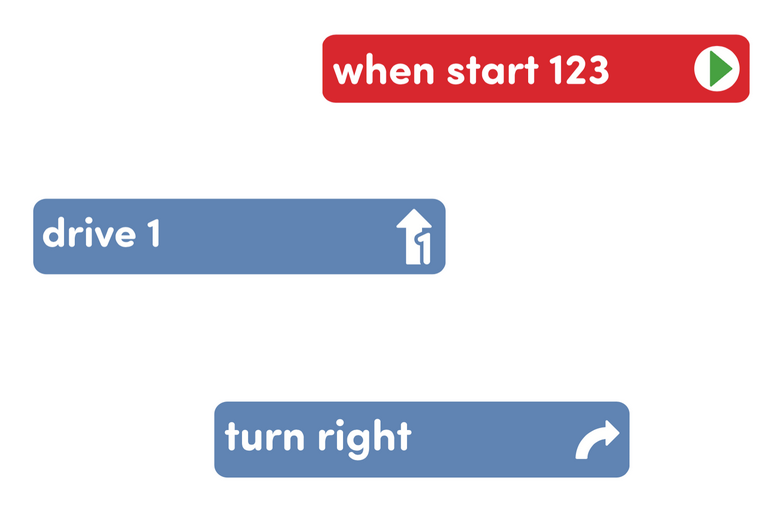
Model Coder Cards Needed - Show students how to lay out the Coder cards in the order (or sequence) needed to have the 123 Robot drive in a 1X1 square.
- Ensure that students know that a square has 4 sides that are the same length and 4 corners. Guide students to decompose the task of driving in a square into smaller actions (i.e. Drive 1, Turn right, Drive 1 again, Turn right...)
- Model how to insert the cards in the Coder making sure to place them in the intended sequence. Students should understand that the "When start 123" card is needed at the beginning of their project. It should be insert in the topmost slot on the Coder.
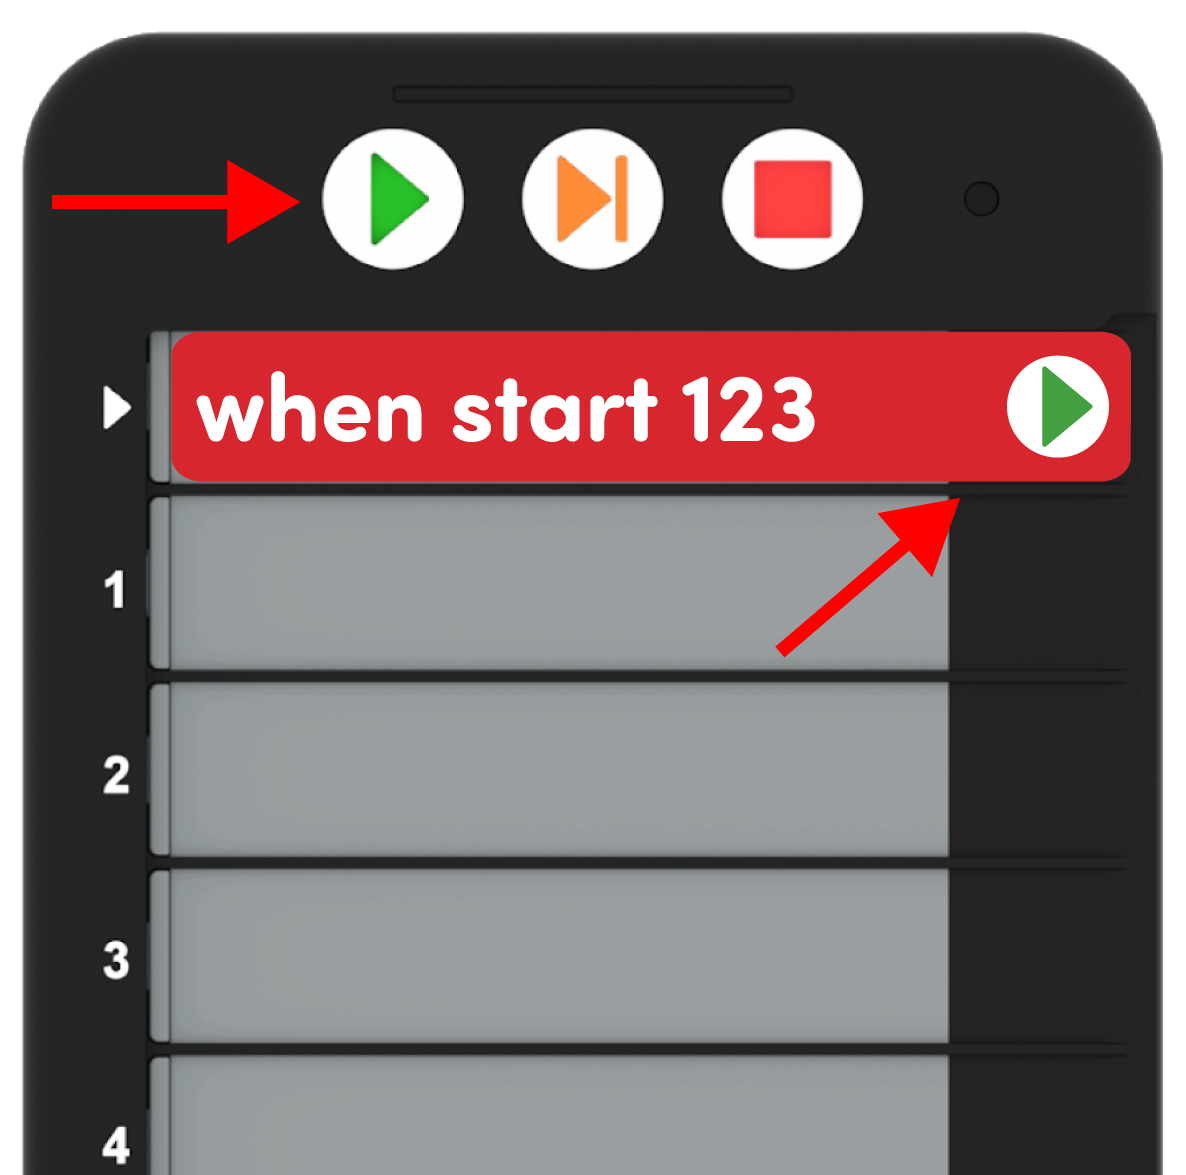
"When started" in the Coder - Students may need to wake the 123 Robot and make sure it is connected to the Coder as shown in the animation below. Turn on the sound for this animation to hear the indicator sounds on the 123 Robot. In the animation, the Start and Stop buttons on the Coder and the Left and Right buttons on the robot are held simultaneously, until a connected sound occurs and the lights on the robot and Coder flash in time.
Video file- Show students how to place the 123 Robot on their 123 Field or on a table to test their project.
- Once all the Coder cards are inserted, they should press Start and observe the 123 Robot behaviors.
- To highlight the troubleshooting process, you may want the teacher demonstration project to have an error, so that you can model how to take out the necessary cards and place them back in the Coder in the correct order to have the 123 Robot drive in a square.
- If groups finish early, have them create a project to drive the 123 Robot in a zig-zag pattern. Students will need to have both "Turn right" and "Turn left" Coder cards.
- In addition to a 123 Robot, Coder, students will need access to a 123 Field or flat surface to test their projects. Each group will also need the following Coder cards:
- FacilitateFacilitate a discussion with the students by encouraging them to talk through the project plans in their groups, and act out the behavior for each Coder card in their project. Use prompts such as:
- Can you use your hands to show how the 123 Robot should move on the 123 Field?
- Will your 123 Robot move the same amount of spaces on all sides?
- How many turns does the 123 Robot need to make to drive in a square?

Project Testing Encourage students to analyze their projects and troubleshoot with the following prompts:
- Which direction did your 123 Robot have to move in for the 123 Robot to make a square?
- Can the 123 Robot use left and right turns to make a square? Why or why not?
- Can you explain what each Coder card in your project does?
- Did your 123 Robot move the way you expected?
- RemindRemind students that coding their 123 Robot to drive in a square will take many tries. Encourage students to keep trying with prompts such as:
- Your 123 Robot didn't move in a square the first time? That's ok! Now you get to try again!
- Is your 123 Robot moving in a way that you didn’t expect? Let's investigate! Where did the 123 Robot start to move out of the square shape? Where is this in the project?
- AskAsk students why they think planning something before doing it may be helpful. Ask students if they have ever planned what they would wear the next day the night before they went to sleep, or planned what they would pack for their lunch the next day. How did making a plan help them?