Summary
Materials Needed
The following is a list of all the materials and teaching resources that are needed to complete the VEX 123 Lab. First listed are the materials needed for the entire Lab, including the 123 Robot. In certain Labs, links to teaching resources in a slideshow format have been included. Not all Labs will include a slideshow. These slides can help provide context and inspiration for your students. All slides are editable, and can be projected for students or used as a teacher resource.
| Materials | Purpose | Recommendation |
|---|---|---|
|
123 Robot |
For performing the behaviors in the project | 1 per group |
|
Coder |
For building a project to use with the 123 Robot | 1 per group |
|
Coder cards |
For inserting into the Coder to create a project | 8 Coder cards per group. See Environment Setup below for specifics |
|
Lab 3 Image Slideshow Google Doc / .pptx / .pdf |
For teacher and student context during the Lab | 1 for teacher facilitation |
|
123 Field |
Area for testing projects with the 123 Robot | 3 Tiles and 2 Walls per group |
|
123 Robot Art Ring with attached Little Red Robot decoration |
For students to turn their 123 Robot into Little Red Robot. Use the same decoration and Art Ring from Lab 1 if possible. | 1 per group |
|
Little Red Robot printable (optional) Google Doc / .docx / .pdf |
To cut and attach to the Field to create Grandmother's house and the red Wolf | 1 per group |
|
Classroom art supplies (paper, markers, tape, pipe cleaners) |
For creating Grandmother's house and the Wolf (if not using printable) | 1 set for whole class to access |
|
Small block |
For attaching to the back of the Wolf so that it can stand up on the Field | 1 per group |
|
VEX 123 PDF Printables (optional) |
To use as manipulatives to support student project planning and saving. | 1 per group |
Environment Setup
- Gather the materials each group needs before class. For this Lab, each group of two students will need a 123 Robot with the Art Ring attached, a Coder, a 123 Field, and the following:
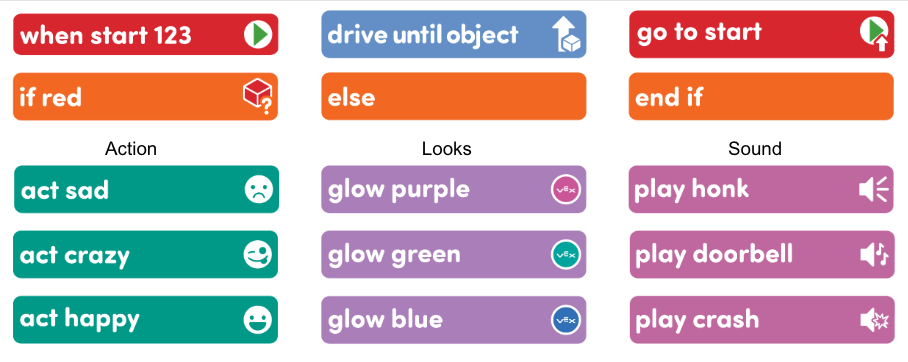
- One "When start 123" Coder Card
- One "Drive until object" Coder card
- One each of the "If red", "Else", and "End if" Coder cards
- One "Go to start" Coder card
- One card from each of the following Coder card categories per group:
- Sound Coder cards (Play honk, Play doorbell, Play crash)
- Looks Coder cards (Glow purple, Glow green, Glow blue)
-
Action Coder cards (Act happy, Act sad, Act crazy)

Coder cards Needed
- To keep your class organized and your students focused on only the necessary Coder cards, only give them access to the cards listed above as needed during the Lab.
- Review the Facilitation Strategies in the Engage section for turn taking ideas to help students share responsibilities during the Lab. For groups larger than the recommended two students, provide students with more granular roles. Examples of responsibilities for students in this Lab:
- Placing the 123 Robot on the Field in the correct location.
- Inserting the Coder cards and pressing the "Start" button.
- Setting up the Field and adding/removing/moving the Wolf.
- Keeping track of the Coder cards and lining them up to plan the group's projects.
-
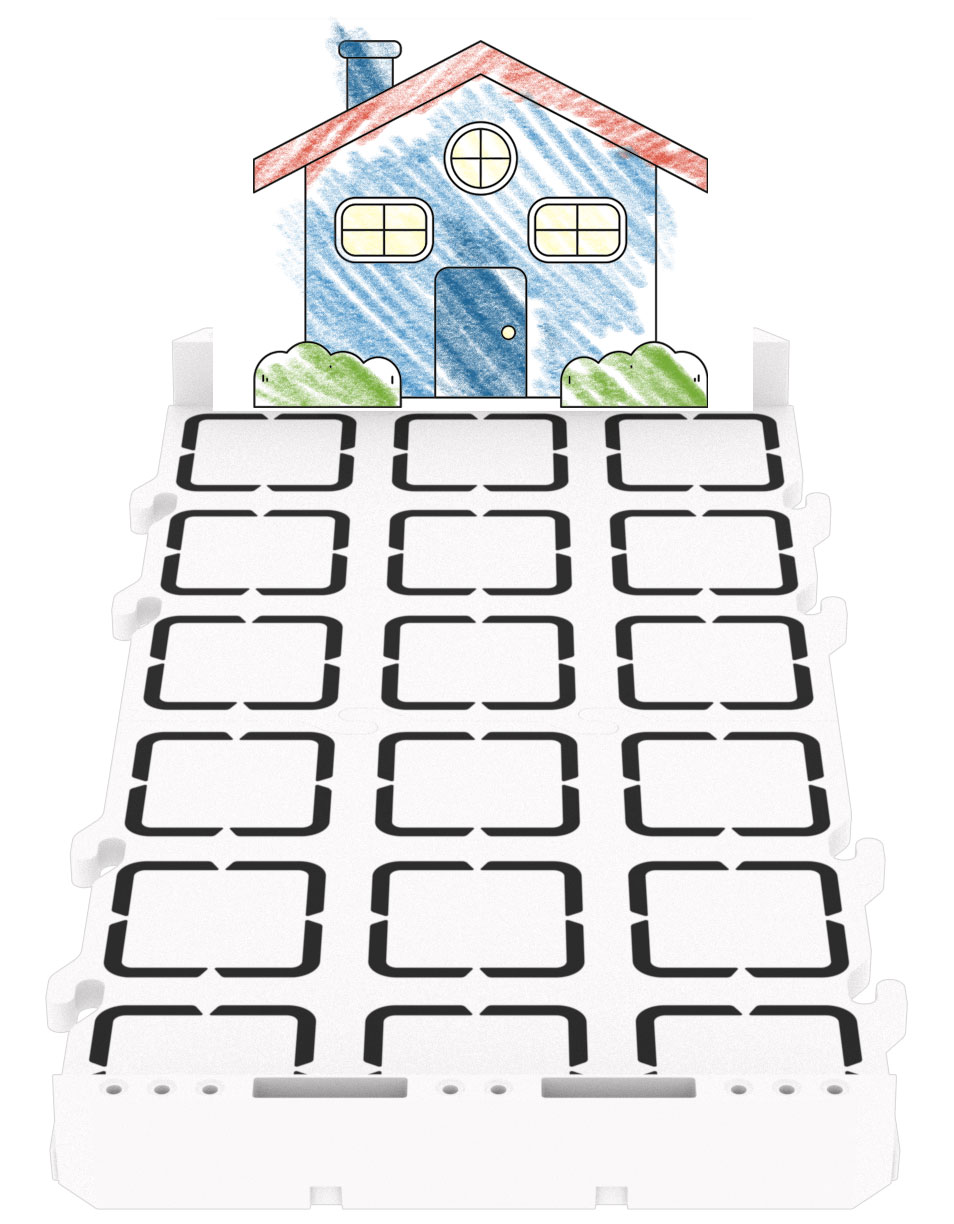
This Lab uses the same Field setup as the previous Labs with the Grandmother's house attached to a Wall. Be sure that the bottom of Grandmother's house does not include any red color, so that the project runs as intended.

123 Field Setup - You will need RED wolves for this Lab. To get the wolves ready for students ahead of time, print and color or make a red paper Wolf and attach it to a small block, so that it can stand up on the Field. The Wolf needs to be upright in order for the Eye Sensor to detect it, and must be colored a solid red (like with a marker) for the Eye Sensor to best detect the color.
- At least one red Wolf will need to be created before beginning the Lab for use in a demonstration during the Engage section.
- Students can use the same Art Ring with attached decoration from the previous Labs, to turn their 123 Robots into Little Red Robots.
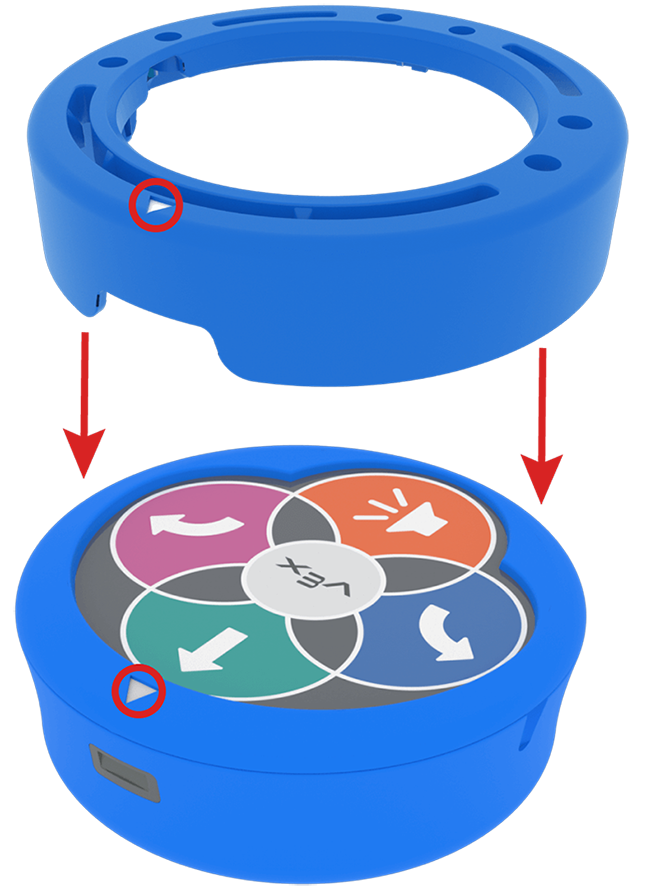
- If these are not available or weren't made in previous Labs, students can make Little Red Robot decorations and attach them to the Art Ring with tape or pip cleaners. Once attached to the Art Ring, snap the Art Ring onto the top of the 123 Robot. Be sure to align the white arrow on the Art Ring with the one on the Robot, and make sure that the decoration is not blocking the Eye Sensor.
-
For more information on using the Art Ring, and to see examples of how it can be used to customize your robot, see the Using the 123 Art Ring article.

Add the Art Ring to the 123 Robot
Engage
Begin the lab by engaging with the students.
-
Hook
In Lab 2, we coded our robots to scare away the Wolf, so that we could get to Grandmother's house. We had to change our projects depending on what was in front of our Little Red Robots. What if we wanted our robots to detect the difference between the Wolf and Grandmother's house? How do you think we could do that?
-
Demonstrate
Introduce the "If red" Coder card, and show students how to use this card in a project to detect a red Wolf.
Note: You may want to use the Mid-Play Break guided discussion while stepping through the Play Part 1 project on the Coder as your demonstration, to more fully foreground the project flow of the "If red", "Else", "End if" Coder card structure for students.
-
Leading Question
What do you think we could add to our project to make our robot do a different behavior when it reaches Grandmother's house?
Play
Allow students to explore the concepts introduced.
Part 1
In Play Part 1, students will create and tests projects using the "If red", "Else", and "End if" Coder cards to have the 123 Robot drive until it detects an object, and perform different behaviors based on the color that is detected by the Eye Sensor.
Mid-Play Break
Students will discuss the 123 Robot's decision-making process based on color detection, observe its behavior step by step, predict project outcomes, and learn about using a "Go to start" card to improve their project, ultimately introducing students to the concept of a 'Wolf Detecting Algorithm.'
Part 2
Students will add the "Go to start" Coder card to the end of their project, and test out their 'Wolf Detecting Algorithm', to drive the robot until it detects the red Wolf, scare it away, and then continue on to Grandmother's house successfully.
Share
Allow students to discuss and display their learning.
Active Share
Students will share their projects, and tell the story of how their Little Red Robot got to Grandmother's house.

Discussion Prompts
- How did the Little Red Robot 'know' when to scare away the Wolf? What information did it use to make that decision?
- What if we wanted to do a behavior if the robot saw something green? How do you think that might work?
- What is something you learned about taking turns today, that can help you be a good partner?