
In the previous Lesson, you learned about the Teach Pendant in VEXcode EXP and how to use the Teach Pendant to move the 6-Axis Arm.
In this Lesson, you will learn about end effectors, including the Magnet Pickup Tool, and how to use the Teach Pendant to engage and release the Magnet.
At the end of this Lesson, you will use those skills in the activity to move a Disk on the CTE Tile to a new location.

End Effectors
An end effector is the device at the end of a robotic arm, designed to interact with the environment. This is also known as the End of Arm Tooling (EOAT). The type of end effector is determined by the task the robotic arm is designed to complete.
There are many different end effectors, including grippers to move and manipulate objects, processing tools like welders or paint sprayers, and sensors for product inspections.
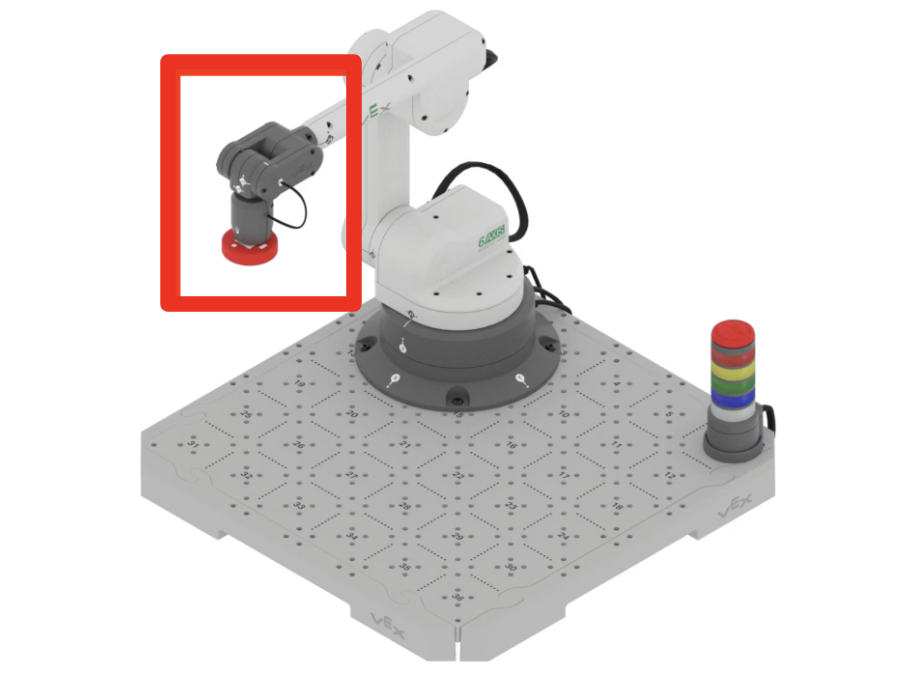
The CTE 6-Axis Robotic Arm Kit includes two end effectors.
The first end effector that you will be using with the 6-Axis Arm is the Magnet Pickup Tool. This is used to pick up Disks and Cubes.
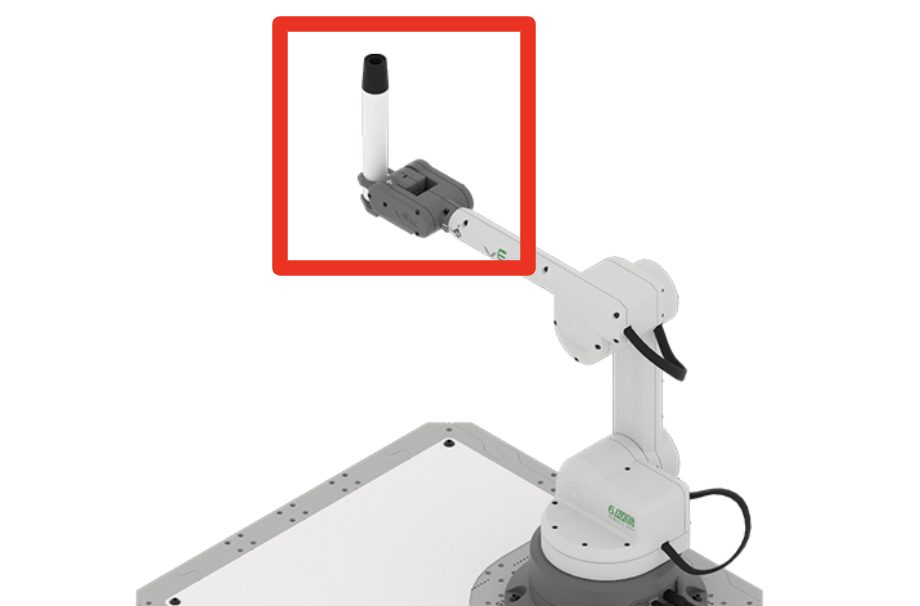
The second end effector you will be using with the 6-Axis Arm is the Pen Holder Tool. This allows you to place the whiteboard marker in the tool to draw on the Tile.
You will learn more about this end effector in a later Unit.
Picking Up and Dropping a Disk
Each Disk has a metal core that allows it to be picked up and moved with the Magnet on the end of the 6-Axis Arm. Follow the steps in this section to use the Teach Pendant to pick up and drop a Disk.
Begin by completing the following setup.
- Ensure the 6-Axis Arm is connected to VEXcode EXP with the Teach Pendant open.
- Place a Disk at Tile location 36.
- Jog the 6-Axis Arm so that the Magnet is touching the Disk, as shown here.
- Remember, select Move to Safe Position in the Teach Pendant to enable jogging functionality.
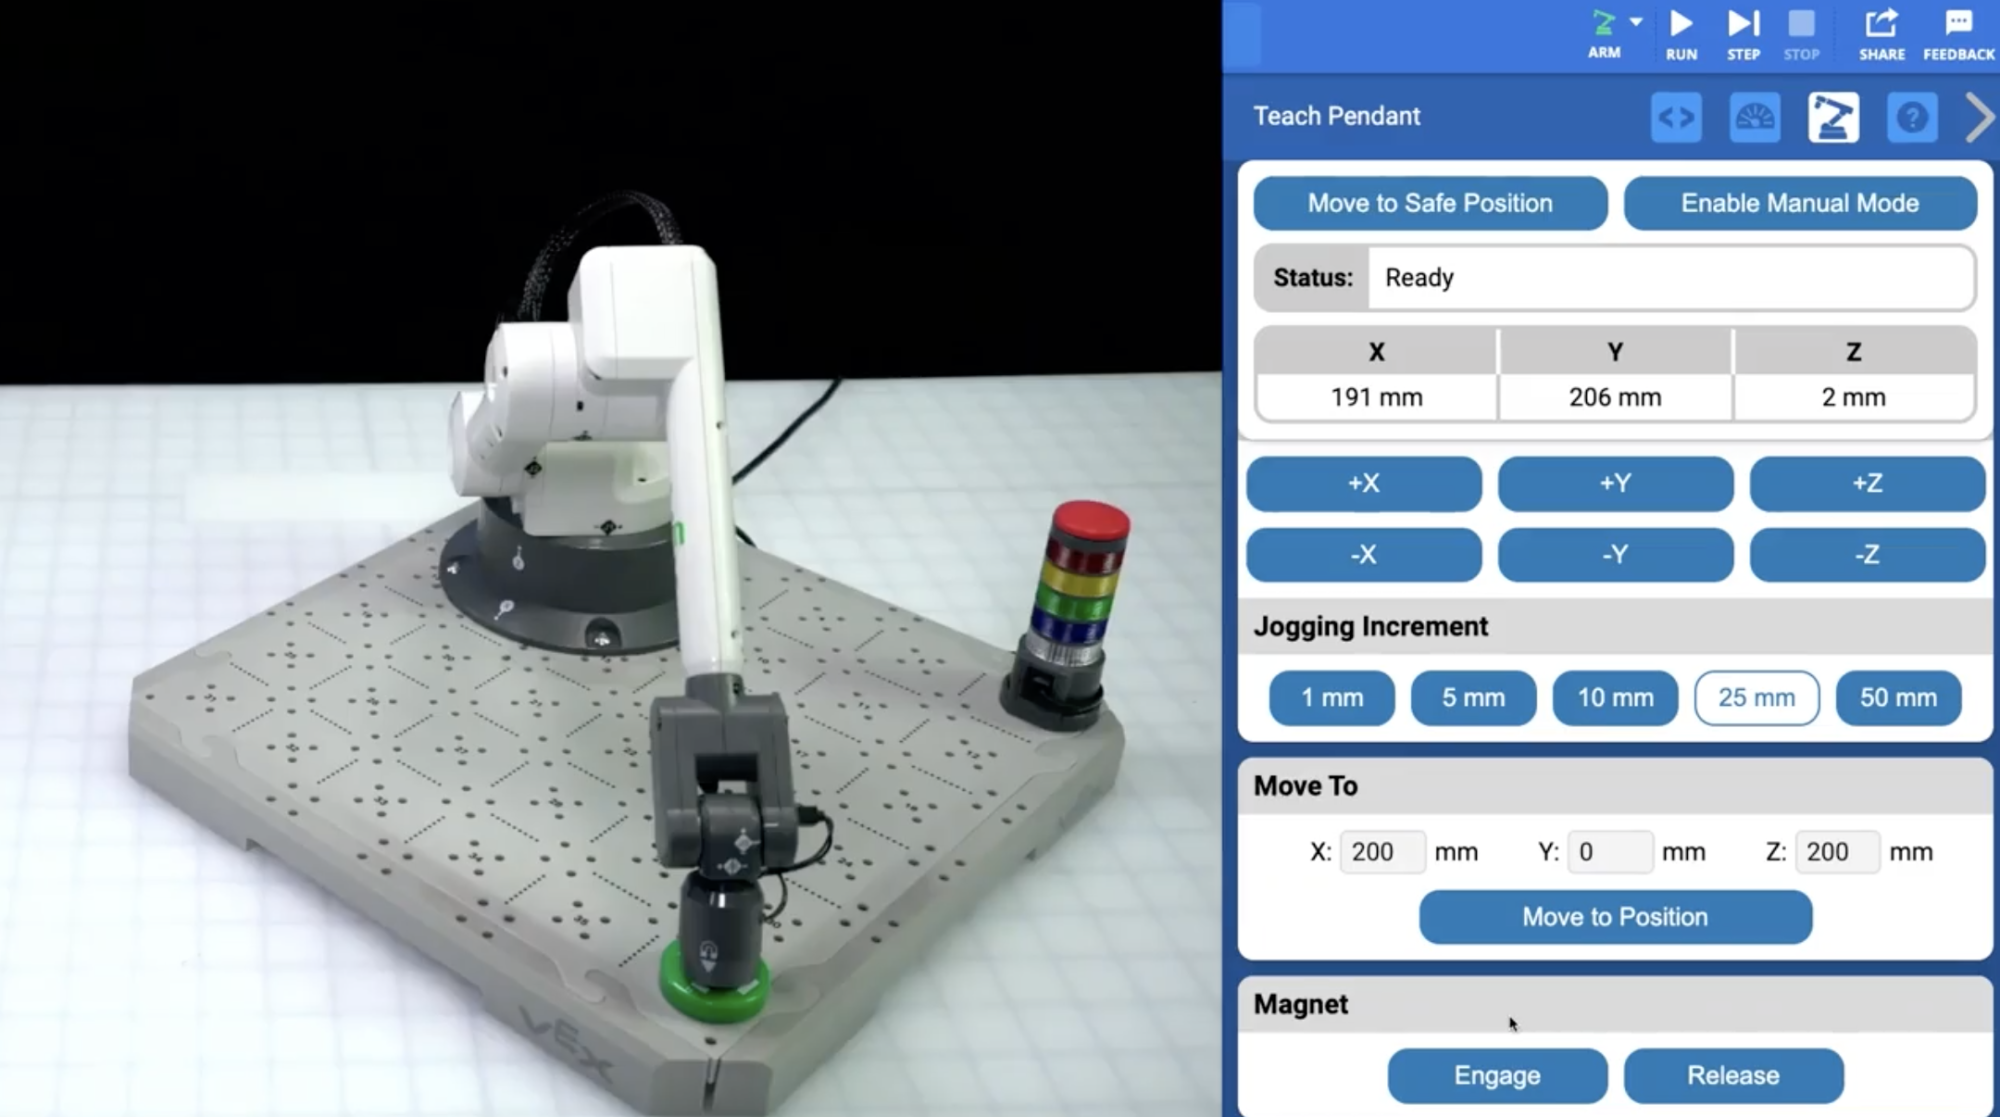
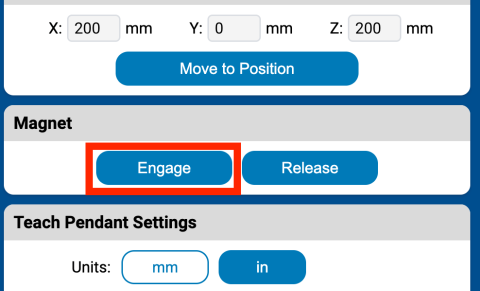
Select the Engage button in the Magnet section of the Teach Pendant to pick up the Disk.
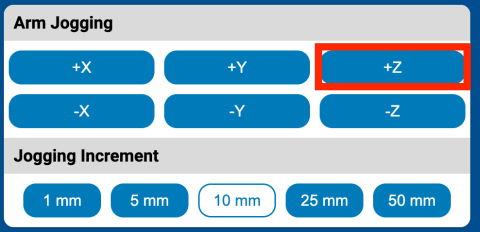
To verify that the Disk has been picked up by the Magnet, jog the 6-Axis Arm along the z-axis by 20-30 millimeters.
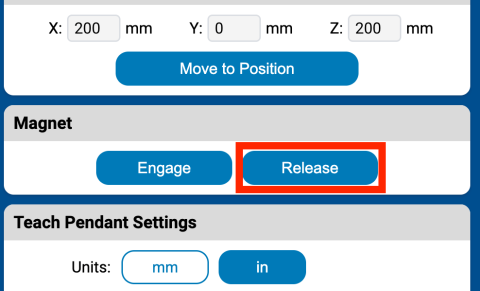
Release the Disk by selecting the Release button.
View this video to see an example of the 6-Axis Arm jogging along the z-axis to lift the Disk with the Magnet. The 6-Axis Arm moves upwards on the Z Axis each time the +Z button in the Teach Pendant is pressed.
View this video to see the 6-Axis Arm release the Disk when the Release button is selected.
Activity
Now that you have moved a Disk using the 6-Axis Arm and Teach Pendant, you will practice moving a Disk on the Tile to a new location.
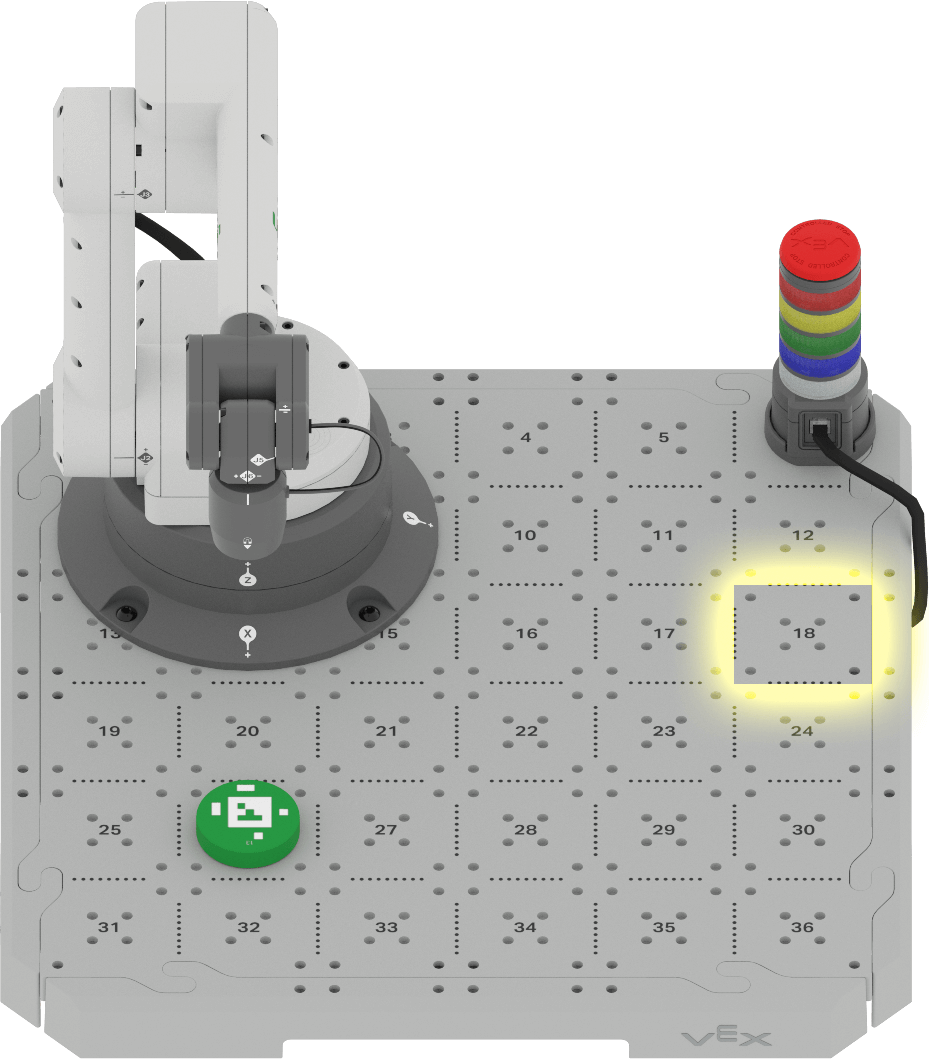
- Setup: Place a Disk at number 26 on the Tile.
- Use the Teach Pendant to have the 6-Axis Arm move the Disk from number 26 to number 18 on the Tile.
Check Your Understanding
Before moving to the next Lesson, ensure that you understand the concepts in this Lesson by answering the questions in the document below in your engineering notebook.
Check Your Understanding questions > (Google Doc / .docx / .pdf)
Select Next > to combine your skills in the Putting It All Together Activity.