
In the previous Unit, you explored manually moving the 6-Axis Robotic Arm along the x, y, and z-axes. You learned to use the Teach Pendant in VEXcode EXP to enable manual movement and gather (x, y, z) coordinates.
In this Lesson, you will learn more about the Teach Pendant, including:
- How teach pendants are used in industrial robotics.
- Key features of the Teach Pendant in VEXcode EXP.
- How to jog the 6-Axis Arm using the Teach Pendant.
By the end of this Lesson, you will be able to use the Teach Pendant to move the 6-Axis Arm incrementally along the x, y, and z-axes.
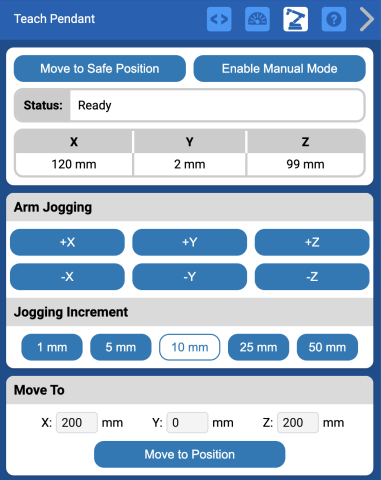
The Teach Pendant in VEXcode EXP
The Teach Pendant in VEXcode EXP has many useful features you can use to control the 6-Axis Arm. This Lesson will focus on features you will use in this Unit.
What is a teach pendant?
A teach pendant is a commonly used device in industrial robotics that allows a user to control a robotic arm remotely and manually. Teach pendants can be used to execute a series of movements and to test and refine them so they are precise. It allows a user to monitor the robot in real time, troubleshoot issues as they arise, and play a crucial safety role by enabling the user to work with the robot from a distance.

Teach Pendant Dashboard
The x, y, z-coordinates of the 6-Axis Arm can be seen in real time on the Teach Pendant Dashboard. You used this feature when gathering coordinates of specific Tile numbers in the previous Unit.
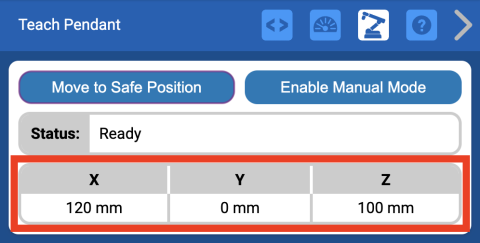
The Dashboard will remain in place at the top of the Teach Pendant at all times, even while scrolling to use other features of the Teach Pendant, as shown in this video.
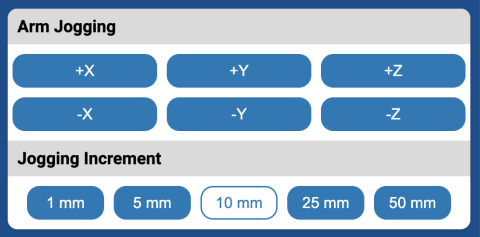
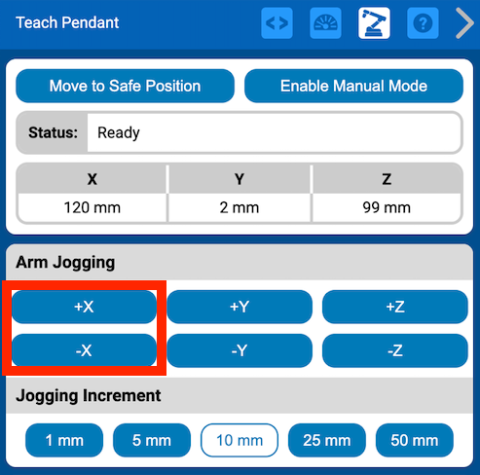
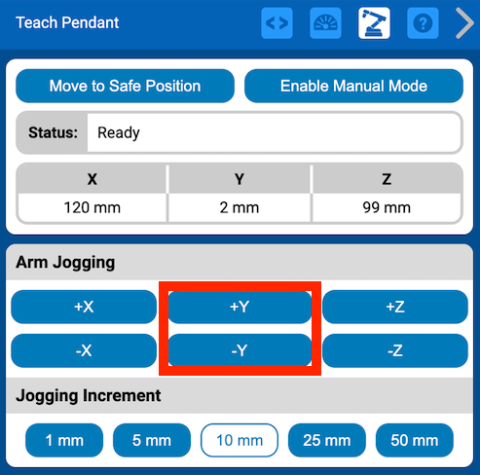
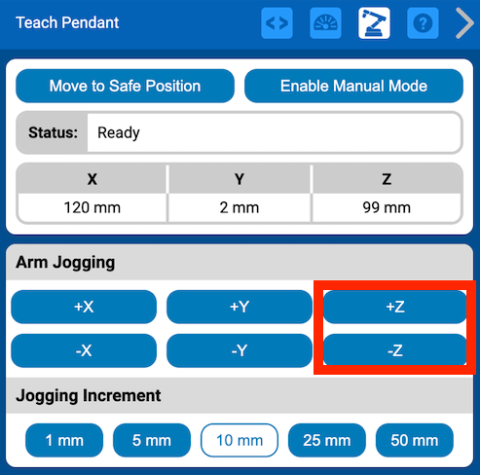
Arm Jogging
The Teach Pendant allows you to move the 6-Axis Arm along the x, y, and z-axes in small increments. This is called jogging.
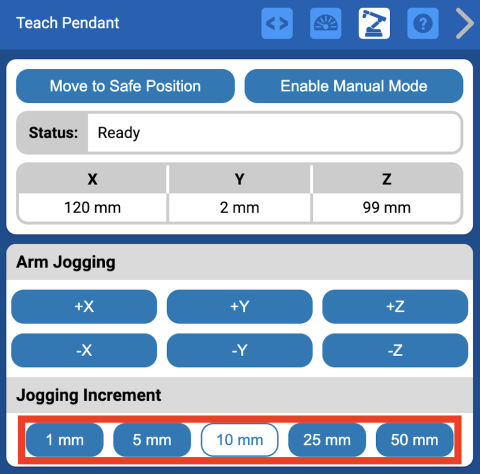
You can also change the increment of movement when jogging.
You will learn more about jogging later in this Lesson.
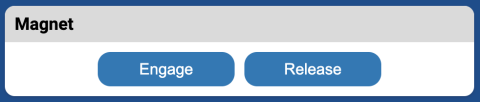
Magnet
The Teach Pendant also provides buttons that can be used to engage and release the Magnet.
You will use these buttons in Lesson 2 of this Unit to pick up and move Disks with the 6-Axis Arm.
Jogging the 6-Axis Arm Using the Teach Pendant
Jogging can be used to move the 6-Axis Arm incrementally from one position to another. This is useful when you want to slightly change the position of the 6-Axis Arm. This can allow you to position the 6-Axis Arm more precisely.
You can move the 6-Axis Arm along one of the three axes by selecting the associated axis buttons from the Teach Pendant. View this video to see an example of the 6-Axis Arm jogging with the Teach Pendant. In the video, the positive and negative buttons for each axis are pressed. The 6-Axis Arm moves away from the base when the positive buttons are pressed, and and then back towards the base when the negative buttons are pressed on each axis.
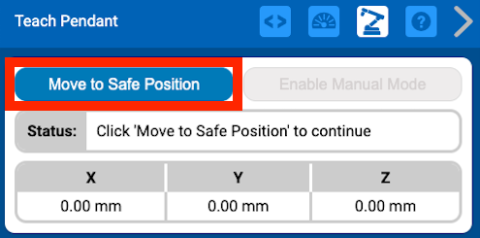
Select Move to Safe Position to enable the jogging feature of the Teach Pendant.
The Teach Pendant will be disabled until Move to Safe Position is selected.
You can use the Arm Jogging buttons to move the 6-Axis Arm incrementally along the x, y, or z-axis.
You will practice jogging the 6-Axis Arm later in this Lesson.
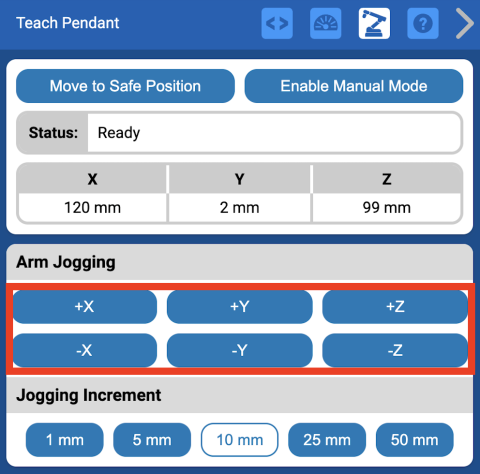
You can change the Jogging Increment to increase or decrease each incremental movement that the 6-Axis Arm is jogged.
The default increment is 10 millimeters (mm).
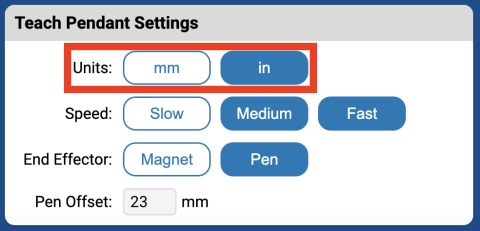
You can also change the units displayed in the Teach Pendant from millimeters (mm) to inches (in), in the Teach Pendant Settings section. Teach Pendant Settings are located at the bottom of the Teach Pendant.
This changes the coordinate units in the Teach Pendant Dashboard as well as the Jogging Increment options.
Practice Jogging the 6-Axis Arm
Now that you know what jogging is, you will practice jogging the 6-Axis Arm for yourself.
Be sure the 6-Axis Arm is connected to VEXcode, the Teach Pendant is open.
Select Move to Safe Position to enable the Teach Pendant.

First, practice jogging along the x-axis. Select the – X and + X buttons in the Teach Pendant. Observe how the 6-Axis Arm moves each time the button is pressed.
Next, practice jogging along the y-axis. Select the – Y and + Y buttons in the Teach Pendant. Observe how the 6-Axis Arm moves each time the button is pressed.
Now, practice jogging along the z-axis. Select the – Z and + Z buttons in the Teach Pendant. Observe how the 6-Axis Arm moves each time the button is pressed.
Activity
Now that you have learned how to jog the 6-Axis Arm, you will practice jogging along the x, y and z-axes.
In this activity, you will practice jogging the 6-Axis Arm along each axis. As you jog the 6-Axis Arm, you will record how the x, y, and z-values change in the Teach Pendant Dashboard.
Be sure that the 6-Axis Arm is connected to VEXcode EXP, and that Move to Safe Position is selected before trying to jog the 6-Axis Arm.

Follow each step and record your answers to the questions in your engineering notebook:
X-axis:
- Position the 6-Axis Arm with the Tool Center Point (TCP) above number 32 on the Tile.
- Move it until the TCP is positioned above the number 20 by jogging the 6-Axis Arm.
- Jog the 6-Axis Arm back to number 32.
- Answer the following question in your engineering notebook: How does the x-value change in the Teach Pendant Dashboard as you jog the 6-Axis Arm?
Y-axis:
- Position the 6-Axis Arm with the Tool Center Point (TCP) above number 12 on the Tile.
- Move it until the TCP is positioned above the number 10 by jogging the 6-Axis Arm.
- Jog the 6-Axis Arm back to number 12.
- Answer the following question in your engineering notebook: How does the y-value change in the Teach Pendant Dashboard as you jog the 6-Axis Arm?
Z-axis:
- Position the 6-Axis Arm with the Tool Center Point (TCP) above number 29 on the Tile.
- Move it up so the TCP is approximately 70mm off of the Tile by jogging the 6-Axis Arm.
- Jog the 6-Axis Arm back down to its approximate original position over number 29.
- Answer the following question in your engineering notebook: How does the z-value change in the Teach Pendant Dashboard as you jog the 6-Axis Arm?
Check Your Understanding
Before beginning the next Lesson, ensure that you understand the concepts in this Lesson by answering the questions in the document below in your engineering notebook.
Check Your Understanding questions > (Google Doc / .docx / .pdf)
Select Next > to learn about end effectors.