Alternate Coding Methods
This STEM Lab Unit is written for use with the Coder and Coder cards. However, you can adapt the Labs in this Unit to use VEXcode 123 or Touch buttons for the coding activities. This flexibility can help you meet the individual needs of your students. For example, if your students are familiar with VEXcode 123, they can complete all the coding activities with VEXcode 123. The Summary section of each Lab contains additional information that can help you modify the individual Lab.
VEXcode 123 Adaptation
If using VEXcode 123 with this Unit, students can use the following blocks to drive the 123 Robot in the coding activities. For more information on how to work with VEXcode 123, see the VEXcode 123 Section of the STEM Library.
| VEXcode 123 Block | Behavior |
|---|---|
 |
The [Drive for] block moves the 123 Robot forward or in reverse a given distance. Set how far the 123 Robot will move by entering a value into the oval. |
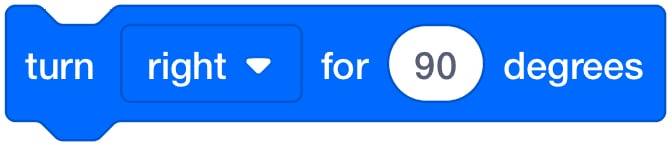 |
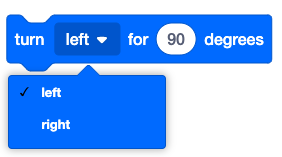
The [Turn for] block turns the 123 Robot in place to the left or right for a specified number of degrees. |
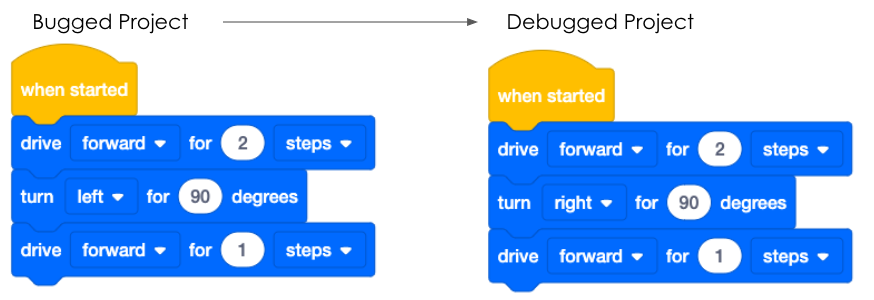
- Students can build the same projects using the Drivetrain blocks in VEXcode 123. To fix the bug in the project, they can adjust the parameters of the blocks, like the example shown here.
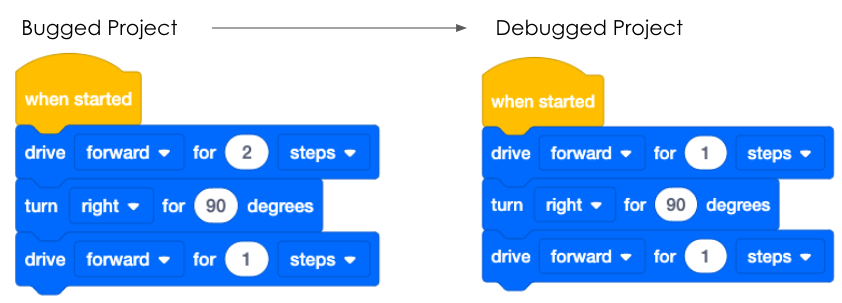
- To recreate the projects for Play Part 1 of Lab 1, the VEXcode 123 projects could look like this:
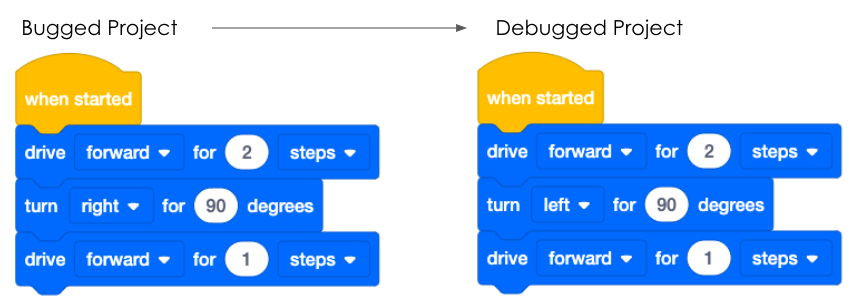
- To recreate the projects for Play Part 2 of Lab 1 and Play Part 1 of Lab 2, the VEXcode 123 projects could look like this:
- In Lab 2, students will use the Step feature as part of the debugging process, to help them more easily find a bug in their project. To learn more about stepping through a project in VEXcode 123, see this STEM Library article. To recreate the projects for Play Part 2 of Lab 2, the VEXcode 123 projects could look like this:
Touch Adaptation
- Students can also use the Touch buttons on the 123 Robot to complete the debugging activities in this Unit. If using Touch, you may find it useful to give students VEX 123 Printables, like the printable touch buttons or the fill in project and motion planning printables, so that they have a visual representation of their project to aid in debugging.
- For more information about coding using the Touch buttons on the 123 Robot, see the Coding with the Touch Buttons on the 123 Robot STEM Library article.
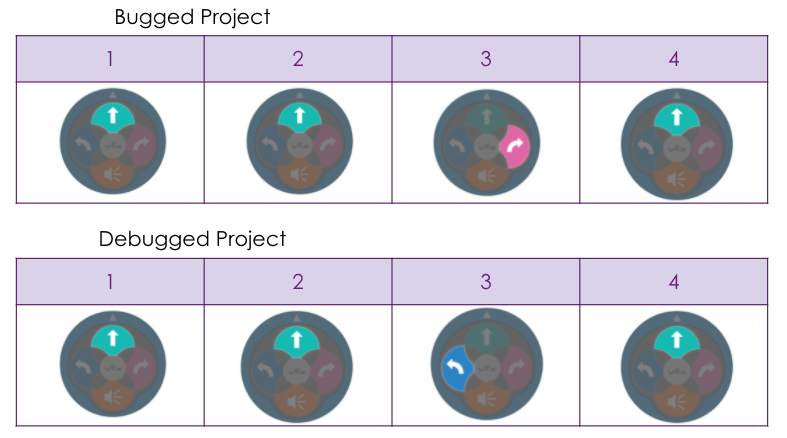
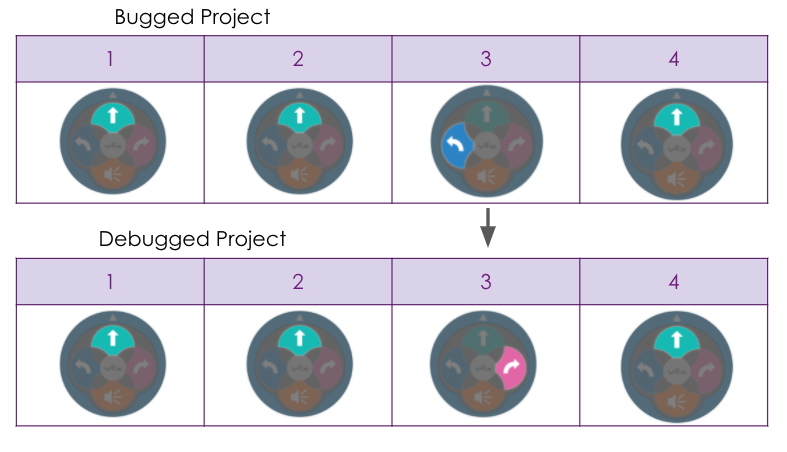
- To recreate the projects for Play Part 1 of Lab 1 with Touch buttons, the sequences could look like this:
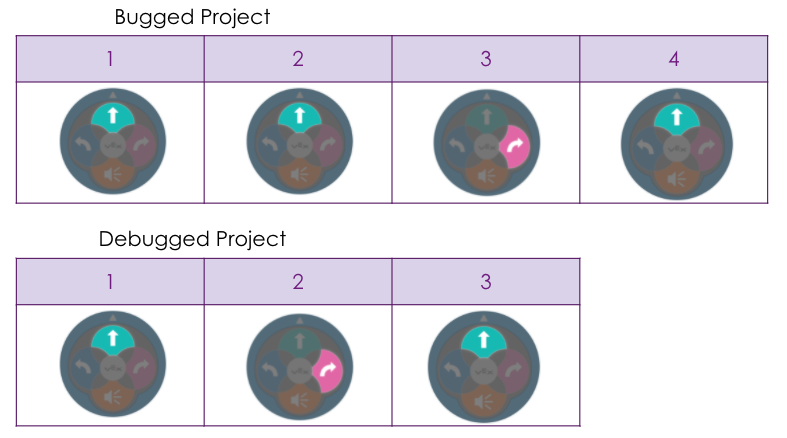
- To recreate the projects for Play Part 2 of Lab 1 and Play Part 1 of Lab 2 with Touch buttons, the sequences could look like this:
- To recreate the projects for Play Part 2 of Lab 2 with Touch buttons, the sequences could look like this: