
Engage
Launch the Engage Section
ACTS is what the teacher will do and ASKS is how the teacher will facilitate.
| ACTS | ASKS |
|---|---|
|
|
Getting the Students Ready to Build
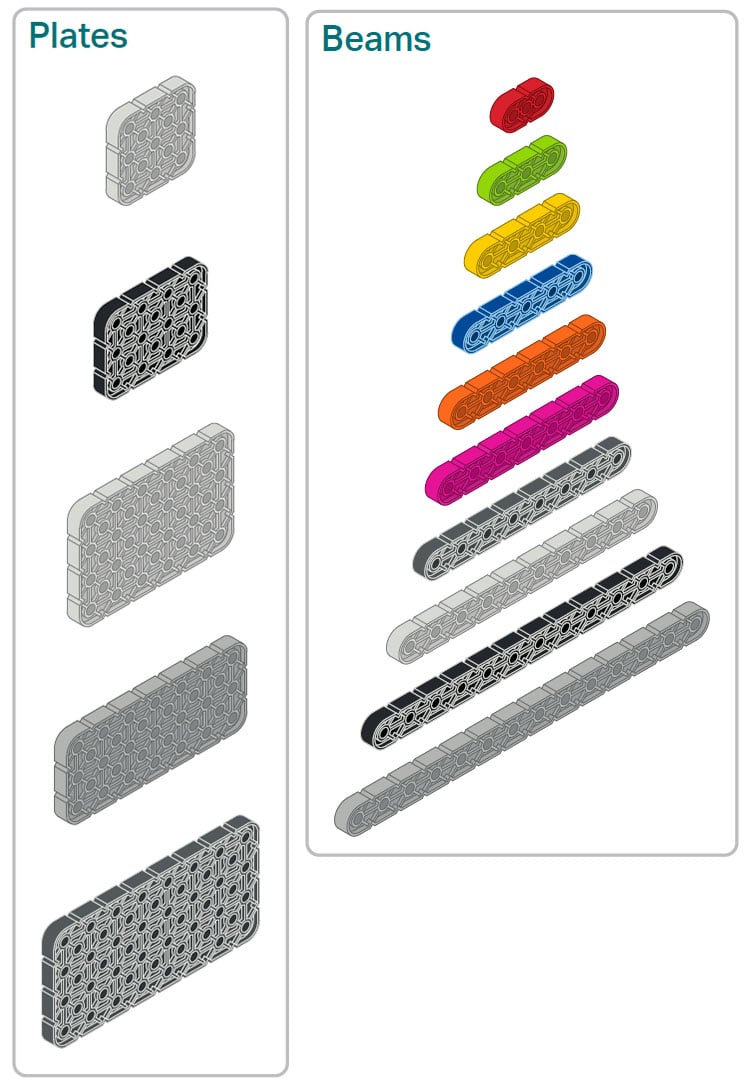
We know what a beam is and we know what a plate is. Now we can use these pieces to create a launch pad for our astronaut to walk across.
Facilitate the Build
-
InstructInstruct
students that they will be building a launch pad for their astronaut to walk across using pins, beams, and plates.
Instruct students to join their groups, and have them complete the Robotics Roles & Routines sheet. Use the Suggested Role Responsibilities slide in the Lab 3 Image Slideshow as a guide for students to complete this sheet.
-
DistributeDistribute
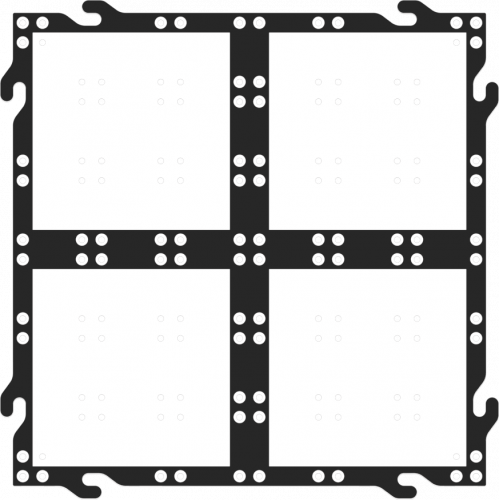
a VEX GO Kit and GO Tile to each group if they do not have one already.
-
FacilitateFacilitate
a building demonstration.
- Each group only has one GO Tile. Thus, ask groups to join with another group, this ensures that each pair of groups has two GO Tiles.
- The distance between the two tiles should be approximately 12.5 cm (~5 in).
- Model for students using two GO Tiles how to attach and detach pins to beams, plates and the GO Tiles.
-
After the demonstration, ask the builder in each group to try attaching pieces to the tiles themselves. Watch the animation below for an example of the construction.
Video file - Journalists should assist with the build and retrieve the necessary parts needed.
- OfferOffer suggestions and note positive group building and problem solving strategies as groups build together.

Teacher Troubleshooting
- Pins can be easily lost. Have students check the floor and move chairs when cleaning.
- Use standoffs for easily creating stair steps.
Facilitation Strategies
- Assign the Journalist to be responsible for material management. This will help to create a consistent practice on how to use the Kits in your classroom.
-
Encourage group members to take turns attaching and detaching parts with the Pin Tool before they begin the build. They will want to play with this. Watch the animation below for an example of using the lever on the pin tool to remove a piece from a field tile.
Video file - Remove the Astronaut from the Kits if the students are distracted by it. They can present their launch pad to you in order to receive the Astronaut.