
Play
Part 1 - Step by Step
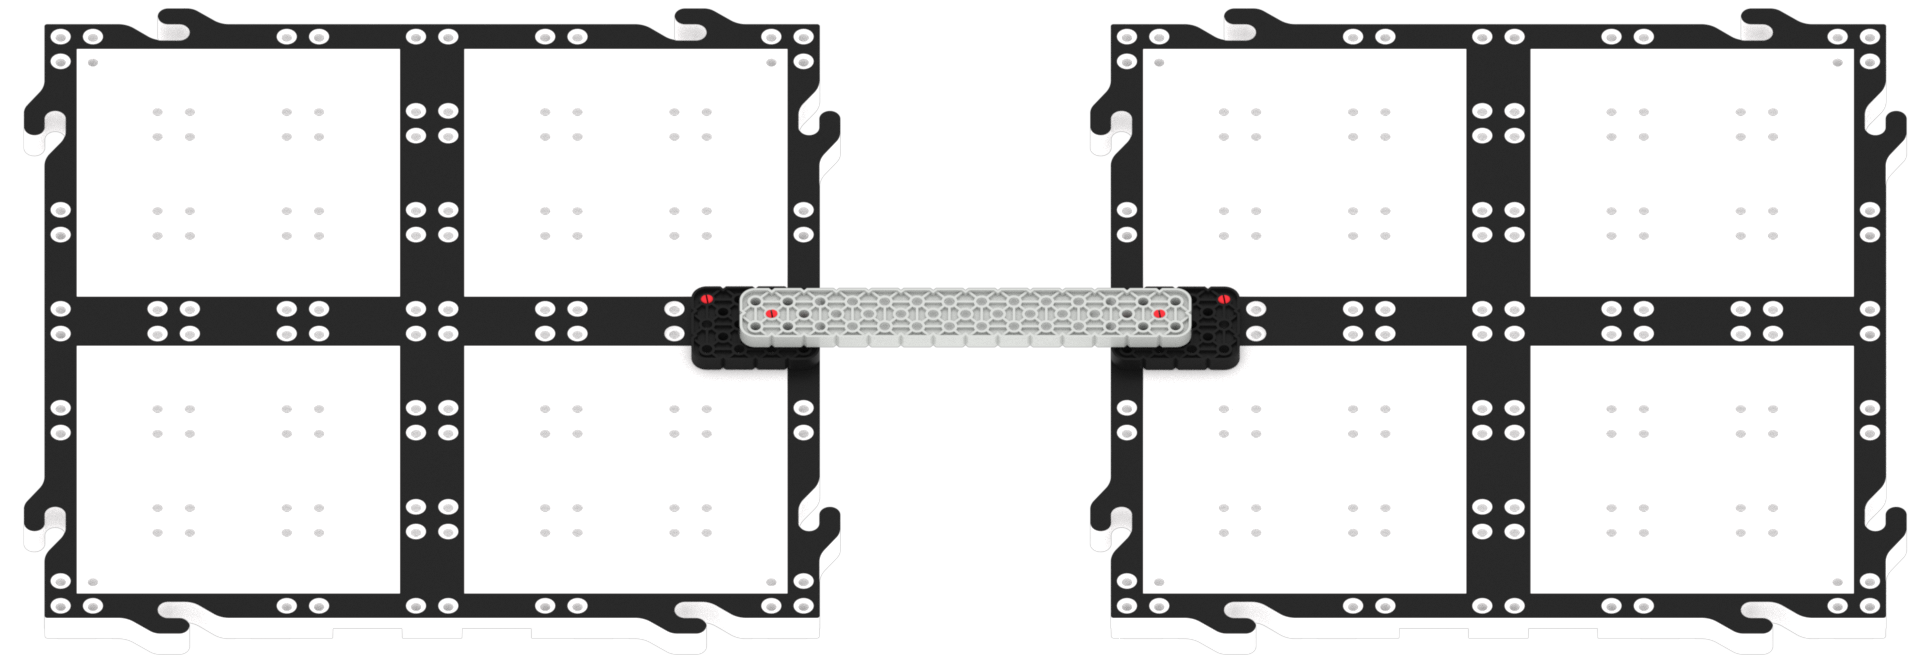
- InstructInstruct groups that they are going to design and build a launch pad that will connect their GO Tile together with another group's tile.
Example Launch Pad - ModelModel for students how to sketch design ideas on the Blueprint Worksheet.
- FacilitateFacilitate the building process by circling the room and asking students about their design ideas.
- What pieces do they need to make their launch pad?
- Why do they think they need that piece?

- RemindRemind groups to talk with one another and share ideas throughout the design and building process.
Have extra paper or additional Blueprint Worksheets available if students want to change their ideas before they begin building.
- AskAsk students if they think that their build is stable or not. If not, how could they change it to make it better?
Mid-Play Break & Group Discussion
As soon as every group has created their first launch pad build, come together for a brief conversation.
- What was the hardest part about creating your launch pad ?
- How did you make your launch pad stable for the Astronauts?
- What pieces did you use and why?
- Is your build stable and balanced? How do you know?
Part 2 - Step by Step
- InstructInstruct each pair of groups to modify their builds to make them more stable.
Once their builds are complete, the Journalist from each group should begin writing their build instructions.
- Each pair of groups will only have ONE set of build instructions. However, the Journalist from each group can write and document ideas from other group members on a piece of paper or a Blueprint Worksheet.
- ModelModel using a group’s build, different options for creating build instructions.
Students can write, draw, or use a combination of pictures and words to make their instructions. Students should write the build instructions as if they are creating a step-by-step guide for another student to build their launch pad.
- FacilitateFacilitate students using spatial language while working on their build instructions.
- Encourage students to use descriptions of the position of each piece (below, above, behind, in front of, to the left of, to the right of).
- Encourage students to use proper part names in their build instructions.
- Detailed descriptions of parts can include:
- Sizes (a beam that is three holes long)
- Colors (the Yellow Standoff)
- Comparisons (this pin is similar to the Red Pin, but longer on one side)
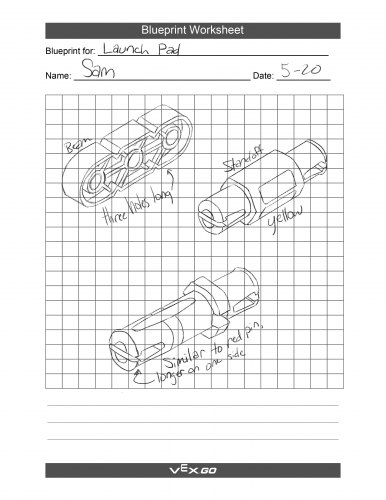
Example Blueprint Worksheet - RemindRemind groups to work together while writing their build instructions. Ask students to describe their instructions to you while you circulate the room. If students seem to be missing steps of the build instructions, ask them about those missing steps.
- AskAsk groups to share their build instructions with another pair of groups if time allows.