Engage
Launch the Engage Section
ACTS is what the teacher will do and ASKS is how the teacher will facilitate.
| ACTS | ASKS |
|---|---|
|
|
Getting the Students Ready to Build
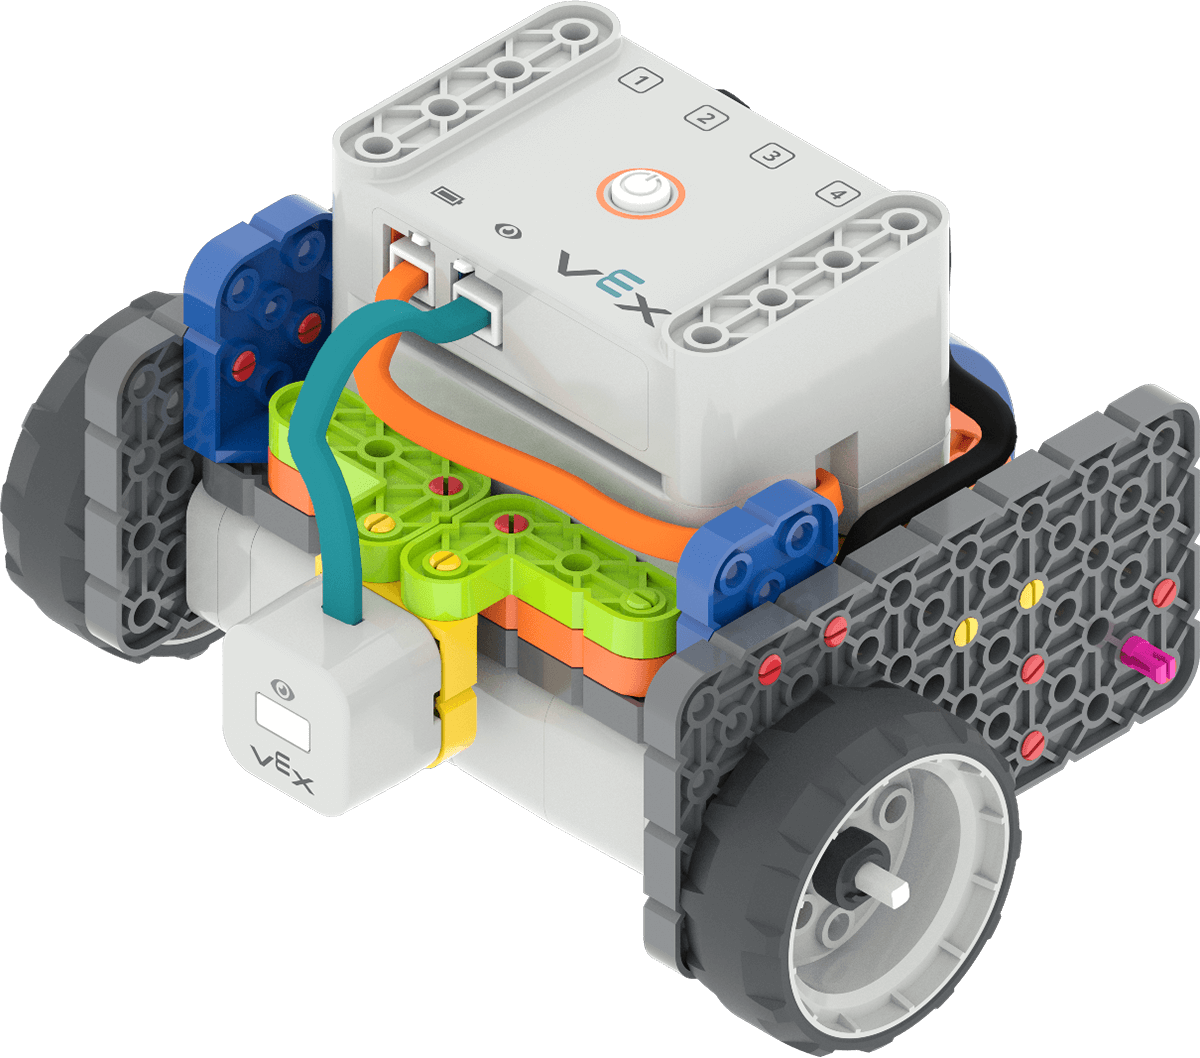
Before we can start coding our Code Base to detect obstacles on the Mars landing area, we need to build the Code Base 2.0 - Eye Forward!
Facilitate the Build
- InstructInstruct students to join their group, and have them complete the Robotics Roles & Routines sheet. Use the Suggested Role Responsibilities slide in the Lab 1 Image Slideshow as a guide for students to complete this sheet.
-
DistributeDistribute
build instructions to each team. Journalists should gather the materials on the checklist.

Code Base 2.0 - Eye Forward build -
FacilitateFacilitate
the building process.
- Builders and Journalists should begin building based on their roles and responsibilities, like those shown in the Lab 1 Image Slideshow.
- Circulate around the room to help students with building or reading instructions where needed. Ask questions about how the build is being constructed to keep all students engaged in the buildings process, and remind students to follow their Role Responsibilities if they need help taking turns.
- OfferOffer suggestions and note positive team building and problem solving strategies as groups build together.

Teacher Troubleshooting
- Remember to use white or light-colored paper or objects as the obstacles — The Eye Sensor uses infrared light to detect objects, and since dark-colored objects absorb infrared light, it makes it very difficult for the Eye Sensor to detect them.
- If the wires seem to be getting in the way for students, use a rubber band to pull them together, and you can tuck the bundle into the build if needed, to keep the wires from impeding the movement of the Code Base during the Lab.
Facilitation Strategies
- Think about how your students will access VEXcode GO. Ensure that the computers or tablets that students will use have access to VEXcode GO. For more information about setting up VEXcode GO, see this VEX Library article.
- Gather the materials each group needs before class. For this Lab, each group of two students will need a GO Kit, Build instructions, a computer or tablet to access VEXcode GO, a balled up piece of white or light-colored scrap paper to act as an obstacle on the landing area. Students will also need access to a Field for testing.
- The Eye Sensor uses infrared light to detect objects. Light-colored objects reflect infrared light and are detected more easily by the Eye Sensor. Dark-colored objects absorb infrared light and the Eye Sensor does not detect them as well. During the Unit, use white or light-colored paper for the obstacles to ensure that the Eye Sensor will be able to detect these objects.
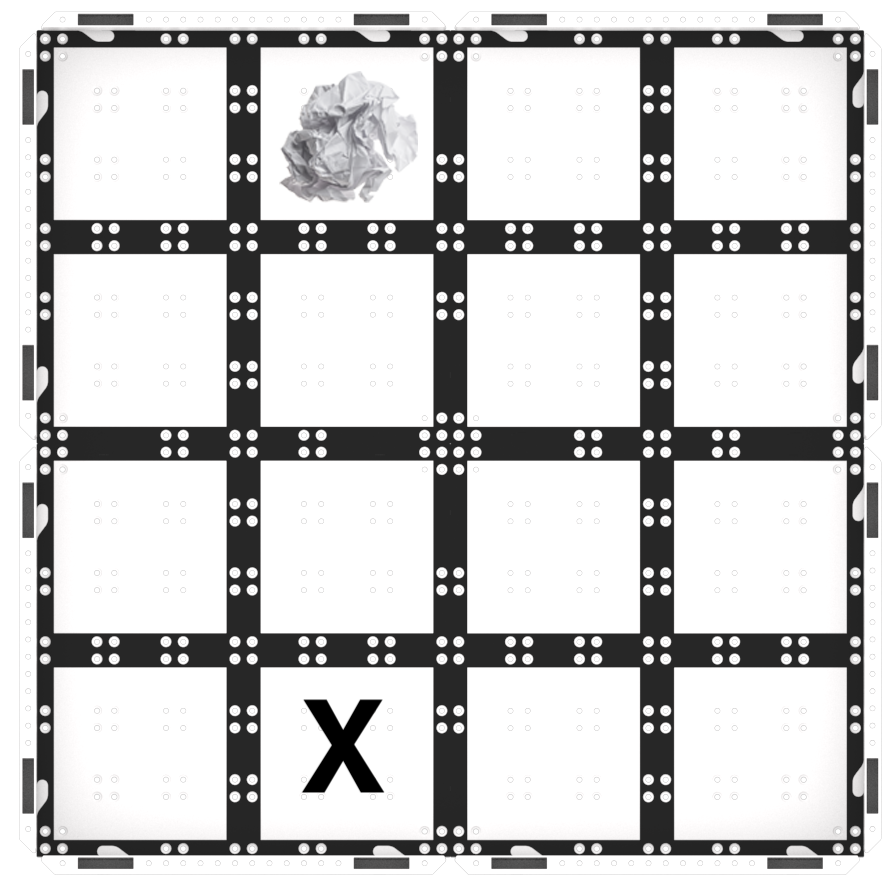
- Set up your Fields ahead of time, as shown in the image below, to serve as a testing area for the Code Base. Have these spread out around the classroom to allow students ample space to test their projects. Both Labs in this Unit will use the same Field setup, so you can leave your fields together from Lab 1 to Lab 2. The balled up paper is the obstacle to be detected, and the 'X' is the starting point for the Code Base in the Lab activities.

- Try a new starting position - If students detect the obstacle right away in Play Part 1, have them move the Code Base to a new starting location and try again, to experiment with object detection more. Does the Eye Sensor still detect the same obstacle? Does it detect something different? Why do they think that is?
- Use the Get Ready...Get VEX...GO! PDF Book and Teacher’s Guide - If students are new to VEX GO, read the PDF book and use the prompts in the Teacher’s Guide (Google Doc / .pptx / .pdf) to facilitate an introduction to building and using VEX GO before beginning the Lab activities. Students can join their groups and gather their VEX GO Kits, and follow along with the building activity within the book as you read.
- Use the Teacher’s Guide to facilitate student engagement. To focus on VEX GO connections in a more concrete or tangible way, use the Share, Show, or Find prompts on each page to give students an opportunity to get to know their kits in more depth.
- To focus on the habits of mind that support building and learning with VEX GO, like persistence, patience, and teamwork, use the Think prompts on each page to engage students in conversations about mindset and strategies to support successful group work and creative thinking.
- To learn more about using the PDF book and accompanying Teacher’s Guide as a teaching tool any time you are using VEX GO in your classroom, see this VEX Library article.