
Play
Part 1 - Step by Step
- InstructInstruct students to sit in a central circle, or to be in a position where they can see both the teacher AND the 123 Robot. Remind them that while there will be some demonstration, they will all get to touch and test the robot today.

Classroom Circle. - ModelModel each action as you read the story to the children, and follow along with the instructions within the Meet Your Robot story.
Turning on the 123 Robot. - FacilitateFacilitate turn taking for sharing observations and using the robot.
- For older children, you may want to offer multiple robots for students to share while features are introduced in the story. This can be a synchronized discovery as you read. The animation below shows each of the buttons on the 123 Robot being pressed and the actions that occur when the project is started.
Video file - RemindRemind students that part of getting to know their robots is careful listening and observation. They will use these features every time they use their robots, so work hard to pay attention.
- AskAsk if anyone has questions throughout the story. Do they have any questions about what they were asked to do in the story?
Mid-Play Break & Group Discussion
As soon as every group reads the story and completes the included actions, come together for a brief conversation.
- What can the robot do that you can also do?
- What is different? How or why?
- What makes this robot different from other devices you know and use?
Part 2 - Step by Step
- InstructInstruct students that you are going to see what they remember from the story, and also, figure out some additional features of the 123 Robot together.
-
For older children, you may want to give them their own charting paper to keep track of each feature, for younger children, keep an ongoing chart on the board for all to see.
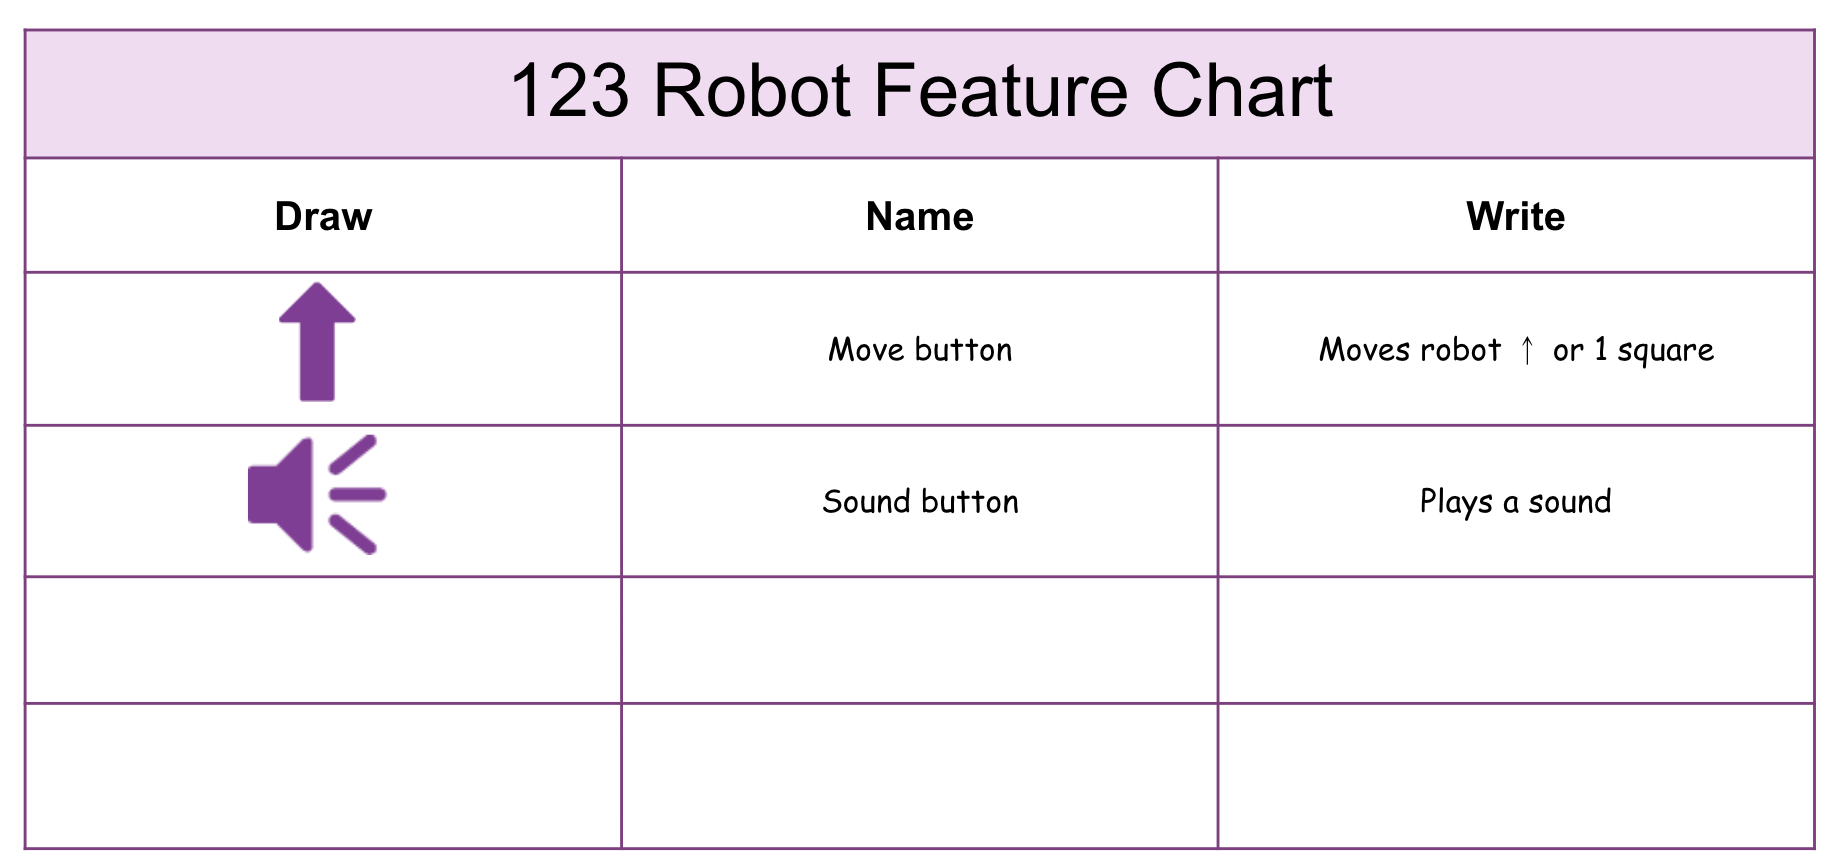
Example of a Features Chart.
-
- ModelModel how to create a Features Chart by testing and writing on the chart together.
- Point to a feature from the VEX 123 poster or the 123 Robot, for all to see.
- Draw a symbol for the feature in the Draw column.
- Ask students the name of this feature, and write that in the Name column. Use the poster to help support the use of accurate terminology, if needed.
- Ask students what they think this feature does, or makes the 123 Robot do.
- Test their ideas, by pressing the button, or using the feature, and watching what happens.
-
If the behavior matches the student description, celebrate the success and add it to the Write column. If it is different, quickly discuss the difference, and add the correct description to the Write column.

Create a Features Chart Together.
- FacilitateFacilitate this process of naming, describing, and testing features to complete the chart.
Ask questions to engage students' thinking about how the 123 Robot works, by asking questions like
- What do you think that behavior can help our 123 Robot do?
- Why do you think the Front Arrow is important?
- Why might you want your 123 Robot to make a sound?
-
Why do you think the Start button has a light?
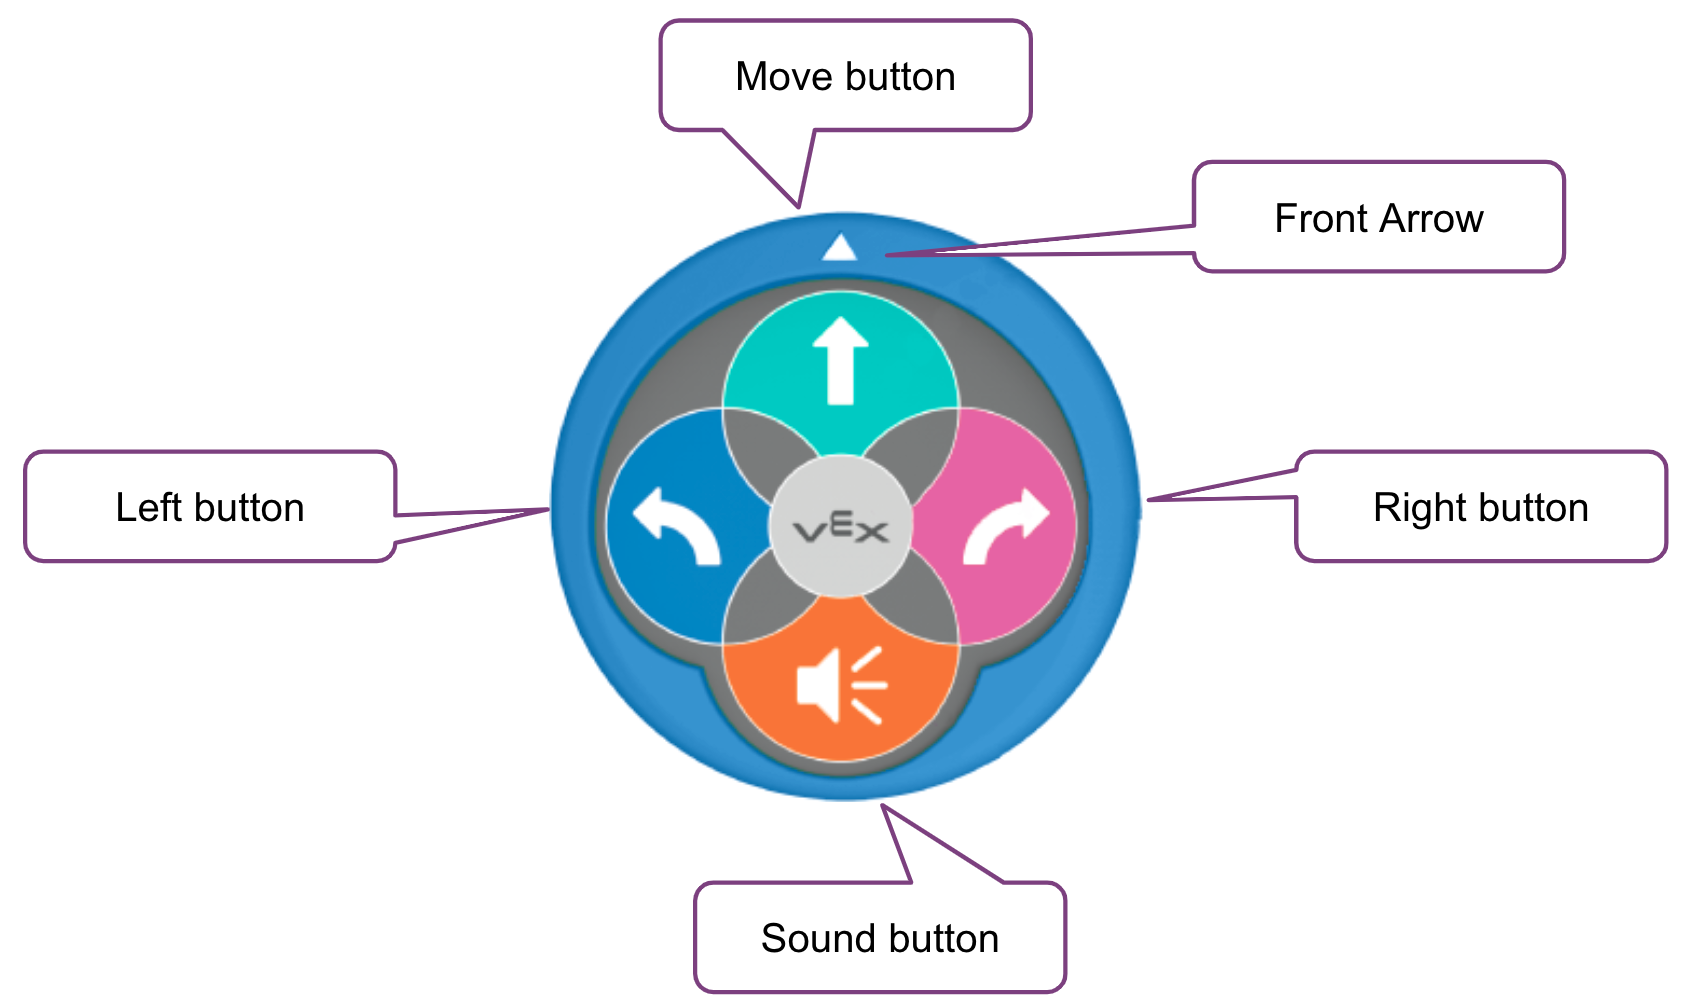
123 Robot Features.
- RemindRemind students that they will be using these features alone, and in combinations to create more complex behaviors later on. They will use the Feature Chart as a way to remember them all, and it will be a part of their classroom robot space.
- AskAsk about what surprised them about the robot parts and features, and what questions they may still have regarding the basic functioning of the robot.