Engage
Launch the Engage Section
ACTS is what the teacher will do and ASKS is how the teacher will facilitate.
| ACTS | ASKS |
|---|---|
|
|
Engage
-
InstructInstruct
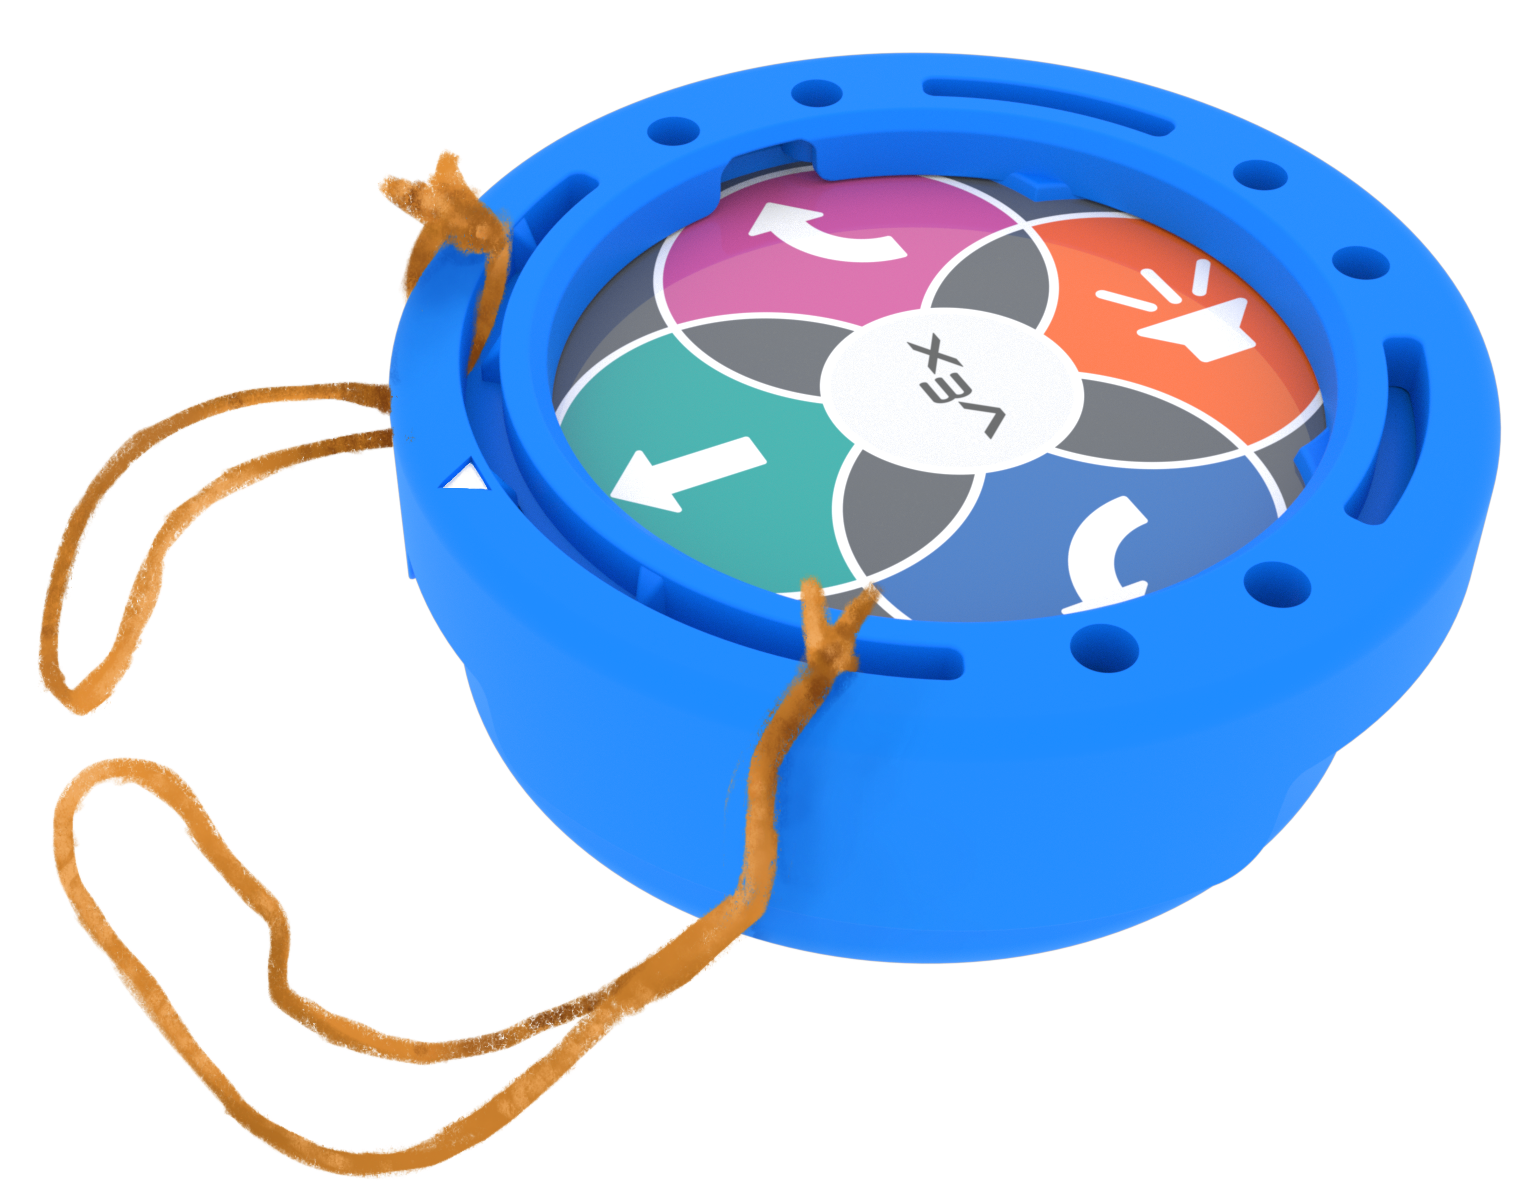
students that they are going to practice this idea of sequencing more, to use their 123 Robots to help them “clean their room”. Explain that their “room” is going to be a Tile, and they have to “clean” it by pushing pom poms off the Tile using the 123 Robot. To help them do this, they are first going to create an “invention” to help their 123 Robot clean. See the image below for an example of an invention that could be made with pipe cleaners.

Example "invention" - DistributeDistribute one Art Ring to each group, and give them access to classroom art supplies that can be used to create their inventions. As a group completes their invention, give them a 123 Robot, so that they can attach the Art Ring to it.
-
FacilitateFacilitate
students' creation of their invention, and attaching the Art Ring to the 123 Robot.
- Students can be free to make whatever creation they think would work best. Offer the following guidelines to help if students need additional support:
- The invention should help your robot to push items off of the Tile, so attach it to the front of the Art Ring.
- The invention shouldn’t get in way of the wheels, so make sure that it stays off the ground.
- The invention should be sturdy enough that it doesn’t fall apart when the 123 Robot is moving.
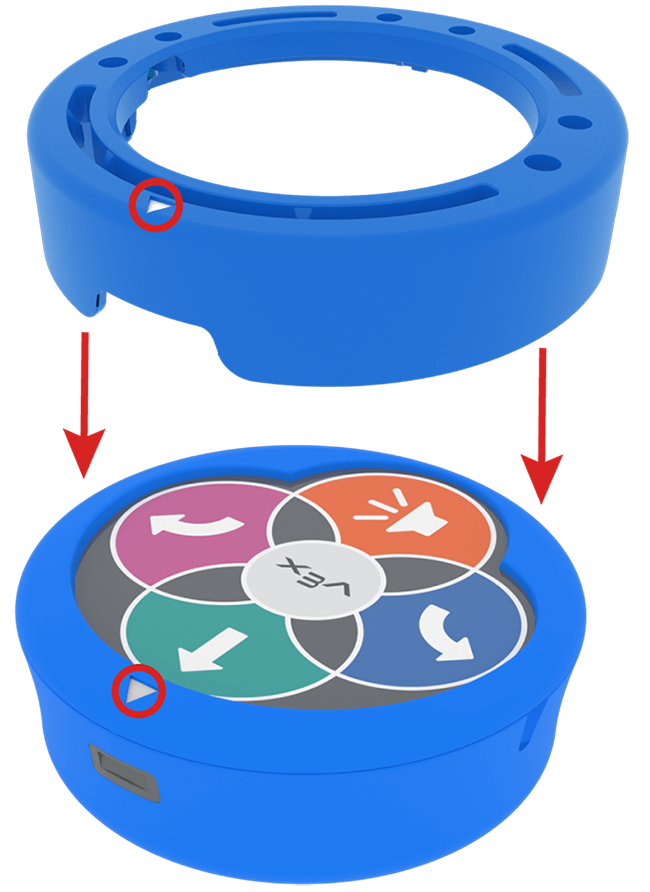
- Remind students that the white arrow on the Art Ring should be lined up with the white arrow on the 123 Robot when they attach the Art Ring to the robot. Use the image below for reference.

LIne up the arrows on the Art Ring and the 123 Robot - Students can be free to make whatever creation they think would work best. Offer the following guidelines to help if students need additional support:
- OfferOffer positive reinforcement for groups that are working well together, and for creativity in students’ inventions.

Teacher Troubleshooting
- Remind students that one press of a button will cause the 123 Robot to move 1 square on the Tile in the direction that the arrow is pointing.
- Students may need to be reminded to shake the 123 Robot to erase the project. This will come in handy as students troubleshoot their projects and start again.
- For more information on using the touch buttons, see the Coding with the Touch buttons on the 123 Robot VEXL Library article.
- For additional information on working with the 123 Robot including charging, waking, and coding the robot, see the Using the VEX 123 Robot VEX Library article.
- See the Identifying the 123 Robot’s Features VEX Library article for detailed information on the physical features of the robot, including the touch buttons.
Facilitation Strategies
- Take Turns - Throughout the Lab, students should take turns in their groups. Suggestions for facilitating this include:
- During Engage, have one student draw out their idea for their invention, and the other student can create it and attach the Art Ring to the 123 Robot.
- During Play, alternate who creates the touch project, and who places the 123 Robot on the Tile and presses the “Start” button. Students can also alternate who places the pom poms on the Tile.
- Try a new starting position - If groups complete the challenge quickly, have them start on a different square and code the 123 Robot to clear the Tile from the new starting position.
- Draw the path - To help students plan their sequence in a more tangible way, have them use a dry erase marker to draw the path the 123 Robot needs to take. Then have students trace each 123 Robot behavior on the path, as they code them with the touch buttons. It is recommended that you erase the dry erase marker from the Tiles at the end of the Lab.
- Follow the pom pom! - Items may roll in unexpected ways when they come in contact with the 123 Robot or the invention attached. Frame this as an additional fun challenge aspect of Play, and encourage students to have their robot “chase” their objects all the way off the Tile. This is a great opportunity to iterate on a project, and can help students see problem solving from a different perspective.
- Use printables as manipulative to support project planning - See the printable resources available in the VEX Library, and use them with students as they are planning and building their touch projects. You could cut out the touch button symbols and have students lay them out on their desk as they build their projects, or use the color-in sheet for students to color in the sequence of button presses in their projects.