Play
Part 1 - Step by Step
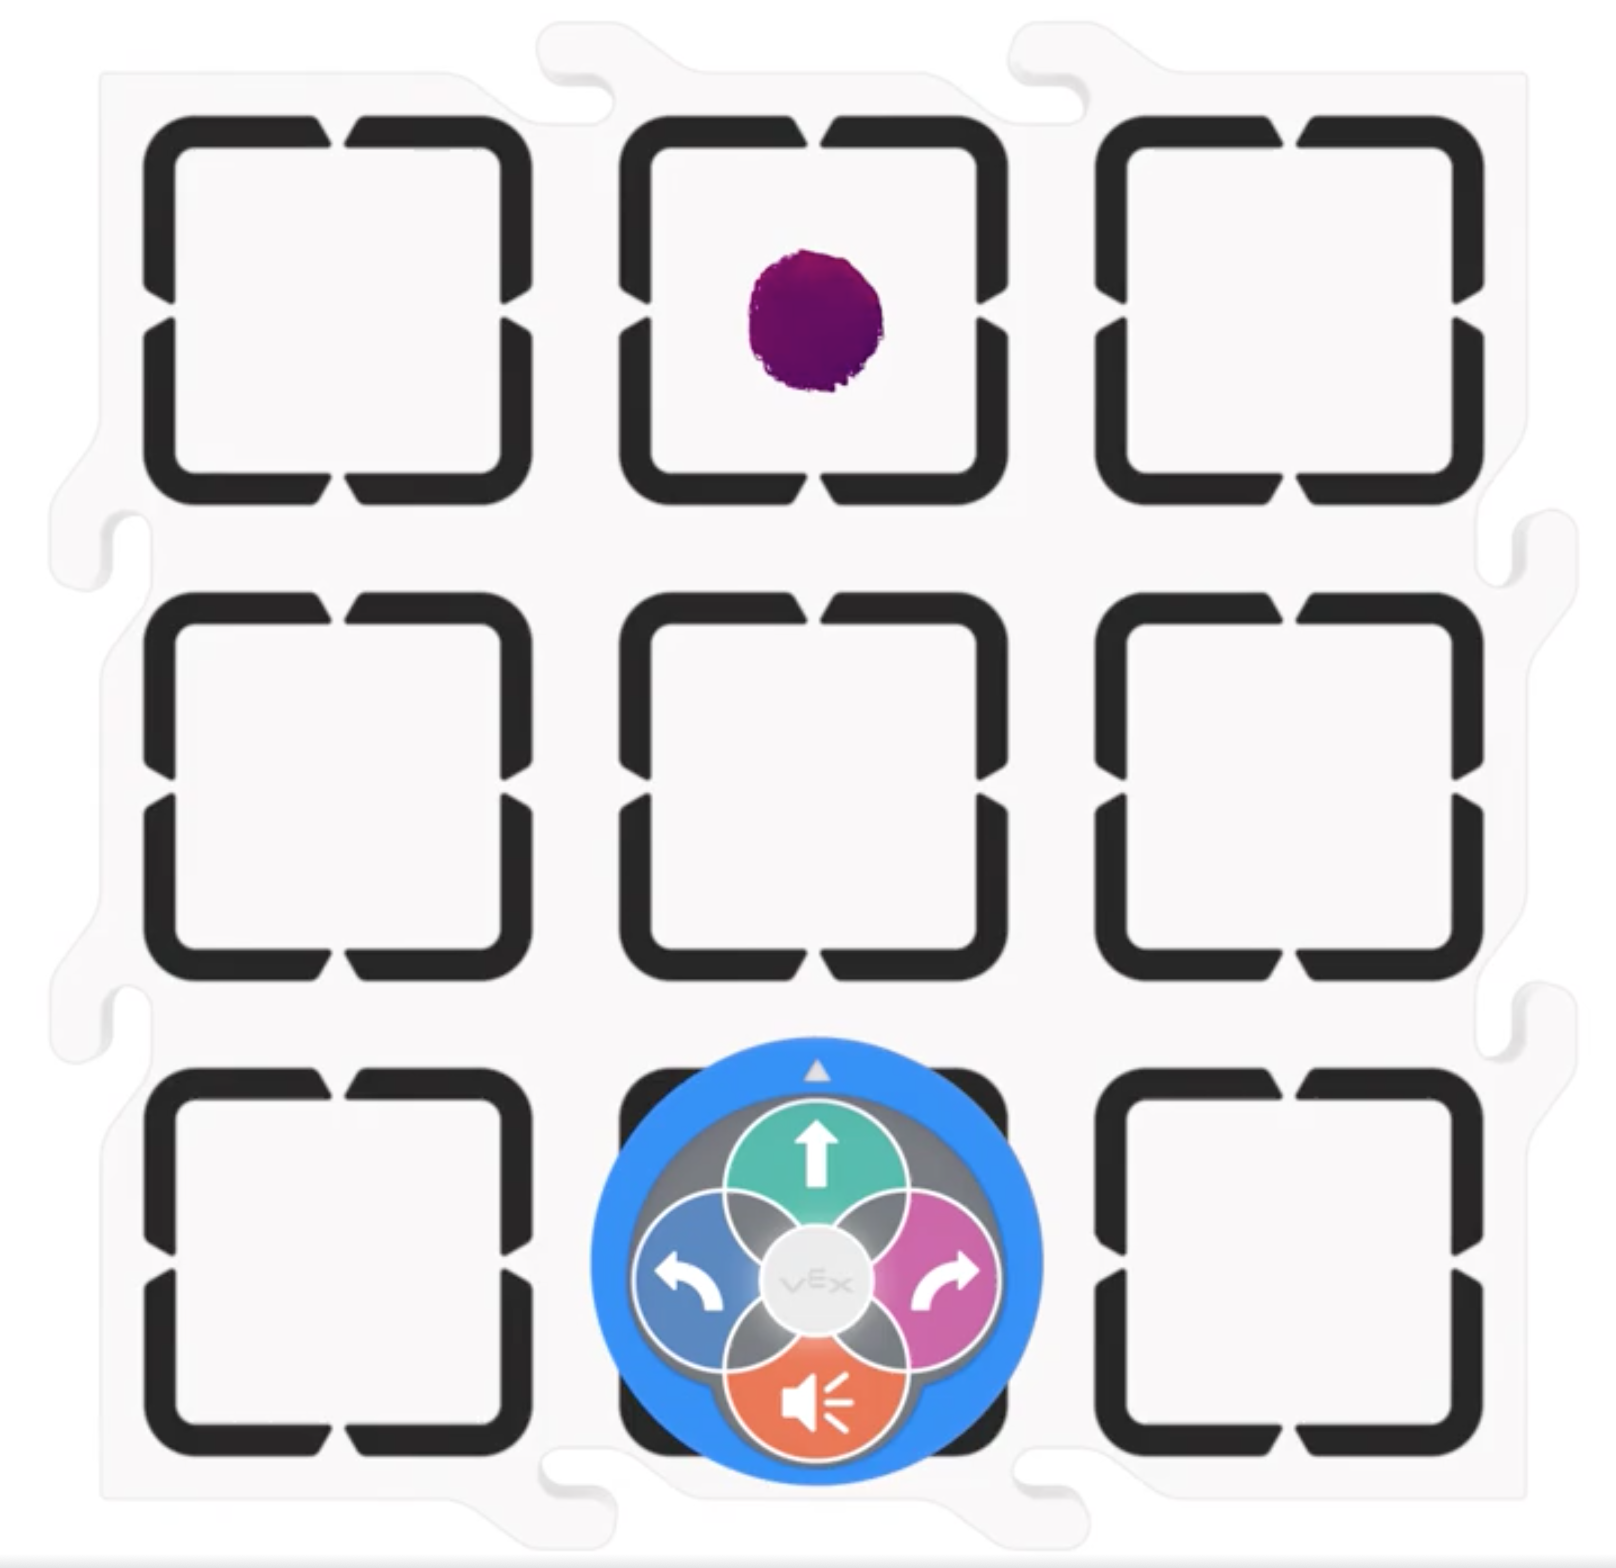
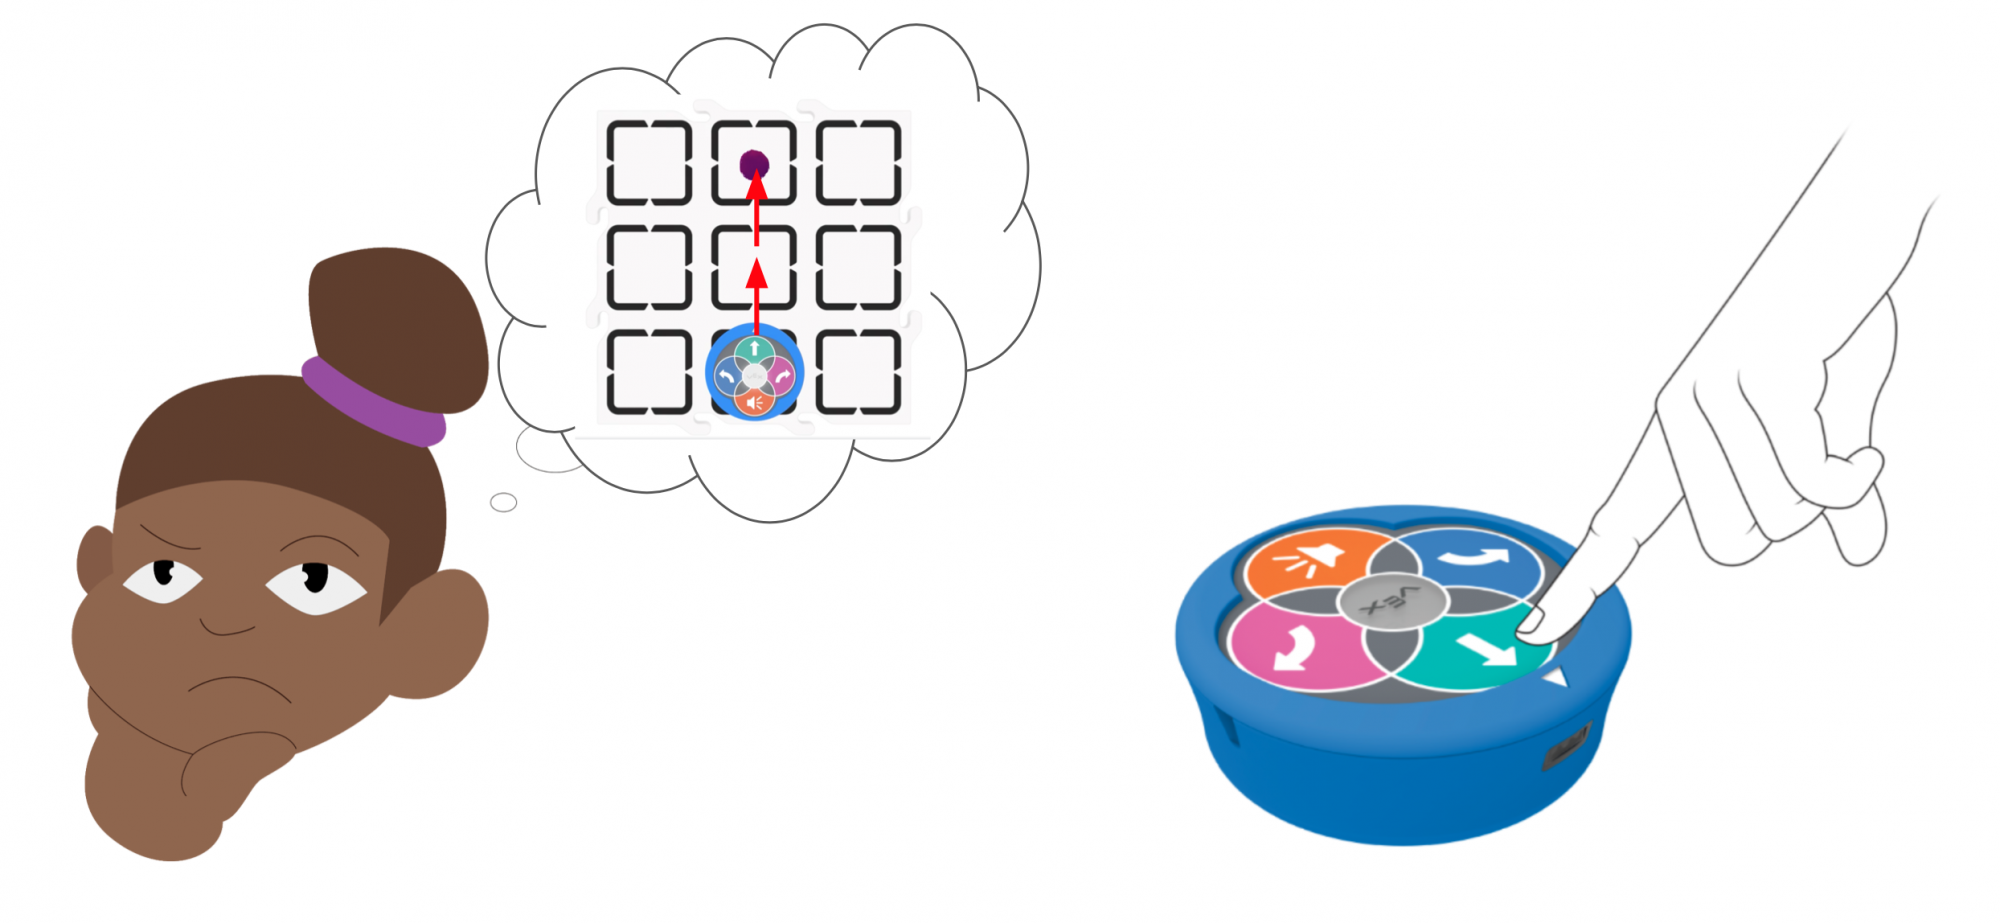
- InstructInstruct students that they are going to use their 123 Robots with their inventions to clean their room, by coding their robots to push a pom pom off of their Tile. View the animation below to see how the 123 Robot will move to clear the pom pom. The robot starts in the middle square of the bottom row on the Tile. A pom pom is placed directly across the Tile from it, in the middle square of the top row. A finger presses the Move button two times, then the start button. The 123 Robot moves forward two squares, pushing the pom pom off the Field.
Video file - ModelModel for students how to set up their “room,” wake their 123 Robots, and plan and test their projects.
- Give each group a Tile and a pom pom, and model how to set it up as shown in the image below.

Set up your room - Model how to wake the 123 Robot, as shown in the animation below. A hand pushes the robot forward, with its wheels touching a surface. It makes a beeping sound and the center light flashes, to show it is awake.
Video file- Model how to plan and test a sequence with your students.
- What does my 123 Robot need to do first? Press the Move button.

Plan then press the touch buttons - Place the 123 Robot on the Tile, as shown in the above image, so that the white arrow is facing the pom pom.

Set up your room - Press the Start button to test your project.
- What does my 123 Robot need to do next to get to the pom pom? Press the Move button again.
- Replace the 123 Robot in the start position, with the white arrow facing the pom pom, and start your project to test it.
- For students who finish early, have them move their pom pom to a different square on the Tile, and try again.
- For an additional challenge, have students add a sound to their sequence, so the 123 Robot plays a sound when it reaches the pom pom.
- FacilitateFacilitate students planning and testing sequences to clean their rooms.
- To help students plan their sequence in a more tangible way, have them use a dry erase marker to draw the path the 123 Robot needs to take. Then have students trace each 123 Robot behavior on the path, as they code them with the touch buttons. Remind students to erase the marker from the Tile at the end of the Lab.
- To help students connect the individual commands to the sequences they are building, ask questions like: Can you explain your sequence to me in words? Can you show me each robot behavior in your sequence with your hands?
- To help students when their 123 Robot does not move as they intended, have them identify what went wrong before they shake the robot to erase the project to try again.
- Make sure that the 123 Robot starts off facing the direction of the pom pom.
- Ask questions like “Did the 123 Robot turn the wrong way? Which way does it need to turn instead?” to help students identify the problem. When students rebuild their project, be sure that they make that change before testing it.
- RemindRemind students to replace the 123 Robot in the same starting position each time they test their project.
- You can mark the starting location with a dry erase marker to help with this process.
- By making sure the starting position is always the same, students will not add extra variables as they test and iterate on their projects.
Remind students that testing and iterating are a part of coding and that each time they find a mistake in their project, it helps them learn.
- AskAsk students about how sequencing robot behaviors is similar or different to giving someone directions to a place. What could they learn from sequencing robot behaviors, that could help them give better directions to a person.
Mid-Play Break & Group Discussion
As soon as every group has accomplished clearing their Tile, come together for a brief conversation.
- Let’s think about the sequences we just used to clean our rooms. What helped you communicate that sequence in your group? How did the symbols on the touch buttons help you to sequence robot behaviors correctly?
- Were there any challenges to creating your sequences that you had to figure out in your groups? How did you solve the problem? Is there anything your group needs help with from the class?
- Are there any successful strategies that your group would like to share, that you think will help the class to sequence behaviors better in the next part of the Lab?
Part 2 - Step by Step
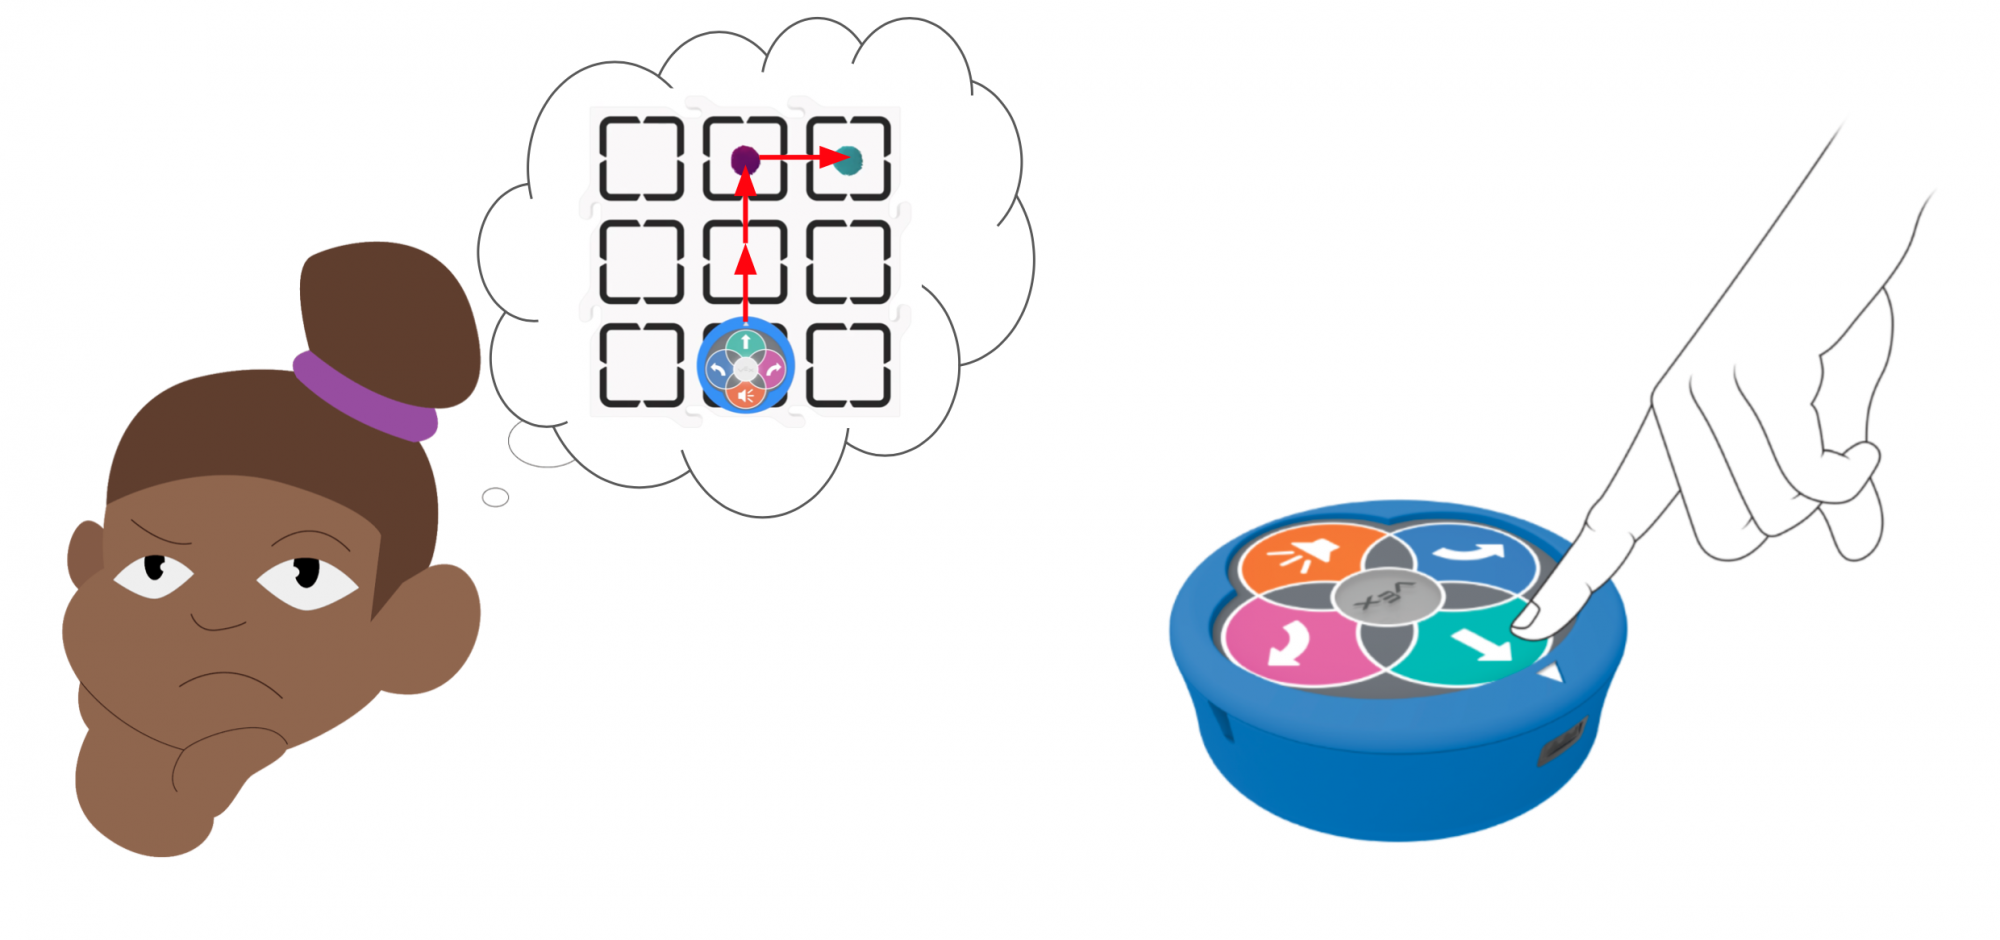
- InstructInstruct students that they are going to use what they’ve learned to complete the messy room challenge! First, they are going to start with two pom poms, and they need to code their 123 Robot to clear both off of the Tile. View the following animation to see how the 123 Robot will move to clear the first two pom poms. The robot starts in the middle square of the bottom row on the Tile. One pom pom is placed directly across the Tile from it, in the middle square of the top row. A second pom pom is placed in the square directly to the right. A finger presses the Move button two times, the Right button one time, the Move button again, then the Start button. The 123 Robot moves forward two squares, pushing the pom pom off the Field. Then, they can add more pom poms to see how many they can code and clean all together.
Video file
- ModelModel for students how to plan and test a project to clear the first two pom poms off the Tile.
- Model for students how to set up their room, as shown in the image below.

Set up the messy room challenge - Show students how to shake the 123 Robot back and forth to erase their projects, so it is ready for the new project as shown in the animation below.
Video file- Model how to place the 123 Robot in the starting position, with the white arrow pointing in the direction of a pom pom.
- Model how to plan and code each behavior you want to communicate to the 123 Robot, using the first behavior as an example. Students will repeat this process on their own to push the pom poms off the tile.

Plan then Press the touch buttons - For students who need an additional challenge try one of the following:
- Have them code the 123 Robot to play a sound each time it clears a pom pom from the Tile.
- Place the extra pom poms for them, and spread them out across the Tile, to ensure that they will need to drive their 123 Robots in more complex sequences.
- FacilitateFacilitate groups working to complete the messy room challenge. Have students show you their successful projects, then you can give them an additional pom pom to add to their room. Students can place the pom poms anywhere on the Tile.
- To help students who are having trouble with turn directions, encourage them to point in the direction they want the 123 Robot to turn, and match that point with the symbol on the touch buttons.
- To help students troubleshoot their projects, have them use a dry erase marker to draw the path they want their 123 Robot to take. Then, when they test their project, they can more clearly see where it went off of their drawn path, and how to correct their sequence. Remind students to erase the marker from the Tile at the end of the Lab.
- RemindRemind students to break down the task of clearing the whole room into smaller behaviors so that they can plan and code their 123 Robots in smaller increments. Students may be eager to plan and code multiple behaviors at a time, but this can get confusing quickly.
- Encourage them to work in smaller increments, so that they can more easily troubleshoot when the need arises, and create more successful sequences.
- Remind students that testing and troubleshooting is a part of coding, and that each time they fix a problem, they are learning even more.
- AskAsk students about how planning the steps in a sequence are helping them to code their 123 Robot.
- How are they communicating the behaviors and sequence to one another verbally while they’re working to solve the challenge?
- How do they decide which button to press if they disagree?
- Are they using gestures, or words, or symbols to help them?
- How might they use what they’ve learned about planning and sequencing in a future Lab?