
Previously in this Unit, you learned about:
- The purpose of using the Brain with the CTE Workcell to act as the programmable logic controller (PLC).
- Getting started using VEXcode EXP with the Brain.
- Gathering coordinates using the Devices Screen on the Brain
- Downloading and running a project on the Brain.
- Creating a VEXcode project using the Brain for the 6-Axis Arm to move a Disk from one location to another.
This Unit began with an explanation of what a workcell is, and the advantages of using workcells in industrial robotics. You then learned how to get started coding the Brain with the 6-Axis Arm using gathered coordinates. Now you will put everything you learned together to complete one final activity in this Unit.
Putting it All Together Activity
In this Activity, you will create a VEXcode project for the 6-Axis Arm to move four Disks to two pallets. Watch this animation to see one way the 6-Axis Arm could move in order to complete this Activity. In this animation, the 6-Axis Arm begins in the safe position, and the first Disk is on Tile location 17. The 6-Axis Arm moves to pick up the first Disk, and place it on the right side pallet. Once the first Disk is placed, the next Disk appears. The 6-Axis Arm moves back to pick up the second Disk and place it on the right side pallet. It then repeats these behaviors to place the third and fourth Disks on the left side pallet.
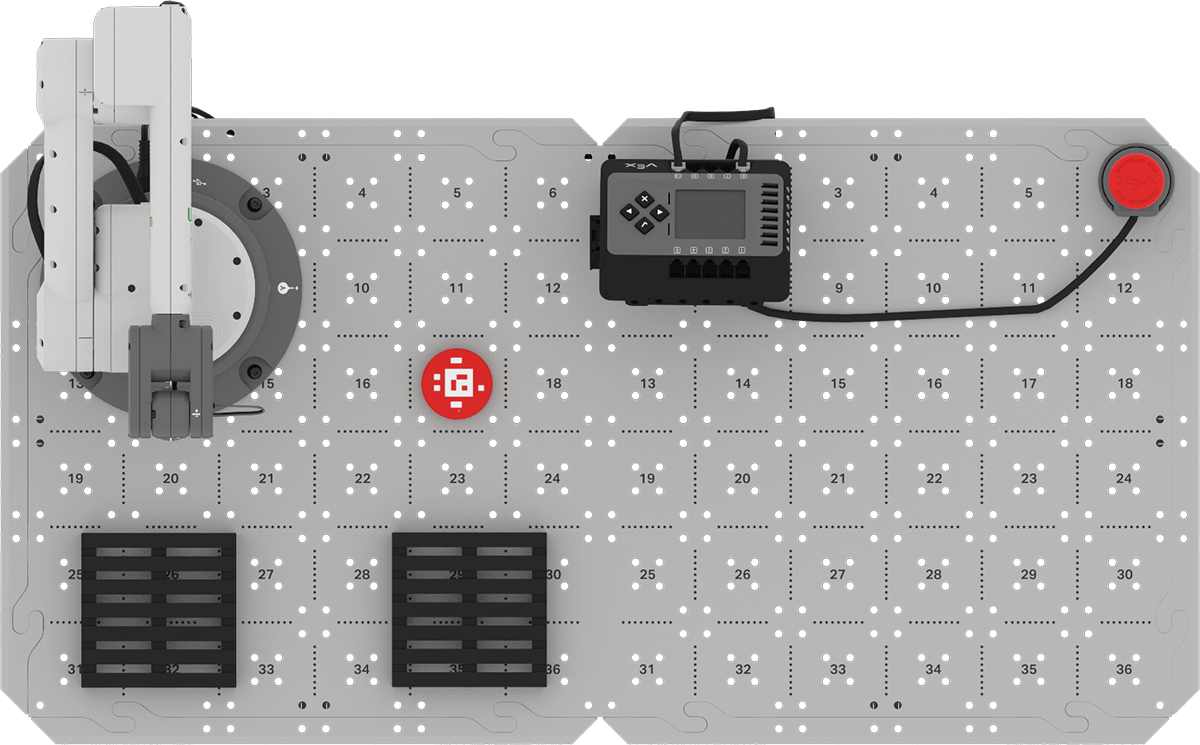
Setup: Place one Disk at the loading zone. The loading zone is located at Tile location 17, as shown in this image.
Activity: Create a VEXcode project for the 6-Axis Arm to move four Disks from the loading zone to the two pallets.
- Plan your project with your group using your engineering notebook. Make a list of each behavior the 6-Axis Arm must complete to move all four Disks from the loading zone to two pallets. Document your plan in your engineering notebook.
- Build your project in VEXcode.
- You can either build onto your project from Lesson 4, or create a new project with the Brain CTE 6-Axis Arm Base template. Remember to rename and save your project to your device before you begin editing.
- Download your project to the Brain.
- Run your project to test it.
- After each Disk is picked up, place an additional Disk at the loading zone. Do this while the project is running, as shown in the animation above.
- After the project has finished running, reflect on what happened. Did the 6-Axis Arm successfully move all four Disks to the pallets? If not, modify your project and test again. Be sure to make just one change at a time, so you can see the results of that change before making additional modifications to your project.
- Remember that you need to download the project to the Brain each time you change it, so that you can test the updated project.
- Document your process in your engineering notebook. Be sure to record each change you make to your project.
- After you have completed the activity, be sure your project has been saved to your device.
Wrap Up Reflection
Now that you have coded the 6-Axis Arm to pick and place four Disks on the pallets, it is time to reflect on what you have learned and done in this Unit.
Rate yourself as a novice, apprentice, or expert on each of the following concepts in your engineering notebook. Provide a brief explanation for why you gave yourself that rating for each concept:
- Identifying the importance of workcells in industrial robotics.
- Opening, downloading, and running a VEXcode project for the 6-Axis Arm, using the Brain.
- Creating a VEXcode project using the Brain to pick up and place four Disks on two pallets.
Use this table to help you determine which category you fall under.
| Expert | I feel that I fully understood the concept and could teach this to someone else. |
| Apprentice | I feel that I understood the concept enough to complete the activity. |
| Novice | I feel that I did not understand the concept and do not know how to complete the activity. |
Then, reflect on the learning targets you co-created with your teacher for this Unit. Have you learned what you set out to learn? Why or why not? What were you most successful with? Why? How do you think you can build on your progress moving forward?
Each person in your group should complete their self-reflections in their engineering notebooks. Once everyone in your group has completed their self-reflections, check-in with your teacher and let them know you are ready for your debrief conversation.
Debrief Conversation
Using your reflections and notes in your engineering notebook, rate yourself on the Debrief Conversation Rubric (Google Doc / .docx / .pdf). For each of the topics, rate yourself as Expert, Apprentice, or Novice.
Ask your instructor if you need any clarification on what is expected of you during this self assessment.

Select < Return to Units to go back to all Units.