
In the previous Lesson, you learned how to collect (x, y, z) coordinates using the Brain. In this Lesson, you will use those coordinates to create a VEXcode project to move a Disk onto a pallet. You will learn how to:
- Open a project in VEXcode.
- Build a VEXcode project to pick up and place a Disk on a pallet.
- Download a project to the Brain.
- Run a project on the Brain.
- Incrementally test VEXcode projects.
At the end of this Lesson, you will code the 6-Axis Robotic Arm to pick up an additional Disk and place it on another pallet.
Picking Up and Placing a Disk
In the previous course, you used a direct connection to code the 6-Axis Arm to pick up and move Cubes and Disks. In this Lesson, you will create an EXP Brain project in VEXcode EXP to pick up and move a Disk from the starting location to a pallet. This will follow the same process that you used to incrementally create and test VEXcode projects in the Introduction to the 6-Axis Arm course.
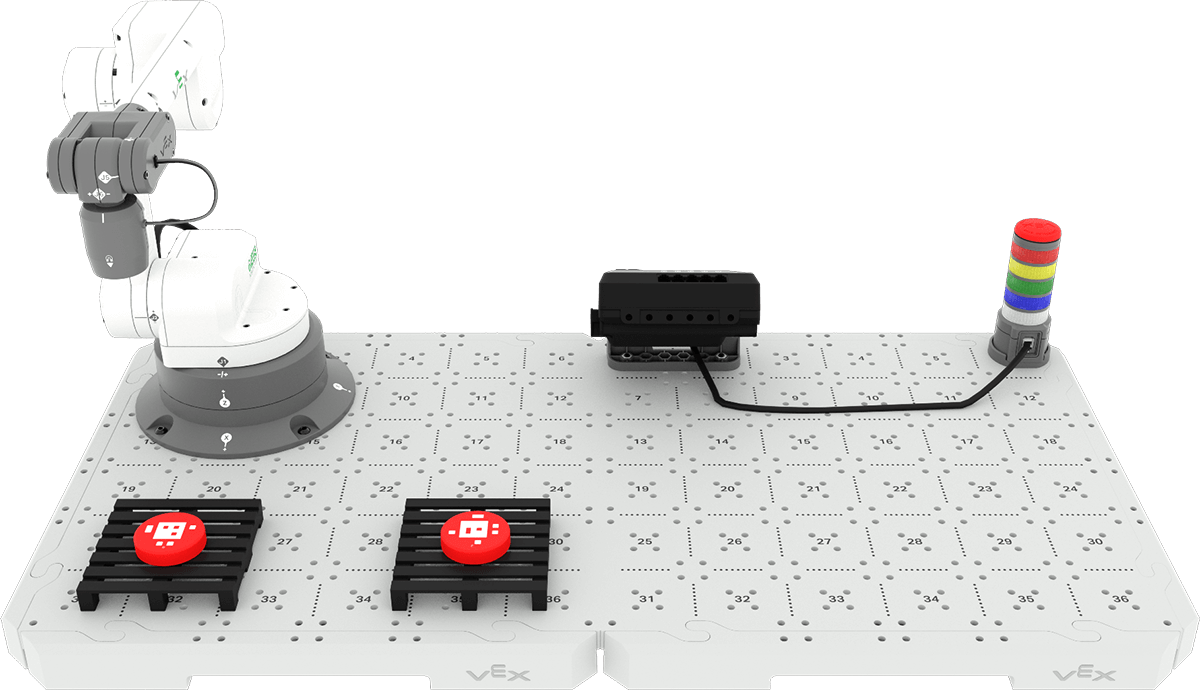
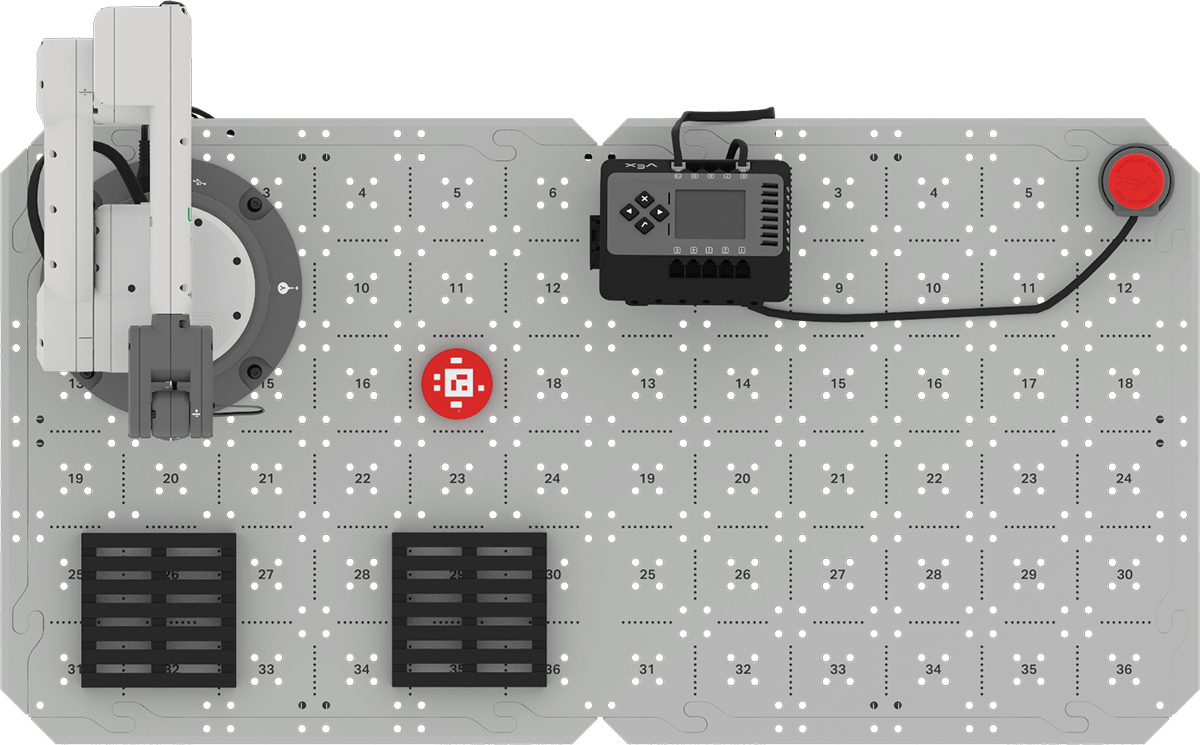
To begin, place a Disk on Tile location 17, as shown in this image. This is the same setup that was used in the previous Lesson's Activity.
Reviewing the Behaviors Needed to Move a Disk
In the Introduction to the 6-Axis Arm course, you learned how to make a plan for a project where you listed out the smallest possible behaviors in order. Previously, you made a plan for moving a Cube from the loading zone at Tile location 17 to the pallet. This same plan (shown below) can be used to move a Disk from Tile location 17 to the pallet now, as the behaviors are the same – only the object being moved changed. Record the plan to move a Disk from the loading zone to a pallet in your engineering notebook.
| Move a Cube to the Loading Zone to a pallet |
| 1. Pick up a Cube. |
| a. Set the 6-Axis Arm's end effector to Magnet. |
| b. Move the 6-Axis Arm to the Cube in the Loading Zone. |
| c. Attach the Cube to the Magnet. |
| d. Move the 6-Axis Arm above the Loading Zone. |
| 2. Place the Cube on the pallet. |
| a. Move the 6-Axis Arm above the pallet. |
| b. Move the 6-Axis Arm down to place the Cube on the pallet. |
| c. Release the Cube from the Magnet. |
| d. Move the 6-Axis Arm above the pallet. |
Opening the CTE 6-Axis Arm Base Template Project
In this Lesson, you will use the Brain CTE 6-Axis Arm Base Template Project to code the 6-Axis Arm to pick up and move Disks to the pallets. Follow along with the steps to open the project.
In VEXcode, open the File menu, and select Open Examples.
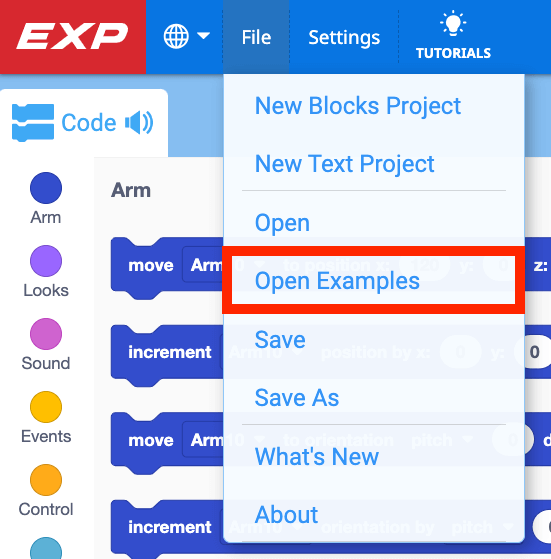
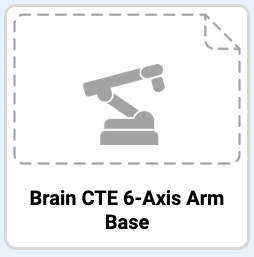
Select the Brain CTE 6-Axis Arm Base template project.
Note: If opening the project for the first time, you may be prompted to allow editing permissions. Be sure to enable saving if prompted.
Now you are ready to begin building your project.
For Your Information
In the Brain CTE 6-Axis Arm Base template project the 6-Axis Arm and Signal Tower are already configured as connected devices. When creating a Brain project, a device, like the 6-Axis Arm, needs to be configured in order for the blocks to control that device to appear in the Toolbox. By using the template project, blocks in the Arm and Signal Tower categories will be available to use. You will learn more about configuring devices in a later Unit.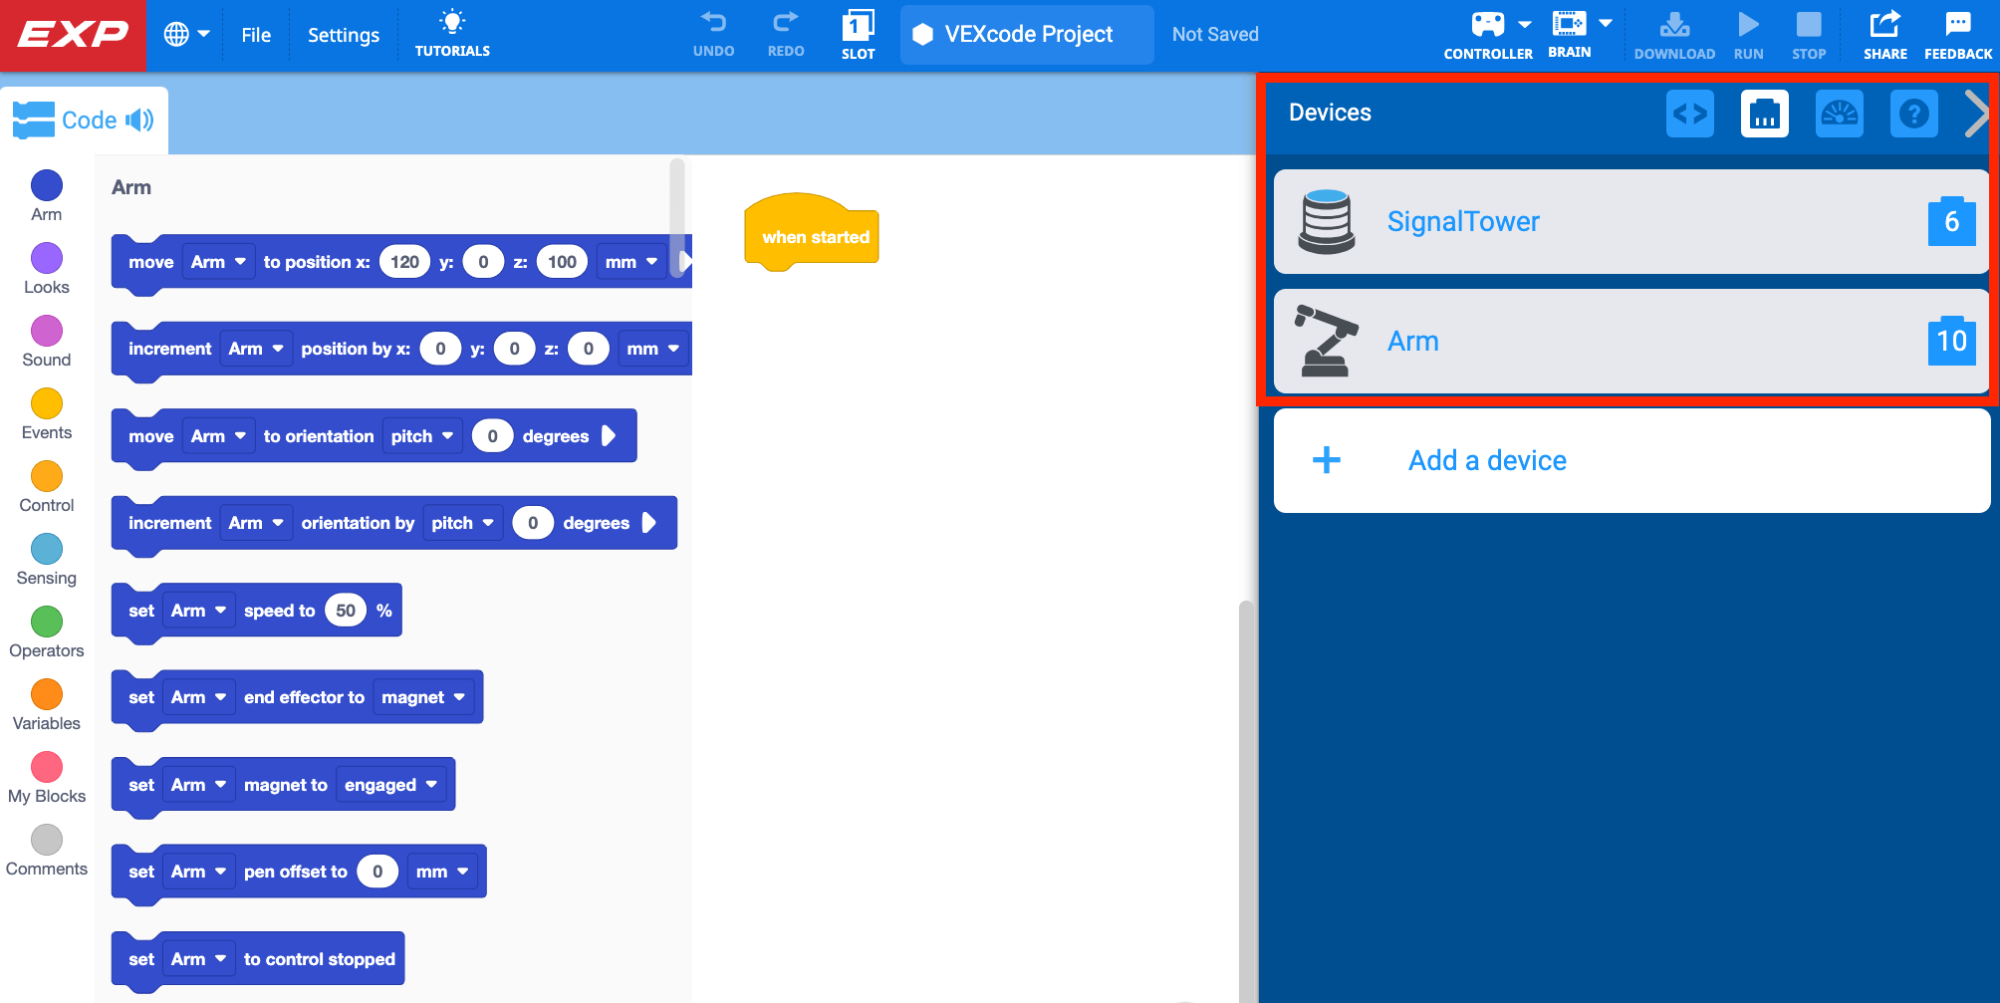
Pick Up the Disk
Before you begin to add blocks, name and save your project to your device. Open the File menu and select Save As. Rename your project Unit 1 Lesson 4.
Now your project will automatically save as you add and remove blocks.

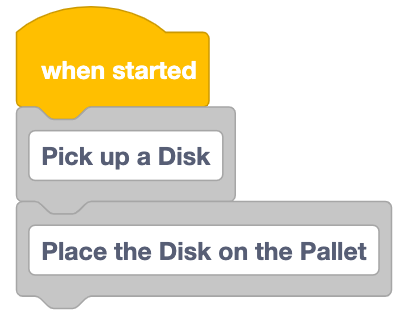
Add Comment blocks for each of the two large steps from the plan above.
Remember, comments help keep your project organized so that is it easy to identify reusable chunks of code as you are building and testing a project.
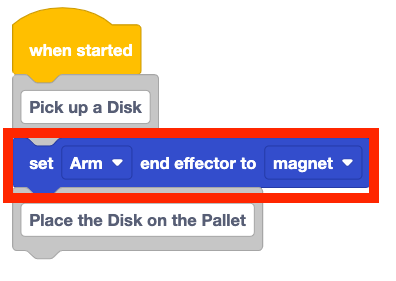
Add a Set end effector block below the first Comment block to set the 6-Axis Arm's end effector to Magnet.
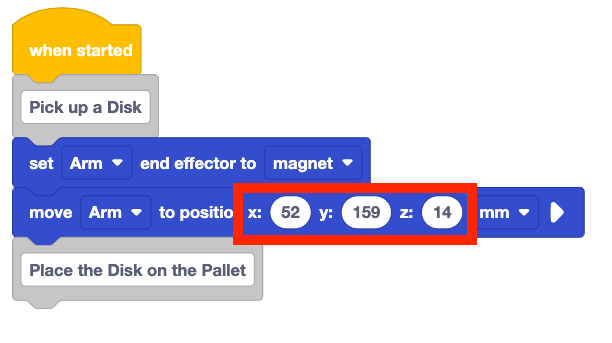
Add a Move to position block beneath to the project.
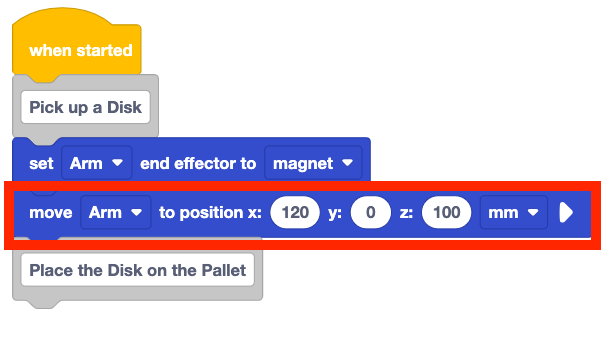
Set the x, y, z-parameters to the coordinates of the top of the Disk in the loading zone (Tile location 17). You recorded these coordinates in your engineering notebook in the previous Lesson's Activity.
Note that the (x, y, z) coordinates shown here are an example. Yours may be slightly different based on the position of the Disk and the 6-Axis Arm when you manually gathered the values. Be sure to use your coordinates in your project.
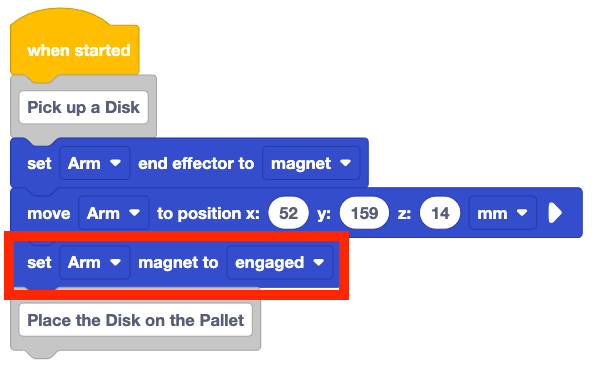
Add a Set magnet block to the project. Be sure the parameter is set to engaged.
You must use a Set magnet block to engage the Magnet in order to attract the Disk to pick it up.
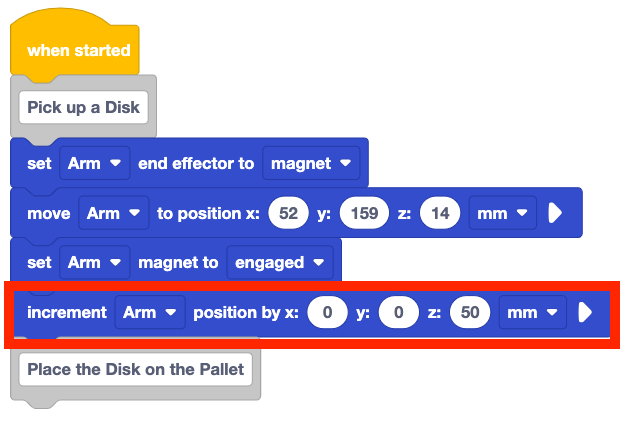
Add an Increment position block to your project and set the z-parameter to 50.
This will cause the 6-Axis Arm to lift along the z-axis, picking up the Disk from the loading zone at Tile location 17.
Run the Project on the Brain
Now that the Brain is being used as the programmable logic controller (PLC), VEXcode projects will need to be downloaded to the Brain. You will download and run projects on the Brain throughout this course. Follow these steps to download and run your project.
Be sure the Brain is powered on and connected to VEXcode EXP. Review the steps in Lesson 2 of this Unit to help you connect the Brain if needed.
The Brain icon in the Toolbar will show green when the Brain is connected.
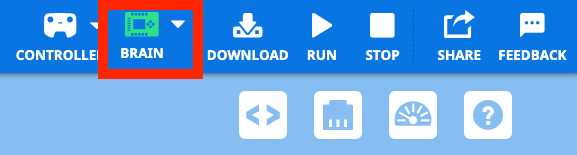
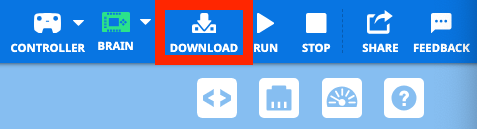
Select Download to download the project to the Brain.

You will see the project on the Brain screen once it is downloaded.
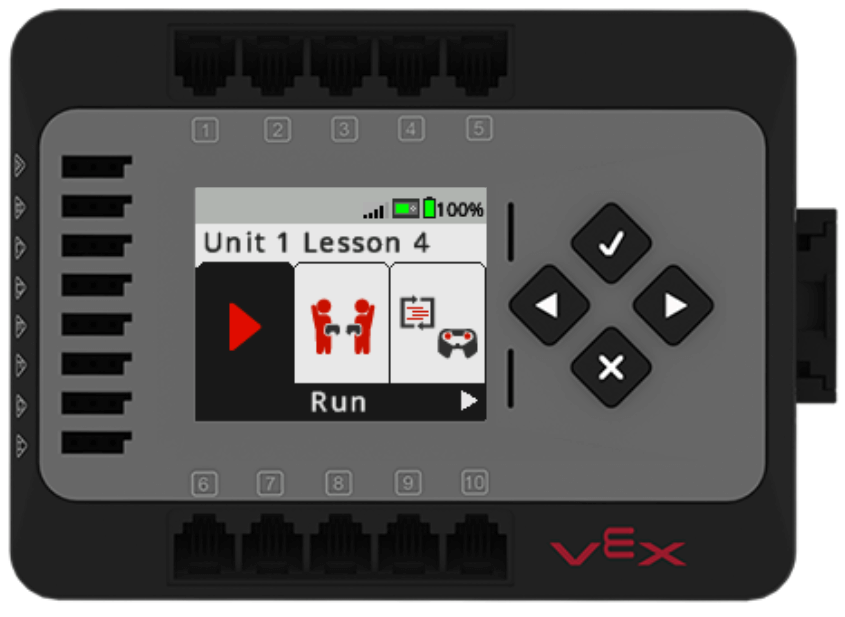
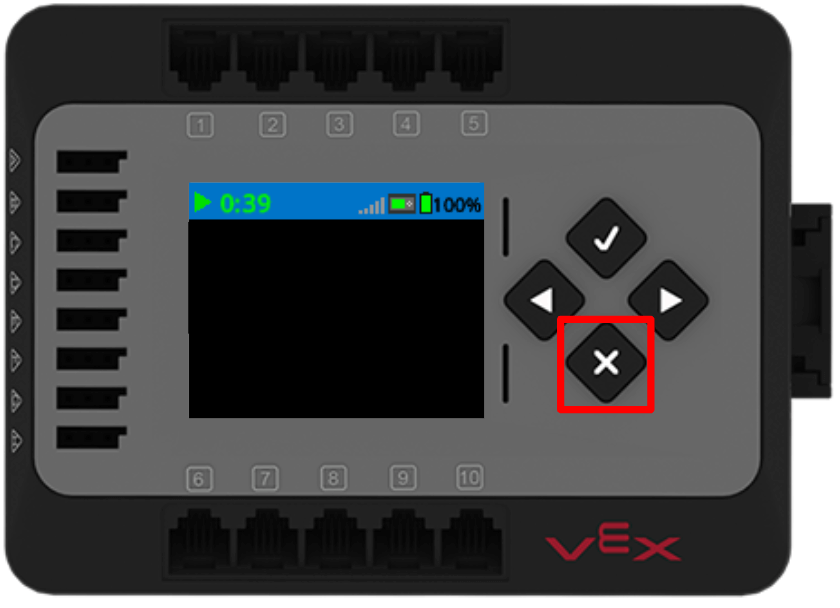
Press the Check button on the Brain to run the project. Observe the behaviors of the 6-Axis Arm.

When the 6-Axis Arm is finished moving, press the X button on the Brain to stop the project.
Did the 6-Axis Arm pick up the Disk from the loading zone as intended? Why or why not?
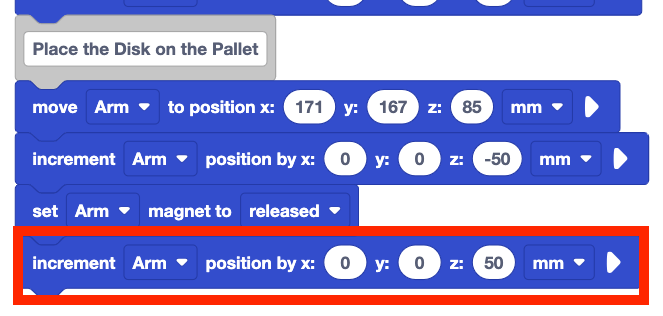
Place the Disk on the Pallet
Now that the Disk is picked up by the 6-Axis Arm, it can be moved to the pallet. The 6-Axis Arm will move the Disk above the drop off location on the pallet. Then it will lower the Disk to the pallet and release the Magnet to place the Disk, as described in the plan above.
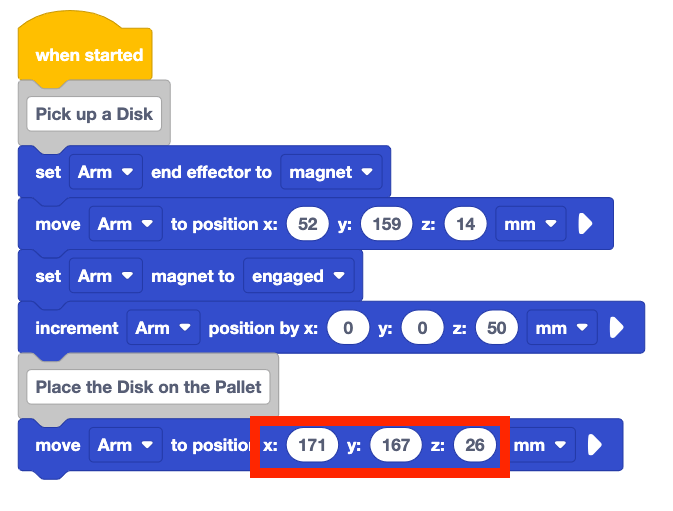
Add a Move to position block to the project beneath the second Comment block, to align with the next behavior listed in the plan.
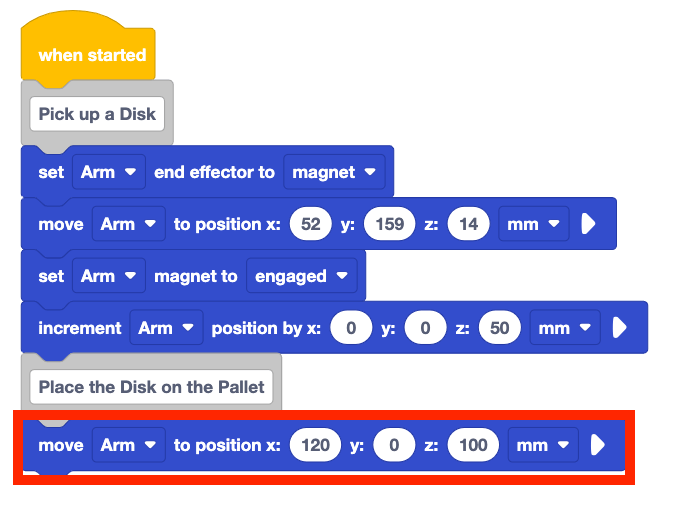
Set the x, y, z-parameters to the coordinates of the drop off location – the top of the Disk on the pallet. You recorded these coordinated in your engineering notebook in the previous Lesson's Activity.
Be sure to use your coordinates, as the ones shown here are an example, and may vary from your own.
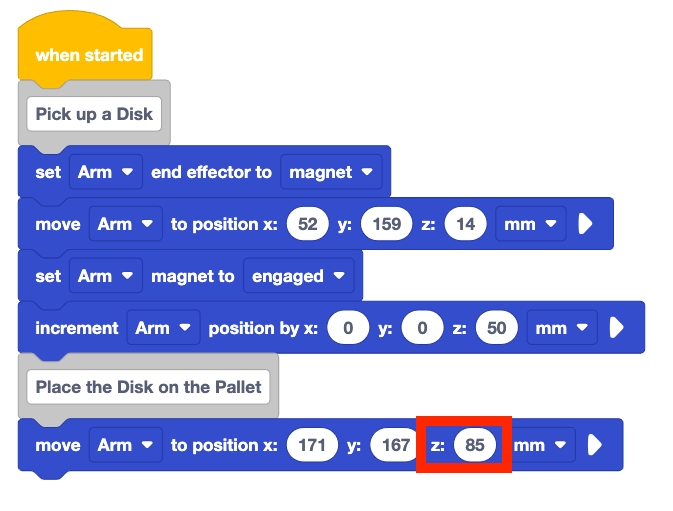
Add approximately 50 to your z-coordinate in the Move to position block.
This is added because the 6-Axis Arm needs to move the Disk above the drop off location. By increasing the z-coordinate, you ensure that the Disk is positioned over the correct location. This also ensures that the 6-Axis Arm avoids any obstacles that may be present.
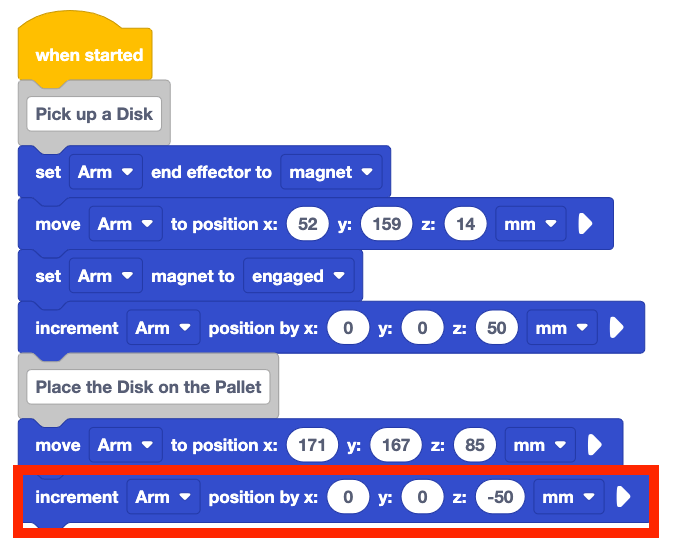
Add an Increment position block to the project. Set the z parameter to -50.
This will move the 6-Axis Arm down 50mm to place the Disk on the pallet.
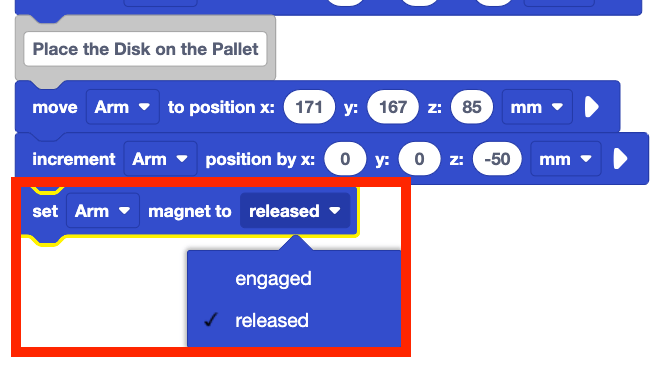
Add a Set magnet block to the project. Set the parameter to released.
This will disengage the Magnet so that the Disk is released on the pallet.
Add an Increment position block to the project. Set the z-parameter to 50.
This will raise the 6-Axis Arm to place the Disk on the pallet.
Download and Run the Project on the Brain
Now that you are running the project directly from the Brain, the project needs to be downloaded to the Brain each time it is edited. This ensures that the project running on the 6-Axis Arm is the same as the project you are building in VEXcode.
Be sure the Brain is powered on and connected to VEXcode. Select Download in the Toolbar to download the project to the Brain.
Once the project is downloaded, press the Check button on the Brain to run the project.
Observe the behaviors of the 6-Axis Arm.

When the 6-Axis Arm has finished moving, press the X button on the Brain to stop the project.
Did the 6-Axis Arm pick up and place the Disk on the pallet as intended? Why or why not?

For Your Information
While your Brain is connected to VEXcode EXP with the USB-C cord, you can also use the Run and Stop buttons in the Toolbar to start and stop your project. When the Brain is connected to VEXcode with the cord, the Brain icon in the Toolbar will show green, and the Download, Run, and Stop buttons will be enabled, as shown here. 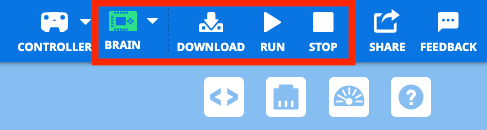
When the Brain is not connected to VEXcode, the Brain icon will show white, and the Download, Run, and Stop buttons will be disabled, as shown here. When the Brain is not connected, the buttons on the Brain must be used to run the project. 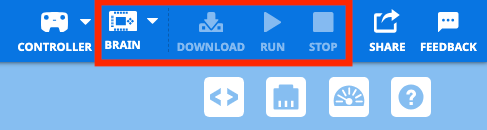
Activity
Now that you have opened, downloaded, and run your project on the Brain, and moved one Disk from the loading zone to the pallet, you will practice these skills. In this activity, you will build on your project from this Lesson to code the 6-Axis Arm to pick up a second Disk from the loading zone (Tile location 17) and place it on the second pallet.

Activity: Code the 6-Axis Arm to place one Disk on each pallet.
- Plan how you will build onto your project from this Lesson. In this project, you will code the 6-Axis Arm to pick up a second Disk from the loading zone and place it on the second pallet with your group. Be sure that you are all agreed on your approach before you begin editing the project.
- Document your plan in your engineering notebook.
- Open the File menu in VEXcode and select Save As. Rename your project Unit 1 Lesson 4 Activity.
- Edit the project in VEXcode to match the plan your group agreed upon.
- Download and run the project to test it. Manually place the second Disk at the loading zone once the first has been placed.
- Does the 6-Axis Arm successfully move both Disks as you intended? There should be one Disk on each pallet. If not, continue to edit the project until you have successfully placed both Disks, one on each pallet.
Check Your Understanding
Before moving on to the next Lesson, ensure that you understand the concepts in this Lesson by answering the following questions in your engineering notebook.
Check Your Understanding questions > (Google Doc / .docx / .pdf)
Select Next > to move on to the Putting It All Together Activity.