
In this Lesson, you will use the Devices Screen on the EXP Robot Brain to gather x, y, and z-coordinates of different locations on the CTE Tile.
In this Lesson, you will learn about:
- Using the Devices screen on the Brain.
- Viewing x, y, z-positions of the 6-Axis Arm on the Brain screen.
At the end of this Lesson, you will apply those skills in the activity to manually move the 6-Axis Arm to find the (x, y, z) coordinates of specific Tile locations.
Using the Devices Screen on the Brain
In the Introduction to the 6-Axis Arm course, you learned how to manually move the 6-Axis Arm to gather coordinates using the Teach Pendant and Monitor. This was possible because of the direct connection of the 6-Axis Arm to VEXcode EXP. Now that you are using the Brain with the 6-Axis Arm, you will use the Brain screen to view coordinates while manually moving the 6-Axis Arm. To do this, you will use the Devices Screen on the Brain.
What is the Devices Screen?
The Devices Screen enables you to view data for connected devices, like the 6-Axis Arm or a sensor. When the 6-Axis Arm was directly connected, you were able to view information like x, y, z-coordinates with the Monitor or Teach Pendant. Now that the Brain is acting as the programmable logic controller (PLC), information from the 6-Axis Arm needs to be accessed from the Brain. Throughout this course, you will use the Devices Screen to gather coordinates. 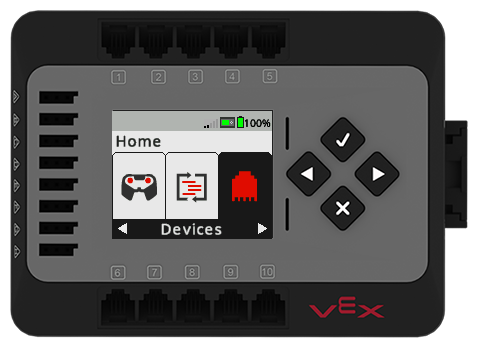
Viewing x, y, z-coordinates with the Devices Screen
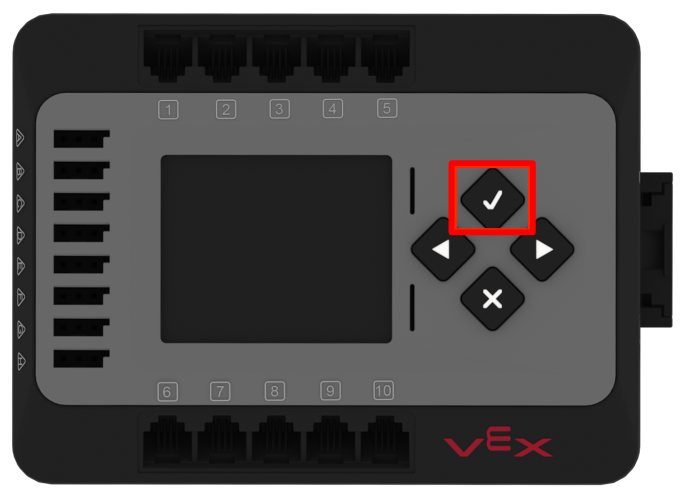
Press the Check button to turn on the Brain.
Be sure that the 6-Axis Arm and Signal Tower are connected to the Brain.
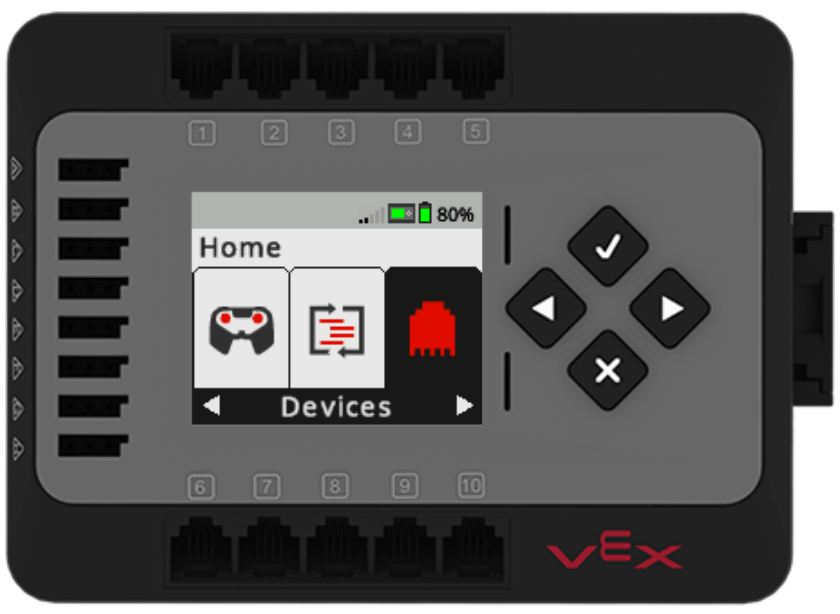
Use the Right Arrow to highlight the Devices menu option. Press the Check button to open the Devices Screen.
The Devices Screen will show information about all of the devices connected to the Brain. Use the Right Arrow to highlight the Arm menu option. Press the Check button to view the Arm data.
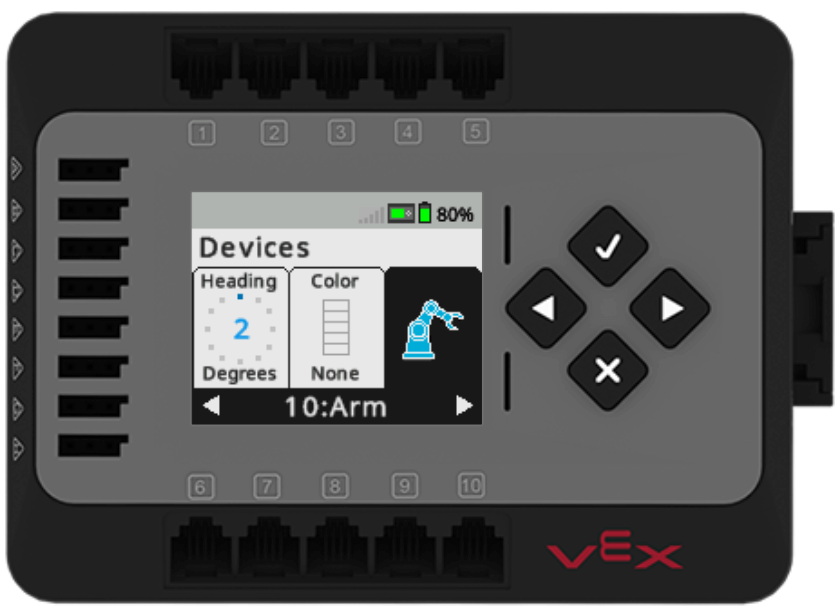
Now you can view data points about the 6-Axis Arm.
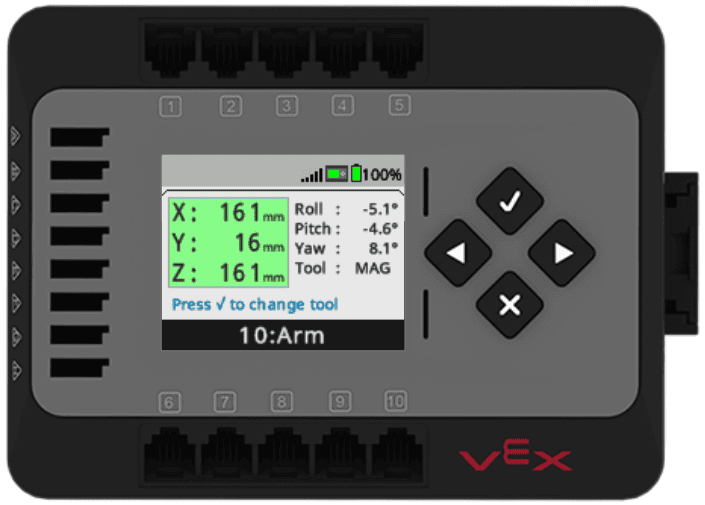
Identifying the x, y, and z-coordinates
The Devices Screen shows a number of data points about the positioning of the 6-Axis Arm. The x, y, and z-coordinate information is located in the upper right hand corner of the screen, and are labeled as X, Y, and Z, as shown in this image.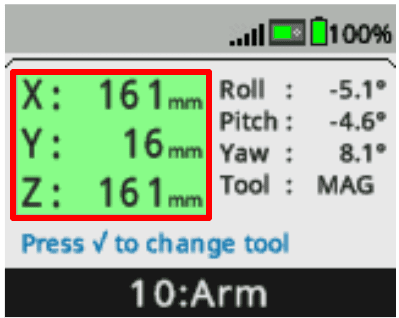
As you move the 6-Axis Arm, the data displayed on the Devices Screen will change in real time, as shown in this video.
You can use the Devices Screen to gather coordinate locations with the 6-Axis Arm and record them in your engineering notebook, just as you did previously with the Monitor when the 6-Axis Arm was directly connected to VEXcode. 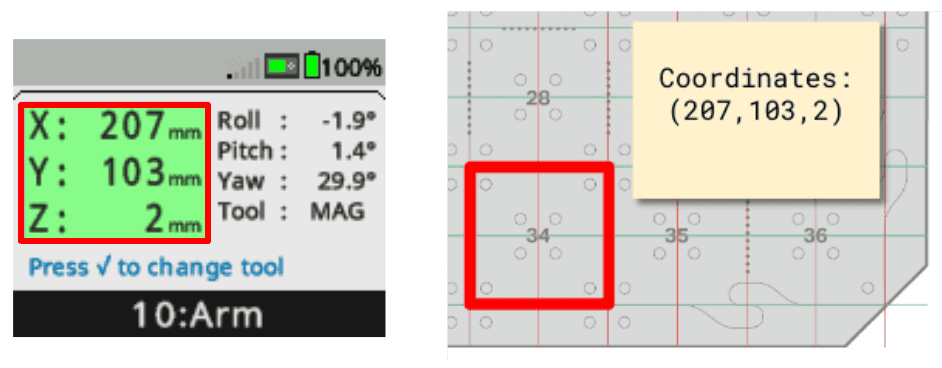
Activity
Now that you have learned how to use the Devices Screen on the Brain to view the x, y, and z-positions of the 6-Axis Arm, you can practice these skills by using the the CTE 6-Axis Arm and the Devices Screen to find the coordinates of specific Tile locations.

- View the Arm data on the Devices Screen on the Brain.
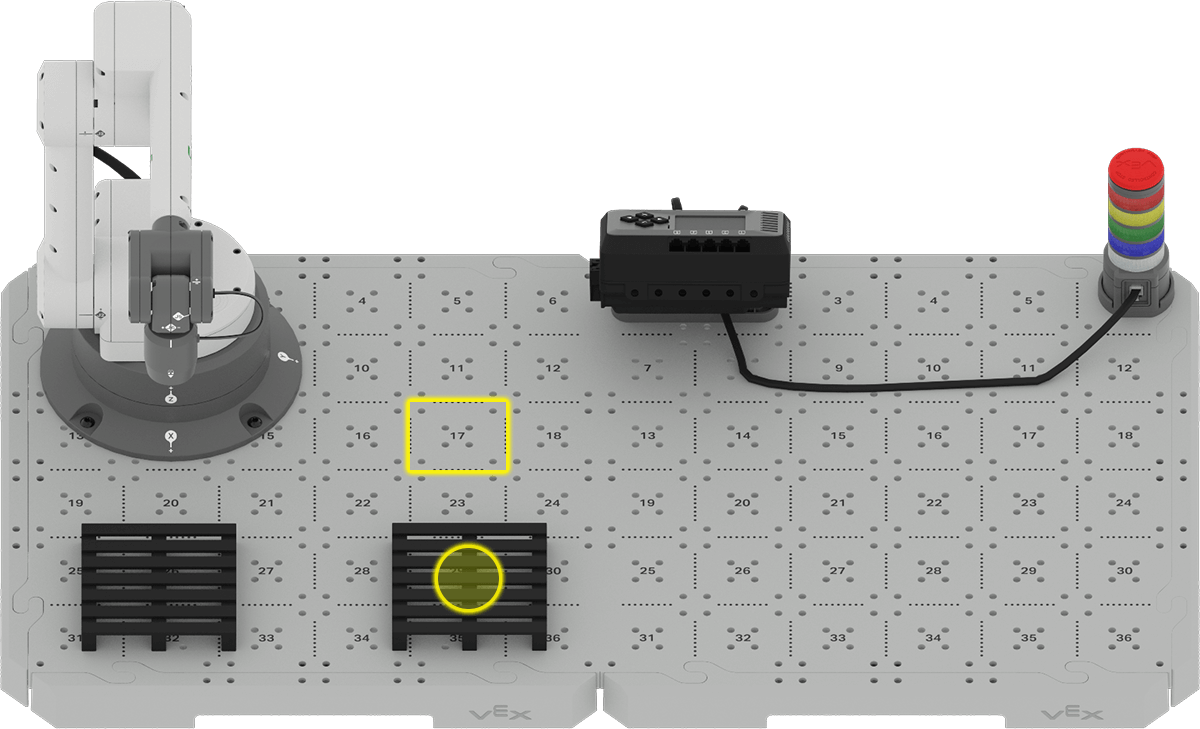
- Manually move the 6-Axis Arm and record the (x, y, z) coordinates of the following Tile locations (as shown in the image above) in your engineering notebook:
- Tile location 17
- Center of the pallet
- Top of a Disk on Tile location 17
- Top of a Disk on the center of the pallet
- How are the coordinates similar to one another? Which values are different and why? Record your answers in your engineering notebook.
Check Your Understanding
Before beginning the next Lesson, ensure that you understand the concepts in this Lesson by answering the questions in the document below in your engineering notebook.
Check Your Understanding questions > (Google Doc / .docx / .pdf)
Select Next > to use the coordinates you gathered in a project to move a Disk.