
Engage
Launch the Engage Section
ACTS is what the teacher will do and ASKS is how the teacher will facilitate.
| ACTS | ASKS |
|---|---|
Note: The information about the size of the crack at the bottom of the page will be used in the next Lab, so there is no need to discuss it with students now.
|
|
Getting the Students Ready to Build
Before we can collect data to determine whether the claim that the bridge is unsafe is true, we have to build the Code Base and add the Eye Sensor, making sure that it is facing upwards.
Teacher Tip: While students are building, load the Printing Data project onto the student devices that will be used to run the project in Play Part 1.
Facilitate the Build
-
InstructInstruct
students that they are going to use the Code Base to collect data about the bottom of the bridge in order to test the claim that the bridge has a dangerous crack in it. To do this, they will need to build the Code Base - Eye Down, and then turn the Eye Sensor to face upwards.
Instruct students to join their groups, and have them complete the Robot Roles & Routines Sheet. Use the Suggested Role Responsibilities slide in the Lab Image Slideshow as a guide for students to complete this sheet.
-
DistributeDistribute
the build instructions to each group. Students will first follow the build instructions to build the Code Base 2.0. Then, they will follow the Code Base 2.0 - Eye Down instructions to add the Eye Sensor to the robot.
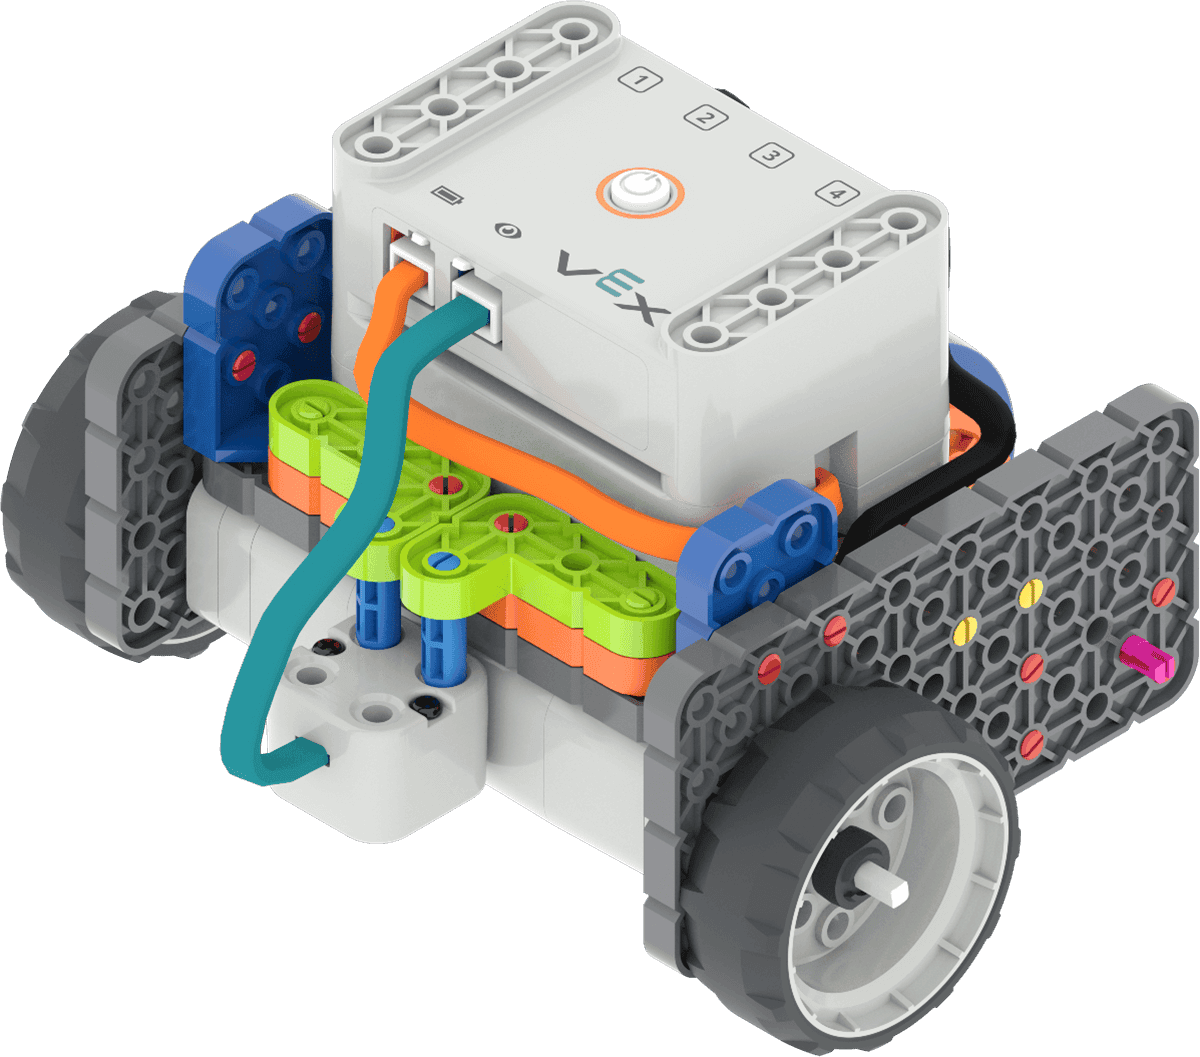
Code Base 2.0 - Eye Down build -
FacilitateFacilitate
the building process.
- Builders and Journalists should begin building based on their roles and responsibilities, like those shown in the Lab 2 Image Slideshow. The Robotics Roles and Routines sheet can be used to help students organize their roles for building.
- Circulate around the room to help students with building or using build instructions where needed. Ask questions about how the build is being constructed to keep all students engaged in the building process, and remind students to follow their Role Responsibilities if they need help taking turns.
-
Once students have completed the build, they will need to move the Eye Sensor to be pointing upwards, so that the sensor can effectively scan the bottom of the bridge. Students should detach the Orange Standoffs that hold the Eye Sensor and move them to the top of the Green Angle Beams, as shown here. Have groups check in with you as they complete the Code Base - Eye Forward build, and then show them how to move the Eye Sensor so it is oriented correctly.
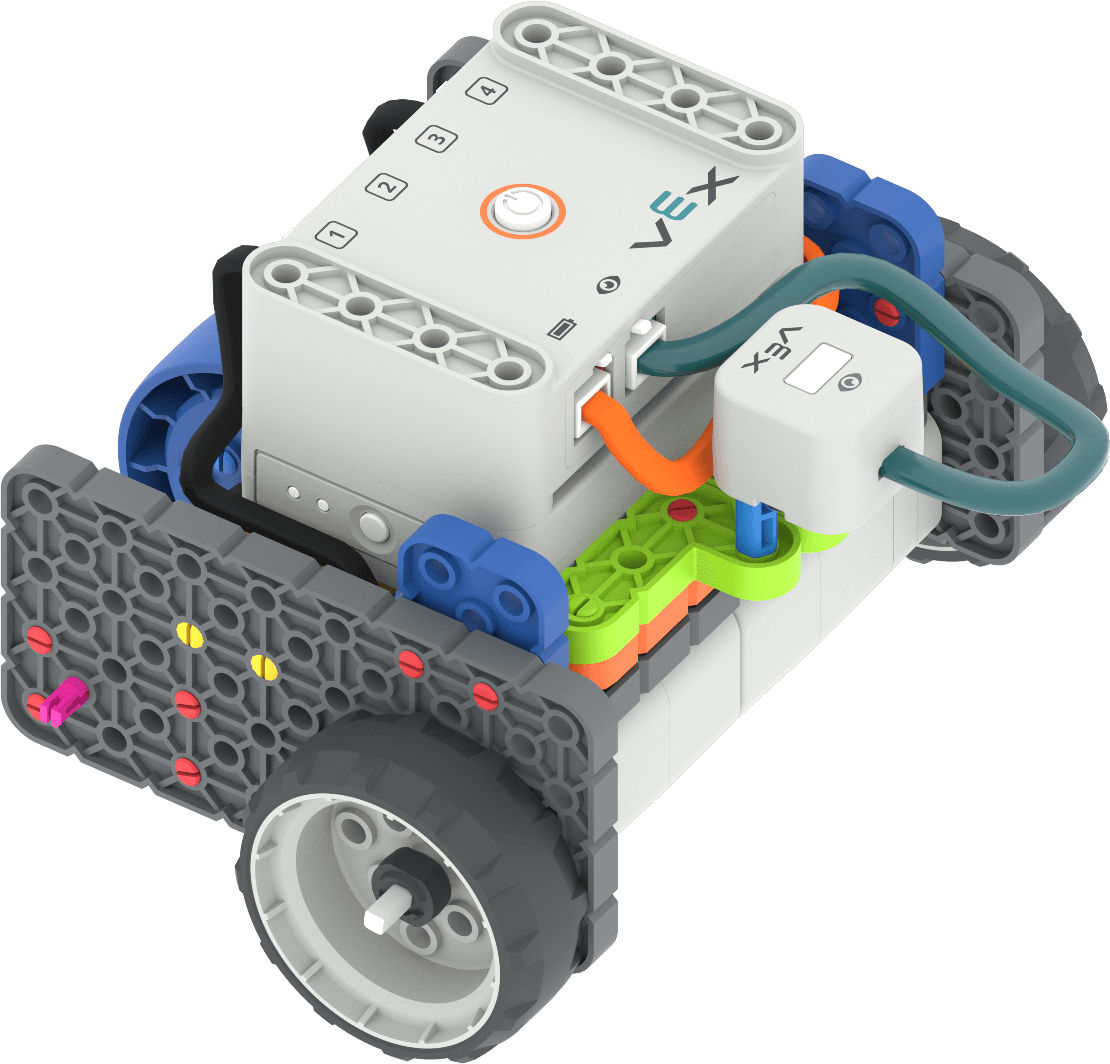
Move the Eye Sensor
- OfferOffer suggestions and note positive turn taking, communication, and problem solving strategies as groups are building together.

Teacher Troubleshooting
- When setting up the bridges, use three GO Kit Boxes for each support, or use books stacked to an equivalent height. It is important that the two supports are the same height, so the bridge surface is parallel to the ground. Ensure the Code Base with the Eye Sensor facing upwards fits underneath the bridge and can pass through easily.
- Be sure to read the Background Information in the Unit Overview, so you can easily help students to troubleshoot if the sensor returns unexpected data.
Facilitation Strategies
- This Lab focuses on studying and graphing data. The goal of the Play section is for students to view and use the data printed to the Print Console in their Bridge Inspection Reports. Students do not need to know or understand all of the coding concepts in the Printing Data project in order to complete Lab activities. Attention should be focused on the data produced by the project, not on building the project itself.
- This Lab uses a VEXcode GO project that should be downloaded to student devices, prior to beginning the Play section of the Lab. Determine how your students will access the Printing Data project:
- You can download it to student devices prior to class, or while students are building their robots.
- If your students are used to accessing files through an LMS or by other means, plan to direct them to do so before beginning the Play section.
- To learn more about how to load and open downloaded projects see these device-specific VEX Library articles:
- For more information about setting up VEXcode GO, see this article.
- If you cannot download the Printing Data project to students' devices, implement Play Part 1 as a demonstration. Download the project to one device, and follow the steps in Play Part 1 with students gathered around the setup to watch the robot run the project. The whole class can use the same set of data that is printed to the Print Console.
- You may want to project VEXcode GO so the whole class can easily see the data in the Print Console. That way each group can graph the data at their own pace.
- Gather the materials each group needs before class. For this Lab, each group of two students will need a GO Kit, build instructions, a computer or tablet to access VEXcode GO, a pre-built bridge setup, and a Bridge Inspection Report. Students will need pencils to fill in the Bridge Inspection Report as well.
- Pre-build the bridges before class. For this lab, each group of 2 students will need a GO Tile prepared with the colored beams attached.
-
Construct your bridge pattern by adding Yellow, Green, and Blue Beams so that it looks like this:
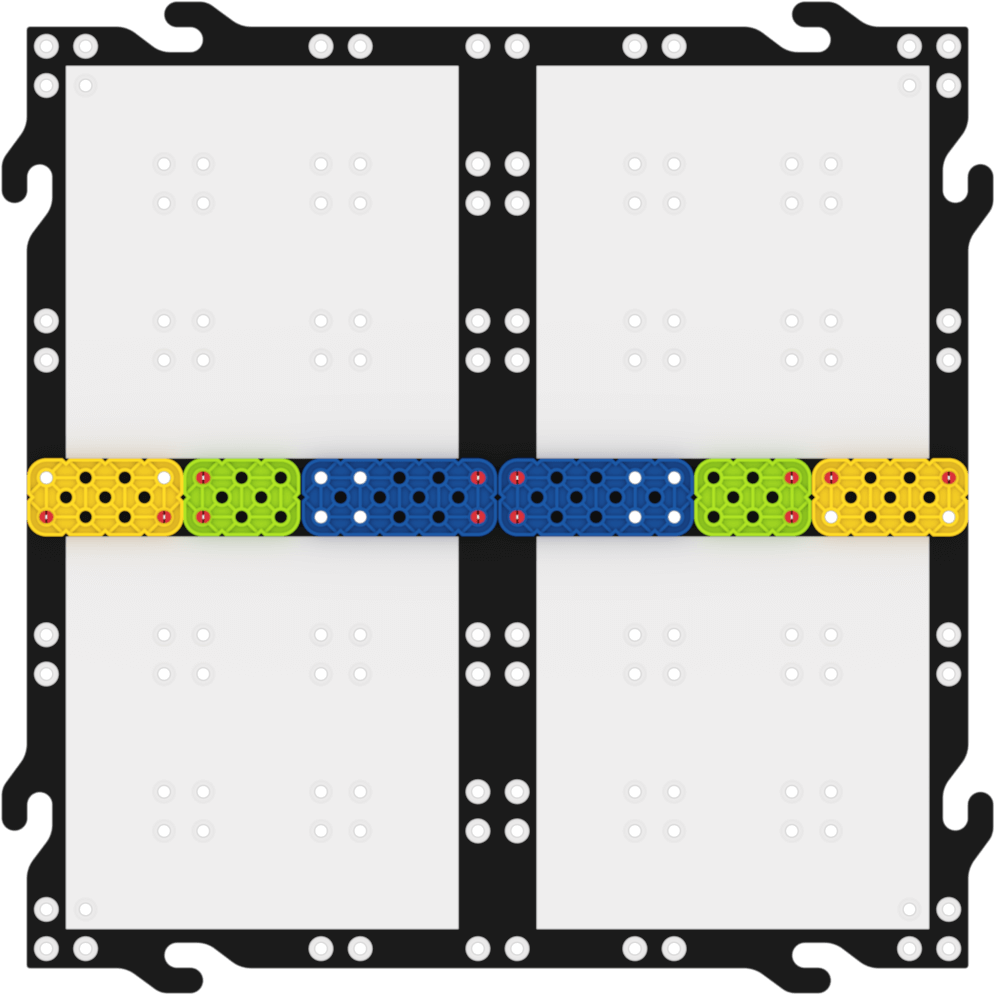
Bridge Setup -
Students should not see the pattern of beams before they engage with Lab activities, so the tiles should be set up on their bridge supports and ready to go before students come in. This is one example of how the bridge could be set up. Be sure that bridge Tile is not touching the Code Base or Eye Sensor when it is placed at the start. (Note the robot is shown at the 'start' of the bridge in this image.)
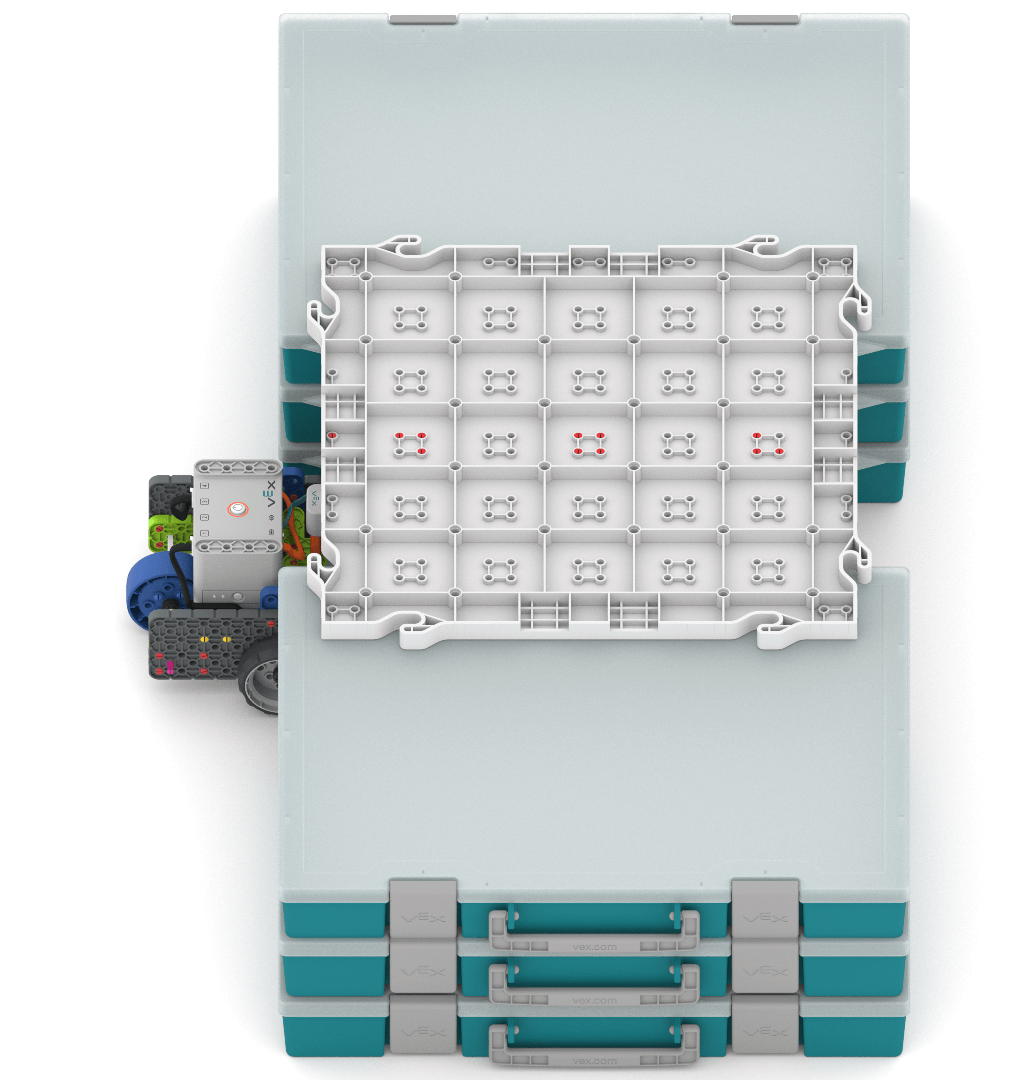
Lab 2 Bridge Set Up
-