Engage
Launch the Engage Section
ACTS is what the teacher will do and ASKS is how the teacher will facilitate.
| ACTS | ASKS |
|---|---|
|
|
Getting the Students Ready to Build
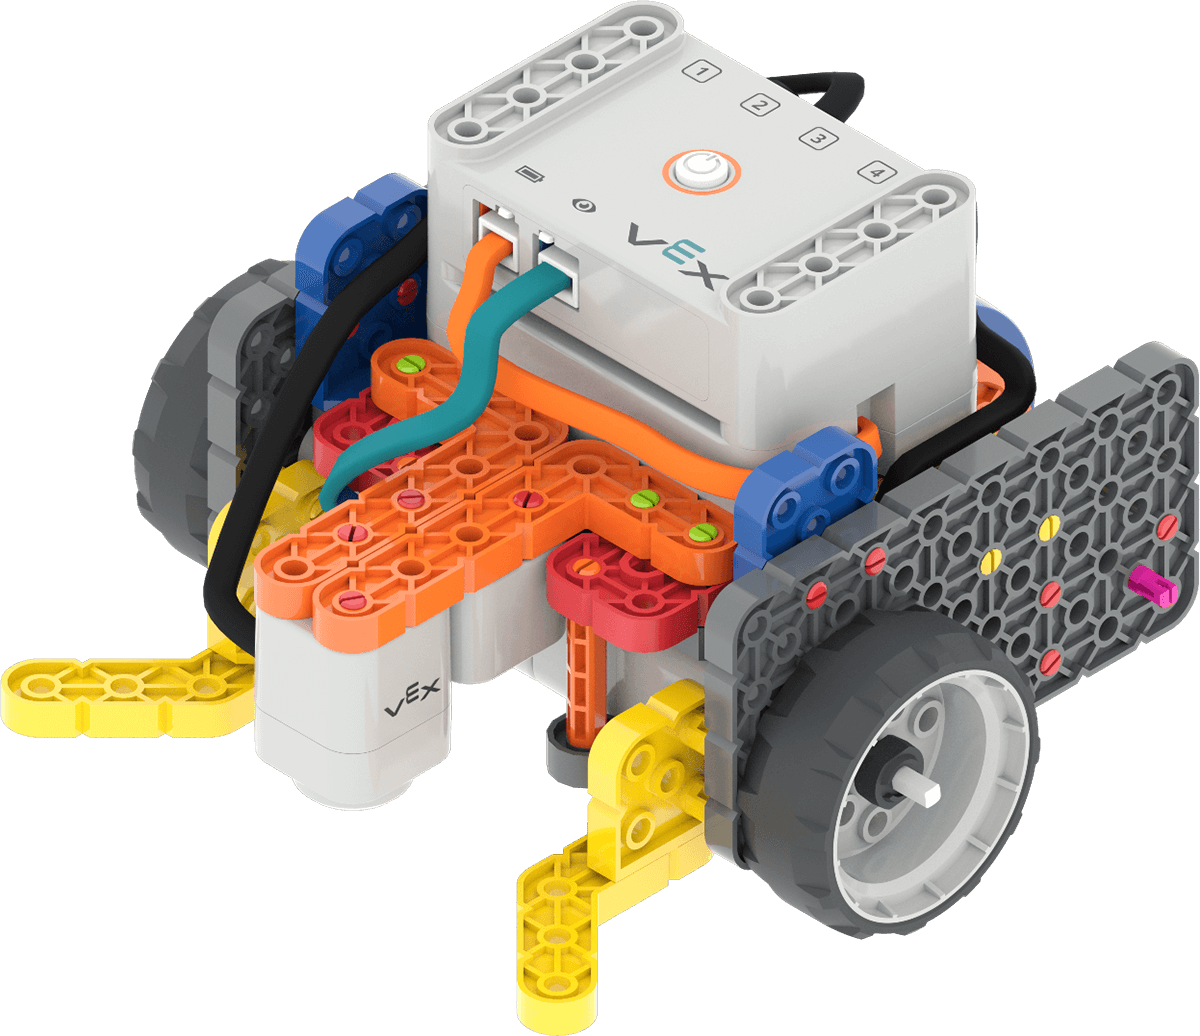
Before we can code and test the Electromagnet, we first need to build the Code Base 2.0 - Eye + Electromagnet!
Facilitate the Build
- InstructInstruct students to join their group, and have them complete the Robotics Roles & Routines sheet. Use the Suggested Role Responsibilities slide in the Image Slideshow as a guide for students to complete this sheet.
-
DistributeDistribute
build instructions to each group. Journalists should gather the materials on the checklist.

Code Base 2.0 - Eye + Electromagnet -
FacilitateFacilitate
the building process.
- Builders and Journalists should begin building based on their roles and responsibilities, like those shown in the Lab 1 Image Slideshow.
- Circulate around the room to help students with building or reading instructions where needed. Ask questions about how the build is being constructed to keep all students engaged in the buildings process, and remind students to follow their Role Responsibilities if they need help taking turns.
- OfferOffer suggestions and note positive team building and problem solving strategies as groups build together.

Teacher Troubleshooting
- Check Your Ports - Remind students to check to make sure that they are connecting the Eye Sensor and the Electromagnet into the correct port. The Eye Sensor is plugged into the teal port on the front of the Brain, and the Electromagnet gets connected to Port 3.
- Help with the ‘drop’ - Sometimes the Electromagnet may not always fully drop the Disk right away. As long as the [Energize electromagnet] block is set to drop correctly in their projects, students can take the Disk off the Electromagnet if needed, when the Code Base returns to the base.
Facilitation Strategies
- Think about how your students will access VEXcode GO. Ensure that the computers or tablets that students will use have access to VEXcode GO. For more information about setting up VEXcode GO, see this VEX Library article.
- Gather the materials each group needs before class. For this Lab, each group of two students will need a GO Kit, Build instructions, a computer or tablet to access VEXcode GO, and the Red Disk from the Kit. Students will also need access to a Field for testing.
-
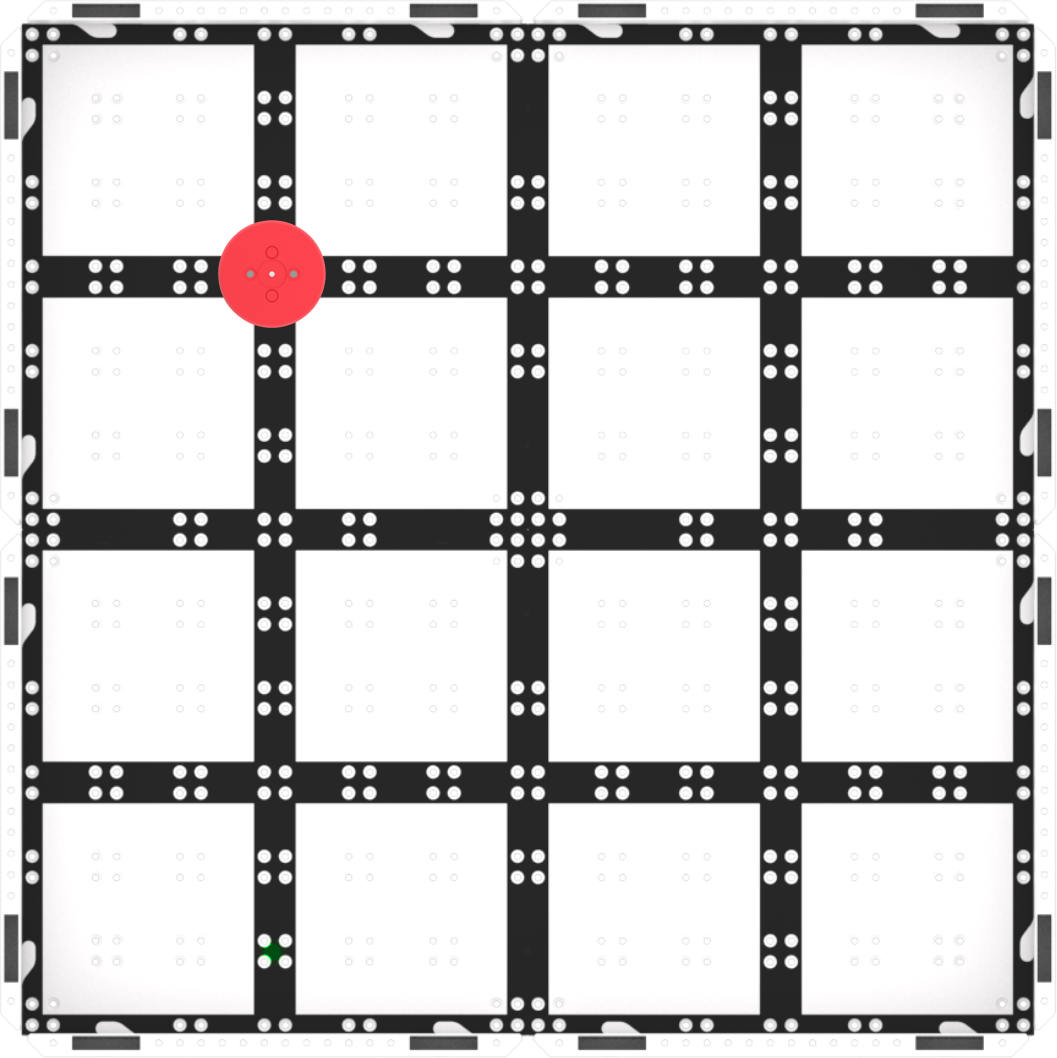
Set up your Fields ahead of time, as shown in the image below, to serve as a testing area for the Code Base. Have these spread out around the classroom to allow students ample space to test their projects. All Labs in this Unit will use the same Field setup, so you can leave them together from start to finish. In this image, the Red Disk is shown in place for Play Part 1. You may want to mark the starting locations of the Disk and the Code Base, as well as the Base location with a dry erase marker to help students when they are setting up to test their projects.

Field Setup - Focus on the concept, not the precision. The goal of this Lab is to focus on the concept of using the Electromagnet in a project. If students slightly misaligned their Code Base, or the Disk is not exactly in the right place when they drive toward it, remind them that it is ok to move the Disk slightly to make sure it gets picked up by the Electromagnet.
- Use the grid lines on the Field to help with alignment. The Disk and the Electromagnet can both be lined up on intersecting grid lines of the Field, to make it easier for students to be set up for success when they test their projects.