Programming a Sequence - VEXcode IQ
![]() Teacher Toolbox
-
The Purpose of this Activity
Teacher Toolbox
-
The Purpose of this Activity
Programming using the arm and claw allows the robot the ability to complete other tasks instead of just moving forward, backward, left or right. In this activity, students will learn the correct sequence of movements needed to approach, grab, lift, and move an object. The object can be an empty aluminum can or empty water bottle. This activity will prepare students for the Package Dash Challenge, where students will have to grab and move an object around an outlined course. The students will path plan using pseudocode.
For more information about the [Spin for] and [Spin to position] blocks or others used in this activity, visit the Help information within VEXcode IQ. For more information about this built in help tool, click here.
The following is an outline of what your students will do in this activity:
-
Watch the Moving the Arm and Open the Claw tutorial videos.
-
Outline the steps needed to approach, grab, lift, and move an object using pseudocode (Google Doc/.docx/.pdf).
-
Program their sequence that they prepared in pseudocode by using VEXcode IQ.
-
Download, run, and test the project to see if it performs as intended.
Let's program a sequence!
In this activity, you will outline a plan for the sequence of movements that your robot will need to make in order to grab, lift, and move an object.
You will first review two tutorial videos about programming the claw and arm. Then you will identify the correct sequence of steps to approach, grab, and lift an object, and plan that project using pseudocode.
You will then create, download, and run the project using the pseudocode that helped you plan!
-
Make sure you have the hardware required, your engineering notebook, and VEXcode IQ downloaded and ready.
![]() Teacher Tips
Teacher Tips
If this is the student’s first time using VEXcode IQ, they can reference the Tutorials at any time during this exploration. The Tutorials are located in the toolbar.
| Quantity | Materials Needed |
|---|---|
| 1 |
VEX IQ Super Kit |
| 1 |
VEXcode IQ |
| 1 |
Engineering Notebook |
| 1 |
Meter stick or ruler |
| 1 |
Clawbot (Drivetrain 2-motor) template example project |
| 1 |
Aluminum can or empty water bottle |
![]() Teacher Tips
Teacher Tips
Model each of the troubleshooting steps for the students.
Step 1: Preparing for the Exploration
Before you begin the activity, do you have each of these items ready? The Builder should check each of the following:
- Are all of the motors and sensors plugged into the correct ports?
- Are the smart cables fully inserted into all of the motors and sensors?
- Is the Brain turned on?
- Is the battery charged?
- Is the Radio inserted into the Robot Brain?
Step 2: Start Planning a Path
Before you begin planning the path that your robot will take, first review the Moving the Arm and Open the Claw tutorial videos in VEXcode IQ.
- Moving the Arm Tutorial Video
- Open the Claw Tutorial Video
Now, in your engineering notebook, use pseudocode (Google Doc / .docx / .pdf ) to write the correct sequence of steps to approach, grab, and lift an object like an empty water bottle or aluminum can.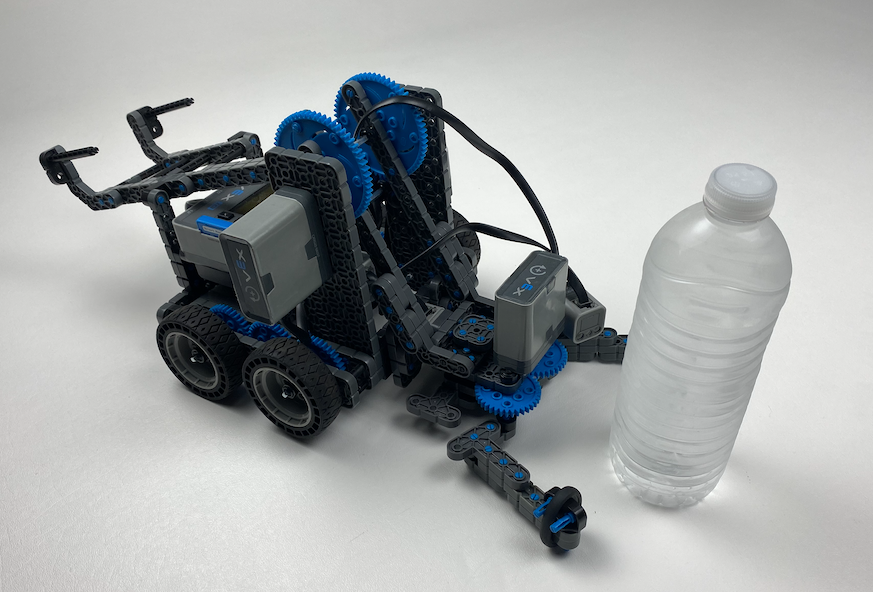
- Parts of this problem to keep in mind:
- First, you will need to measure in millimeters how far away the object is from the robot. You will need this to determine how far forward and in reverse the robot should move.
- Identify how many degrees the claw will have to open and close depending on its range of motion and how large the object is. For more help, refer to the previous page in the Play section.
- Hint: Open the Device Menu and see how many degrees the claw will close with the object inside.
- Identify how far up in degrees the arm will raise to carry the object.
- When you approach an object, the claw should already be opened. If you approach an object with the claw closed, the closed claw could knock the object over.
- The robot will also have to grasp the object in its claw, raise the object up, move in reverse to relocate the object, and then place the object back down and release it.
![]() Teacher Tips
-
Practicing Pseudocode
Teacher Tips
-
Practicing Pseudocode
In case students are unfamiliar with pseudocode (Google Doc/.docx/.pdf) and how it is used in project planning, the provided link explains. A rubric (Google Doc/.docx/.pdf) for reviewing pseudocode can be used and it will be provided again in the Rethink section when students are next asked to write pseudocode. This opportunity to write pseudocode may be thought of as practice for later planning and sharing the pseudocode rubric now can assist in that practice.
![]() Teacher Toolbox
-
Solution
Teacher Toolbox
-
Solution
The distance between the object and the robot can vary by student or group. Ensure that the students are measuring the distance before writing their pseudocode.
Note that the first time the claw is opened and then when it is closed to grab an object do not have the same degree measure. Since the claw is closing on an object and should not crush it, the degrees should stop once the claw is wrapped around the object.
The arm should raise far up enough the ground to transport the object effectively.
The correct series of steps that the students will need is the following. The distance measured in this example was 15mm. This could change per student or group:
-
Open the claw 75 degrees.
-
Drive forward 15 mm to approach the object.
-
Close the claw 60 degrees to grab the object.
-
Raise the arm 315 degrees to lift the object.
-
Drive in reverse 15 mm to move the object to a new location.
-
Lower the arm 315 degrees to place the object back down.
-
Open the claw 60 degrees to release the object.
![]() Teacher Tips
Teacher Tips
- Since this is a beginning activity with programming, the teacher should model the steps, and then ask the students to complete the same actions. The teacher should then monitor the students to ensure that they are following the steps correctly.
- Make sure that the students have selected the Clawbot (Drivetrain2-motor) template.
- You can point out to the students there are several selections to pick from on the Examples page within VEXcode IQ. As they build and use their robots, they will have a chance to use different templates.
- You can ask students to add their initials to the project name. This will help differentiate the projects if you ask the students to submit them.
- Ensure the students are measuring the distance between the object and their robot in millimeters (mm).
Step 3: Programming a Sequence
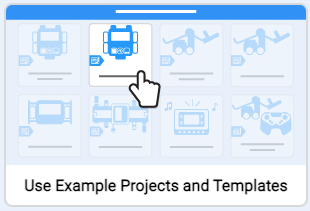
- Open the Clawbot (Drivetrain 2-motor) template example project.
- For help opening an example project, view the Use Example Projects and Templates tutorial video in VEXcode IQ Blocks.
- Rename and save the project as 'Sequence'.

- For help renaming and saving a project, view the Naming and Saving Your Project tutorial in VEXcode IQ.
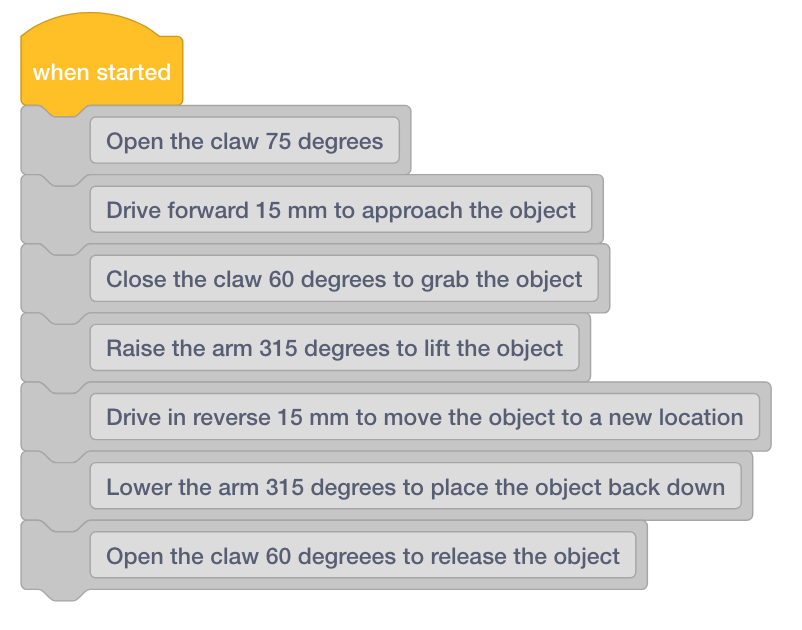
- Now, create your project using your pseudocode. First outline your project using comments to insert your pseudocode. The example shown below is a reference. Degree and distance measurements may be different depending on how far away your object is and its size.
- Use the [Drive], [Spin for], and [Spin to position] blocks to create the project based on the pseudocode.
Don't forget to reset the Arm Motor's position to 0 and to include a 3-second timeout for the Claw Motor.
Use the image below as an example of how to organize the project. The following project is not complete but you should completely program yours.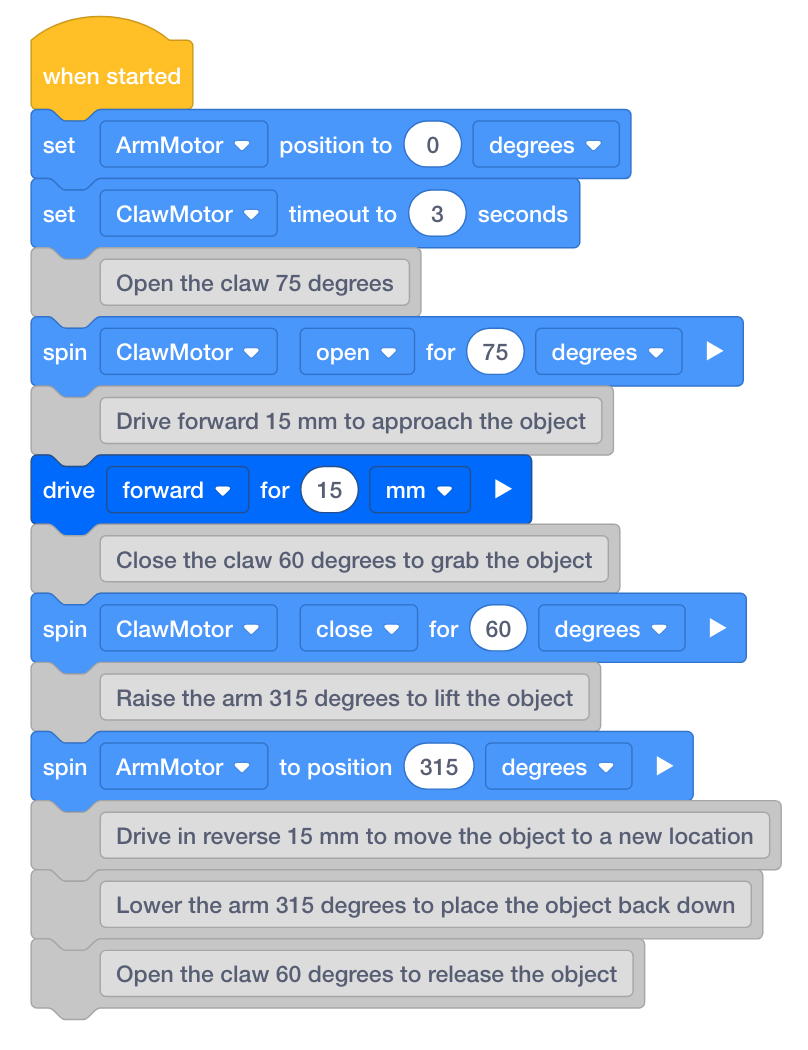
- After your project is complete, predict what it will do. Write your predictions in your engineering notebook.
Step 4: Test the Project!
Now that you have created a project to approach, grab, and lift and object - let's test it!
- Download and Run your Sequence project. For help, view the Download and Run a Project tutorial video in VEXcode IQ. It will have the following icon:
Did your project run as intended? Write your observations in your engineering notebook comparing your pseudocode to your final project and answer the following questions:
- Did your project have your robot to grab, lift, and move an object?
- Why is this sequence of movements important?
![]() Teacher Toolbox
-
Solution
Teacher Toolbox
-
Solution
Students' projects will vary depending on the object and how far away it is from the robot. The students should be able to reflect on their pseudocode and the project that was programmed based on the pseudocode. Was an error due to the pseudocode or to the programming? The students should look through the pseudocode to see which step within the project may have been incorrect.
This activity should highlight for students that the sequence of movements is important. If the movements were rearranged in another order, the robot might not pick up and move the object. For example, if the claw was not opened first, the robot may knock the object over when it approaches it.
The following is an example solution: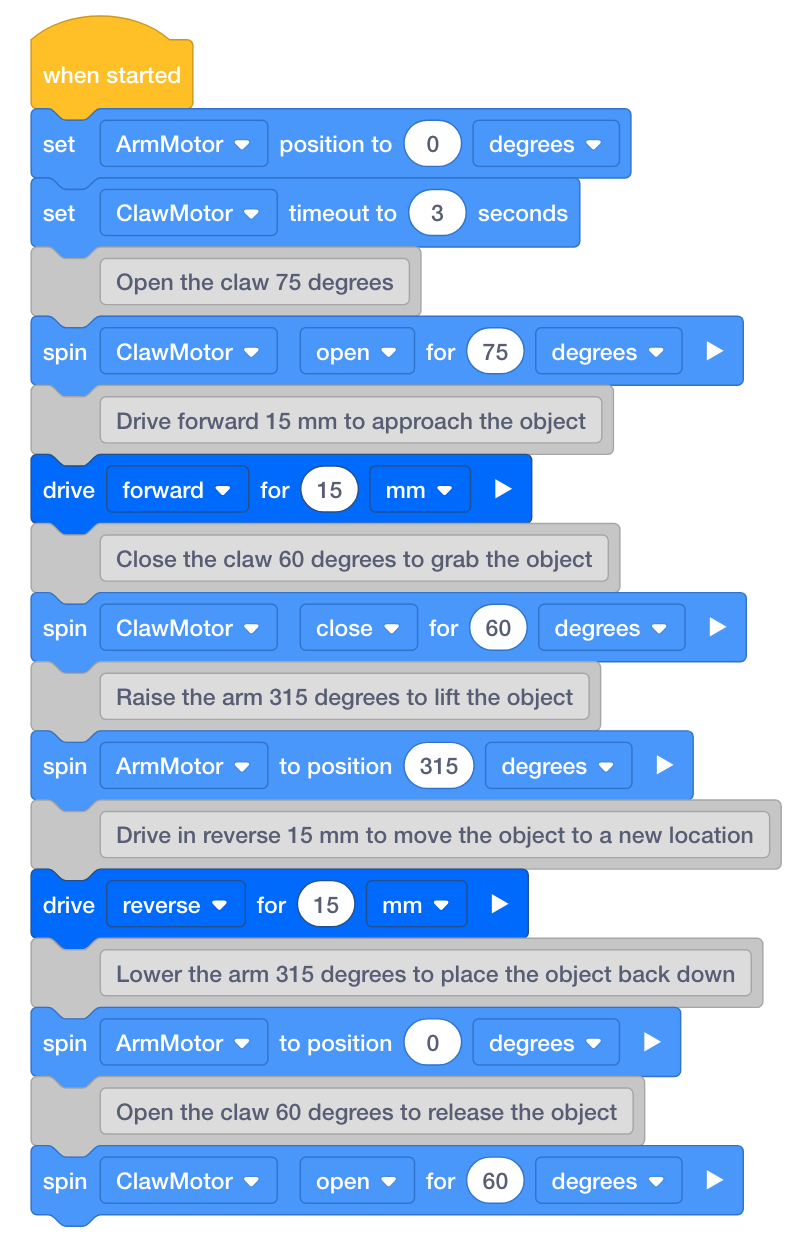
![]() Extend Your Learning
-
[Set motor stopping] Block
Extend Your Learning
-
[Set motor stopping] Block
If students program their robot to lift and carry heavier objects, these objects could drag the arm down because of their weight.
In this case, the [Set motor stopping] block can be used so that the arm does not fall due to gravity and the weight of the object lifted. This block can be used at the beginning of the project and will be applied to all future motor blocks for the rest of the project.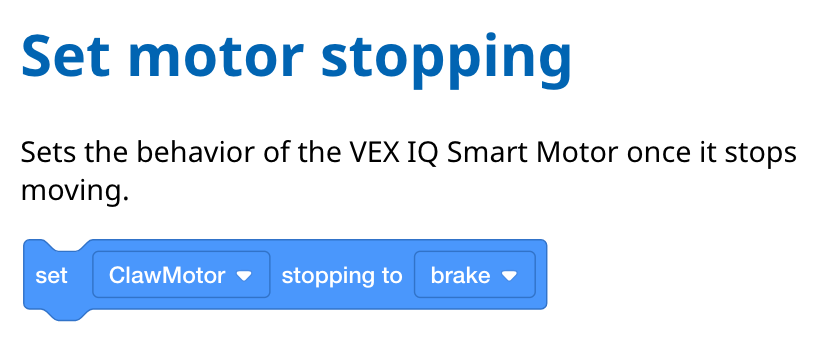
The [Set motor stopping] block has three settings:
- Brake causes the Motor to come to an immediate stop.
- Coast lets the Motor spin gradually to a stop.
- Hold causes the Motor to come to an immediate stop and returns it to its stopped position if moved.