Design, Develop, and Iterate on your Project
![]() Teacher Tips
Teacher Tips
-
Ask students to use a ruler or meter stick to measure their proposed path. Then, have students evaluate their pseudocode before moving on to develop their projects.
-
Instruct students to use their pseudocode as comments in their project to help with organization, flow, and troubleshooting.
-
For more information on the [Comment] block, visit the Help feature in VEXcode IQ. For more information about using the Help tool in VEXcode IQ, click here.
-
Instruct your students to evaluate their pseudocode before programming in VEXcode IQ. You can download a pseudocode rubric by clicking any of the following links (Google Doc/.docx/.pdf)
-
Require students to document the entire planning, implementing, testing, iterating, and final solution in their engineering notebooks which can be used to assess students' progress. If students are working in their notebooks individually, evaluate them with the Engineering Notebook Individual Rubric (Google Doc/.docx/.pdf). Or, use the Engineering Notebook Team Reflection Rubric (Google Doc/.docx/.pdf) to evaluate group/team engineering notebooks. Be sure to share the rubrics with students before they begin working.
Follow the steps below as you create your project:
-
Plan out the path you want to program your robot to take using drawings and pseudocode (Google Doc / .docx / .pdf).
-
Use the pseudocode you created in the Play section to develop your project using blocks.
-
Test your project often and iterate on it using what you learned from your testing.
![]() Teacher Toolbox
-
Example Pseudocode Solution
Teacher Toolbox
-
Example Pseudocode Solution
Here is an example of what students' pseudocode might look like for collecting a package (Google Doc/.docx/.pdf). The pseudocode can be expanded using the same format for picking up multiple packages.
If you want to score their pseudocode, here is a rubric for doing so (Google Doc/.docx/.pdf). If you plan to use this or any rubric, it is recommended that you show the rubric to students or give them a copy of it before starting to work.
Notice that the example names the configuration in a general way, lists the parts of the solution and later parts of the program in simple language, and indicates the sequence of those parts with an arrow. Those are all features itemized within the rubric. Additionally but unnecessarily, this example has the three package locations numbered in their planned order of pickup and the number appears on the side of the aluminum can where the Clawbot will approach.
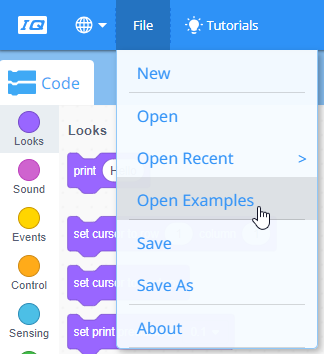
If you're having trouble getting started, review the Example Projects below within VEXcode IQ:
- Forward (Inches or mm)
- Backward (Inches or mm)
- Left Turn (Degrees)
- Right Turn (Degrees)
- Claw and Arm
- Use the Claw
- Use the Arm
