Turning Right and Left Exploration - Part 2
Step 1: Turn Right

- Add the [Turn for] block to the {When started} block in the programming area.

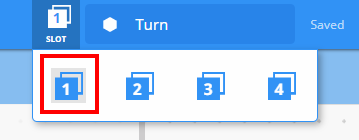
- Click on the Slot icon. You can download your project to one of the four available slots in the Robot Brain. Click on the number 1.

- The Programmer should connect the robot to your computer or tablet. The Brain icon in the toolbar turns green once a successful connection has been made.

- Click the Download button on the toolbar to download the Turn project to the Robot Brain.
![]() Teacher Toolbox
-
Help with Blocks
Teacher Toolbox
-
Help with Blocks
-
Point out that in the programming area, there is already a when started block located there by default. Every project will begin with this block. When the project is started the connected blocks will be followed in the sequence in which they are placed.
Demonstrate clicking on the turn for block and dragging it to the programming area, connecting it to the when started block. You will hear a click when as it attaches.
-
If you are using a computer, the student should have VEX IQ Robot Brain connected to the computer using a USB cable. If you are using a tablet, the VEX IQ Robot Brain should be connected to the tablet using the Smart Radio.
-
If the students are using a computer, ask them now to disconnect the USB cable from the Robot Brain.
![]() Teacher Toolbox
-
Stop and Discuss
Teacher Toolbox
-
Stop and Discuss
This is a good point to pause and have the student reflect on running their first project. As students:
-
What did Autopilot do when you ran the program?
-
Did it behave as you would expect it to, based on the program?
Take a moment to make sure all students have completed this step without any issues before moving on.

- The Operator should check to make sure your project has downloaded to the Autopilot’s Brain by looking at the Robot Brain’s screen. The project name should be listed in slot 1.
![]() Teacher Toolbox
-
Model First
Teacher Toolbox
-
Model First
Model running the project in front of the class before having all the students try at once. Gather the students in one area and leave enough room for the Autopilot to move if it is placed on the floor. Since Autopilot will continue running the project until the X on the Robot Brain is pressed, the teacher may want to choose someone to serve in the Operator role, to assist in stopping the Autopilot project when it finishes.
Tell the students it is now their turn to run their project. Make sure that they have a clear path and that no Autopilots will run into each other.
- The Operator should now run the project on the Autopilot robot by making sure the project is highlighted and then press the Check button.
- Congratulations on creating your first project!
Step 2: Turn Left

- Go back to the VEXcode IQ programming area. The Programmer should change the [Turn for] to display left instead of right.
- The Programmer should download the project.
- The Operator should now run the project on the Autopilot robot by making sure the project is highlighted and then press the Check button.
![]() Teacher Toolbox
-
Completing Step 2
Teacher Toolbox
-
Completing Step 2
-
To change the [Turn for] block from right to left, simply click on the drop-down menu and select left.
-
If the students are using a computer, remind them to disconnect the USB cable from Robot Brain before running the program.
Because we are not selecting a new slot, the new program will download to slot 1 and replace the previous program.
-
Since VEXcode IQ has autosave, there is no need to save the project again.
![]() Motivate Discussion
-
Understanding the Blocks
Motivate Discussion
-
Understanding the Blocks
Q: Turning right and left are important basic behaviors to master, but they will only move the robot so far. What are other blocks in VEXcode IQ which could be combined with the turn for block?
A: Students could answer with many ideas, including the drive block to move the robot forward and reverse in addition to being able to turn.
Q: If you wanted Autopilot to turn around and go the opposite direction as it started, how many degrees would you program the turn for block to go?
A: Students should respond with 180 degrees, as this would turn the robot in the opposite direction as it started.