
Engage
Launch the Engage Section
ACTS is what the teacher will do and ASKS is how the teacher will facilitate.
| ACTS | ASKS |
|---|---|
|
|
Engage
-
InstructInstruct
students that the series of Coder cards that they place in the Coder is called a project, and that the order of the cards is very important. The order of the Coder cards is called a sequence. Sequence is the order in which the cards are executed by the 123 Robot, one after another, starting from the topmost card and moving down.
- Show students the class map (see Map Set-Up slide in the Lab 3 Image Slideshow.) Point out the Map Symbols. These are the starting and stopping points for the 123 Robot (see Map Symbols printable in the Materials Needed section.)
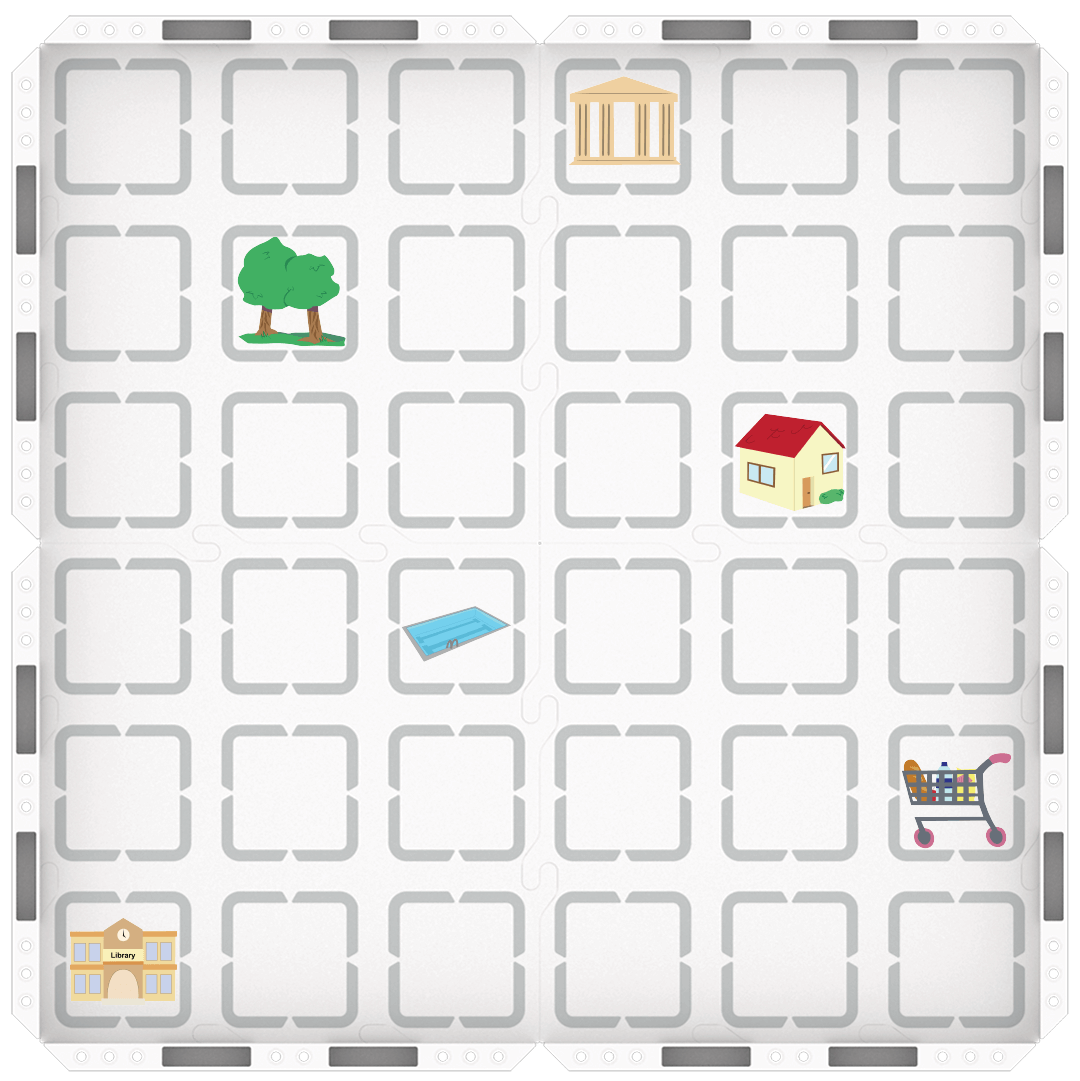
Map Setup on 123 Field - Show students the Map Challenge Prompts and explain that the image on the left is the starting point, and the image on the right is the endpoint. They want the 123 Robot to move from the object pictured on the left (start) to the one on the right (end.)
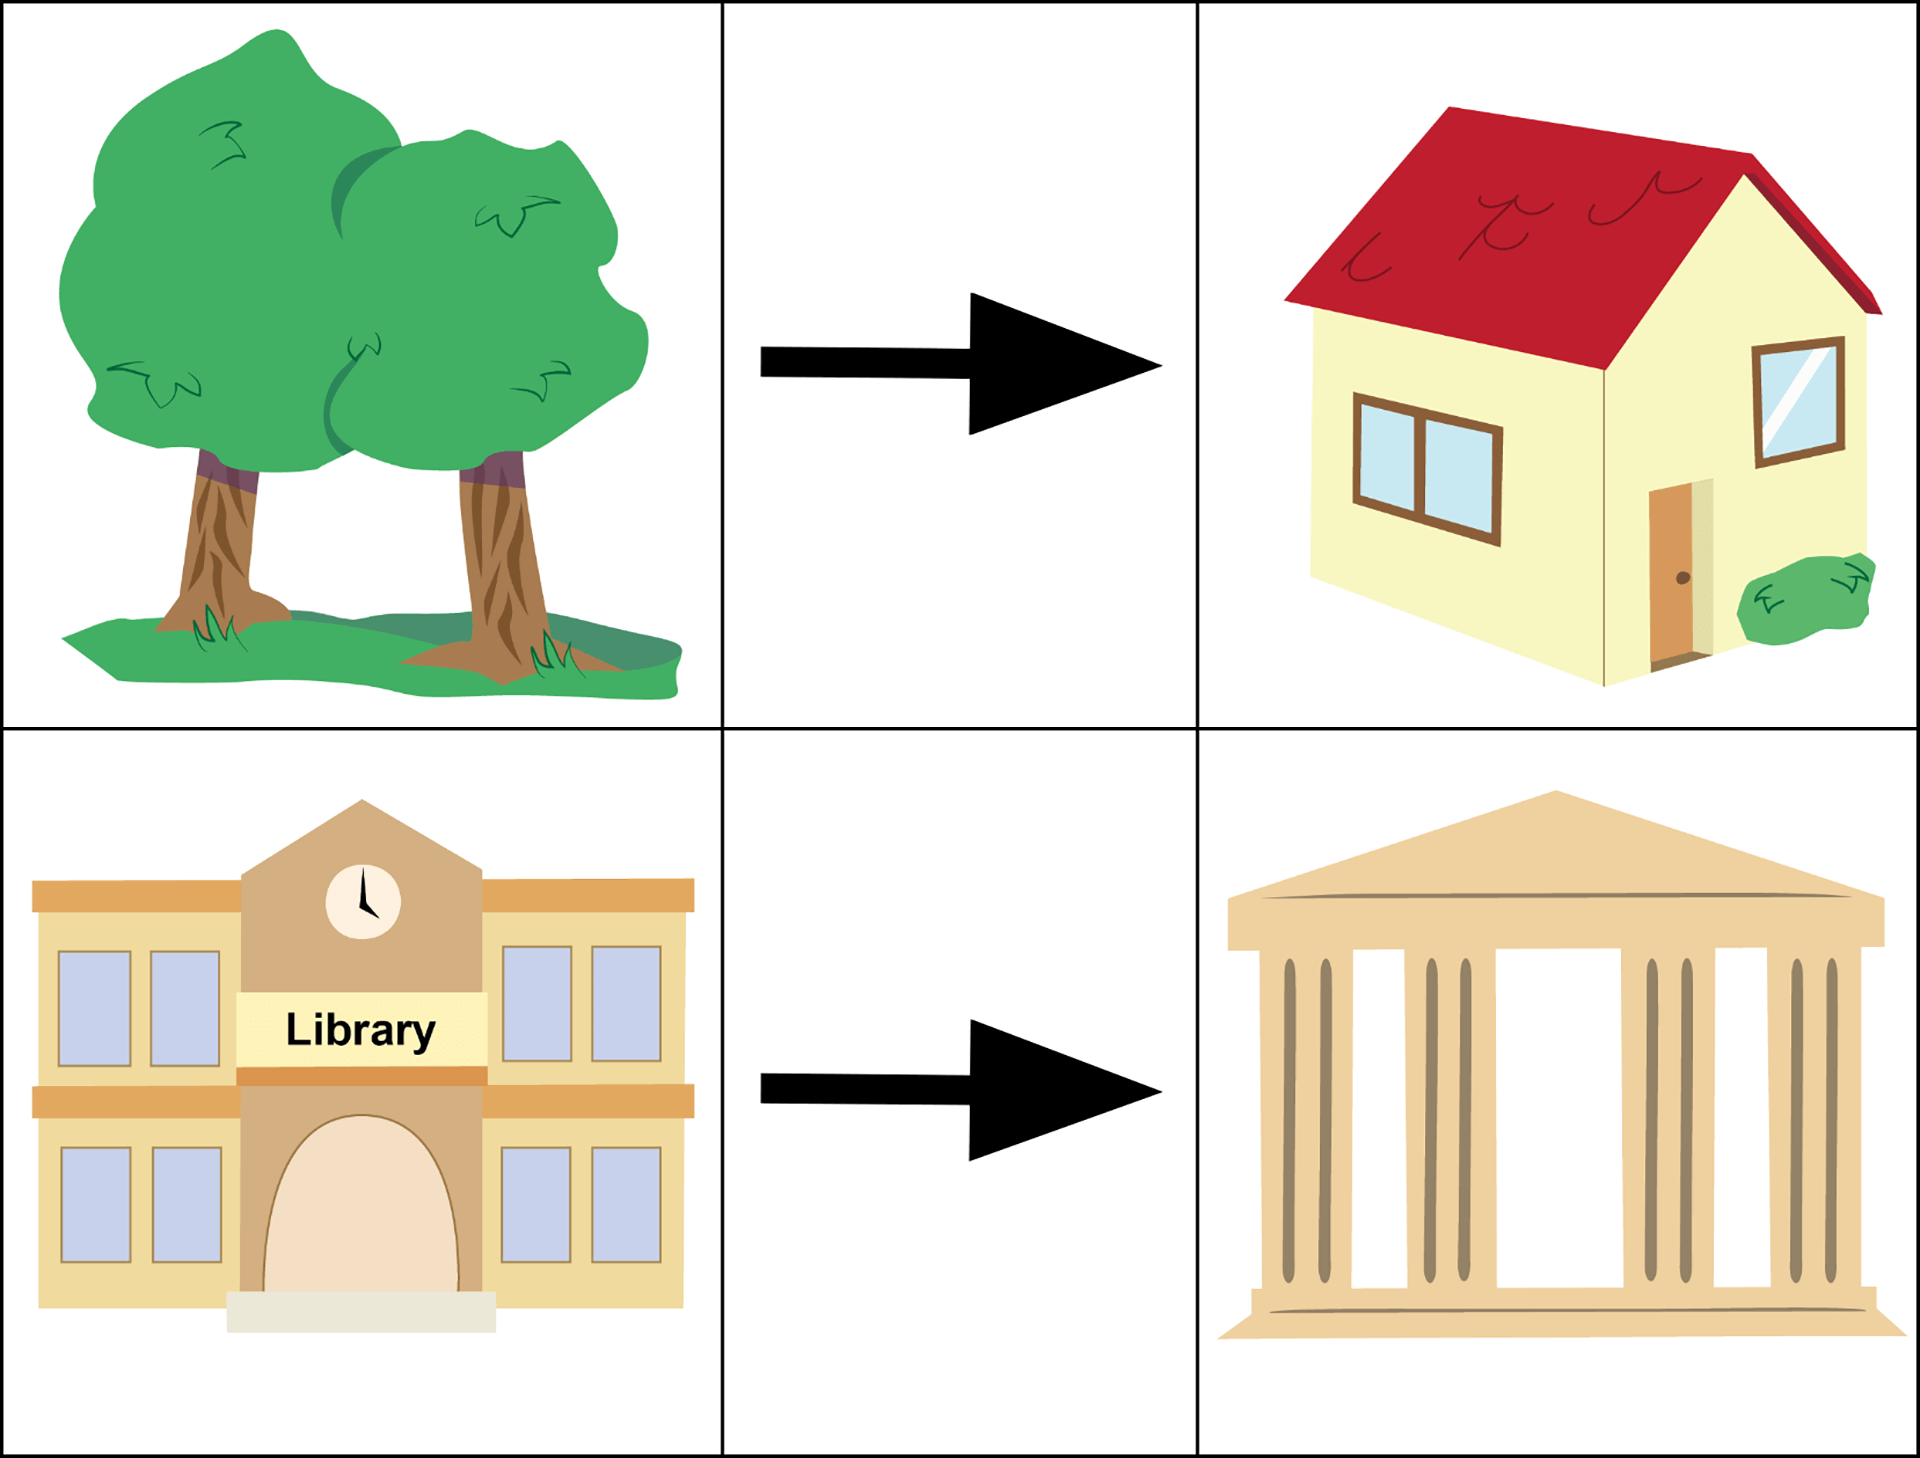
Map Challenge Prompts - Demonstrate how to use Coder and Coder cards to create a project based on the map prompts, highlighting the sequence of the cards,.
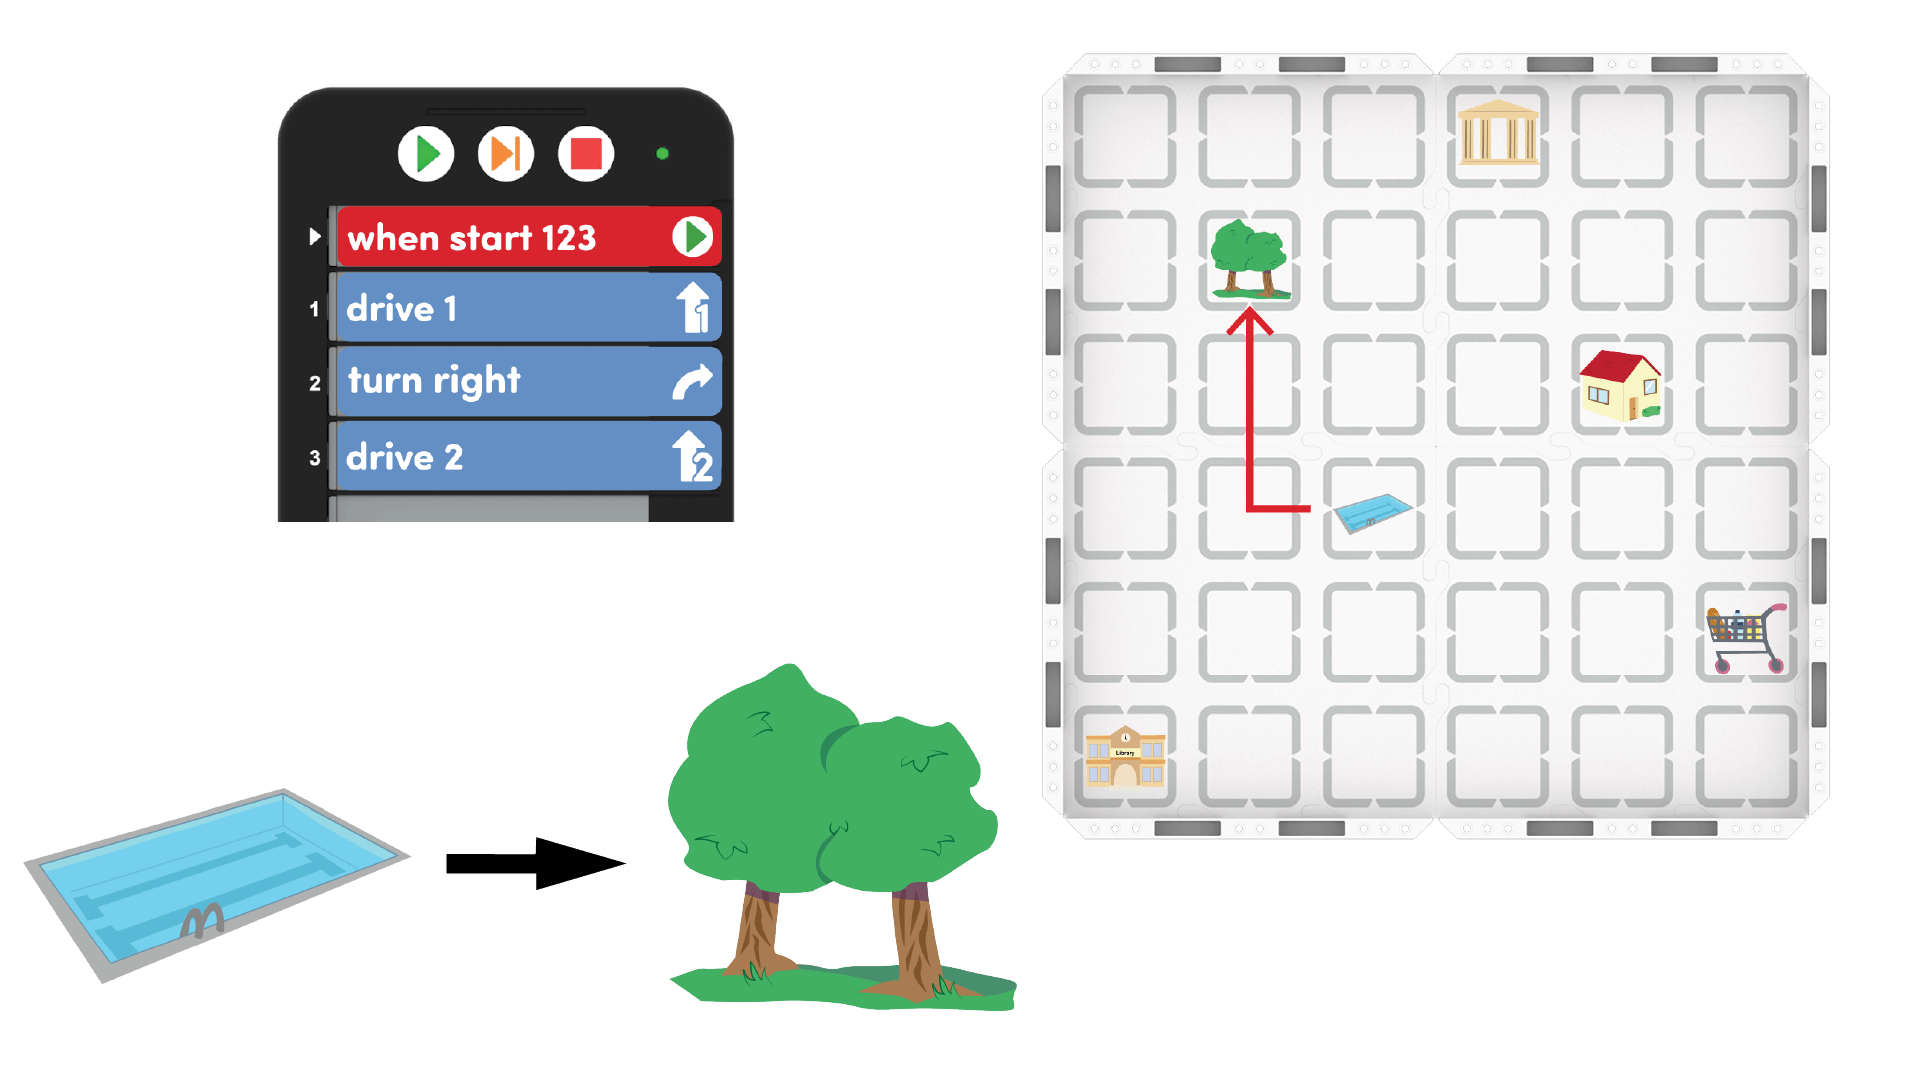
- Point out the starting point and the desired stopping point on the map (i.e. from pool to the park).
- Use a dry-erase marker to show the path that you want the 123 Robot to follow.
- Ask students what the robot needs to do first (drive forward on square on the Field), then find the Coder card that matches that action ("Drive 1".)
- Continue to go through each step to create a project on the Coder to drive the 123 Robot to the final location. Insert the Coder cards to match these steps: "Drive 1", "Turn right", "Drive 2".
Creating a New Map Challenge Project - Show students how to test their projects. First they will have to wake the 123 Robot by pushing the wheels along a surface until you hear the startup sound, as shown in the animation below. Turn on sound for this animation. For more information about the 123 Robot, see the Using the VEX 123 Robot VEX Library article.
Video file- Then, connect the 123 Robot to the Coder by pressing and holding the Start and Stop buttons on the Coder, and the Left and Right buttons on the 123 Robot for at least 5 seconds, until you hear the connected sound, and the indicator lights flash in time, as shown in the animation below. Turn on sound for this animation. For more information about the Coder, see the Using the VEX 123 Coder VEX Library article.
Video file- Once connected, place the 123 Robot on the map and start the project to watch the 123 Robot drive from the pool to the park.
- Once you have tested the project, ask the students if the project would still work if you changed the order or sequence of the steps? If time allows, change the order of some of the Coder Cards and test the project. Ask students about why the sequence is important.
- DistributeDistribute some of the Map Challenge Prompts for students to see before the demonstration.
-
FacilitateFacilitate
discussion throughout the demonstration by asking some of the following questions:
- What direction does our 123 Robot have to move first?
- How far does your 123 Robot have to move? (How many squares on the Field?)
- Does our 123 Robot need to make any turns? If so, what direction?
- What would happen if we changed the sequence of the Coder cards in our project?
- OfferOffer positive reinforcement for students incorporating coding vocabulary into their explanations.

Teacher Troubleshooting
- If students seem to move quickly through the process of creating their own sequence in the Play sections, give them another set of Map Challenge Prompts to work with.
- Encourage students to iterate on their projects by asking them if they can create a project that drives the robot on a different path to the same destination. Or, challenge them to drive the robot to the destination with fewer Coder cards. Now, can you make a solution that has 5 Coder cards?
- For an added challenge, ask them to add a 3rd point in their challenge. Now can you make a project where the 123 Robot travels to 2 different locations?
Facilitation Strategies
- If students are having trouble orienting their left from their right, you may want to have everyone draw arrows at the top of their maps when you begin, and label them LEFT and RIGHT, or just L and R for younger children. This may help them be more efficient and independent in their work.
- For younger students, you may want to chose the second Map Challenge Prompt for the Play Part 2 activity.
- Use printables as manipulative to support project planning - See the printable resources available in the VEX Library, and use them with students as they are planning and building their Coder projects. You could use the motion planning sheets for students to draw the path they want their 123 Robot to travel, as well as the fill-in project and motion planning sheets for students to document their Coder cards and the path of the 123 Robot. You can also use the fill-in Coder sheet for students to write or draw their Coder cards to "save" their projects.
- Use Coder card posters to reinforce learning with the Coder - Highlight specific Coder cards, or refer to cards as you are teaching with the Coder card posters. Students can use these posters to review terminology as they are working with VEX 123. See the Using Coder Cards Posters in the Classroom VEX Library article to access these printable posters and to see more strategies for using them in your learning environment.