
Play
Part 1 - Step by Step
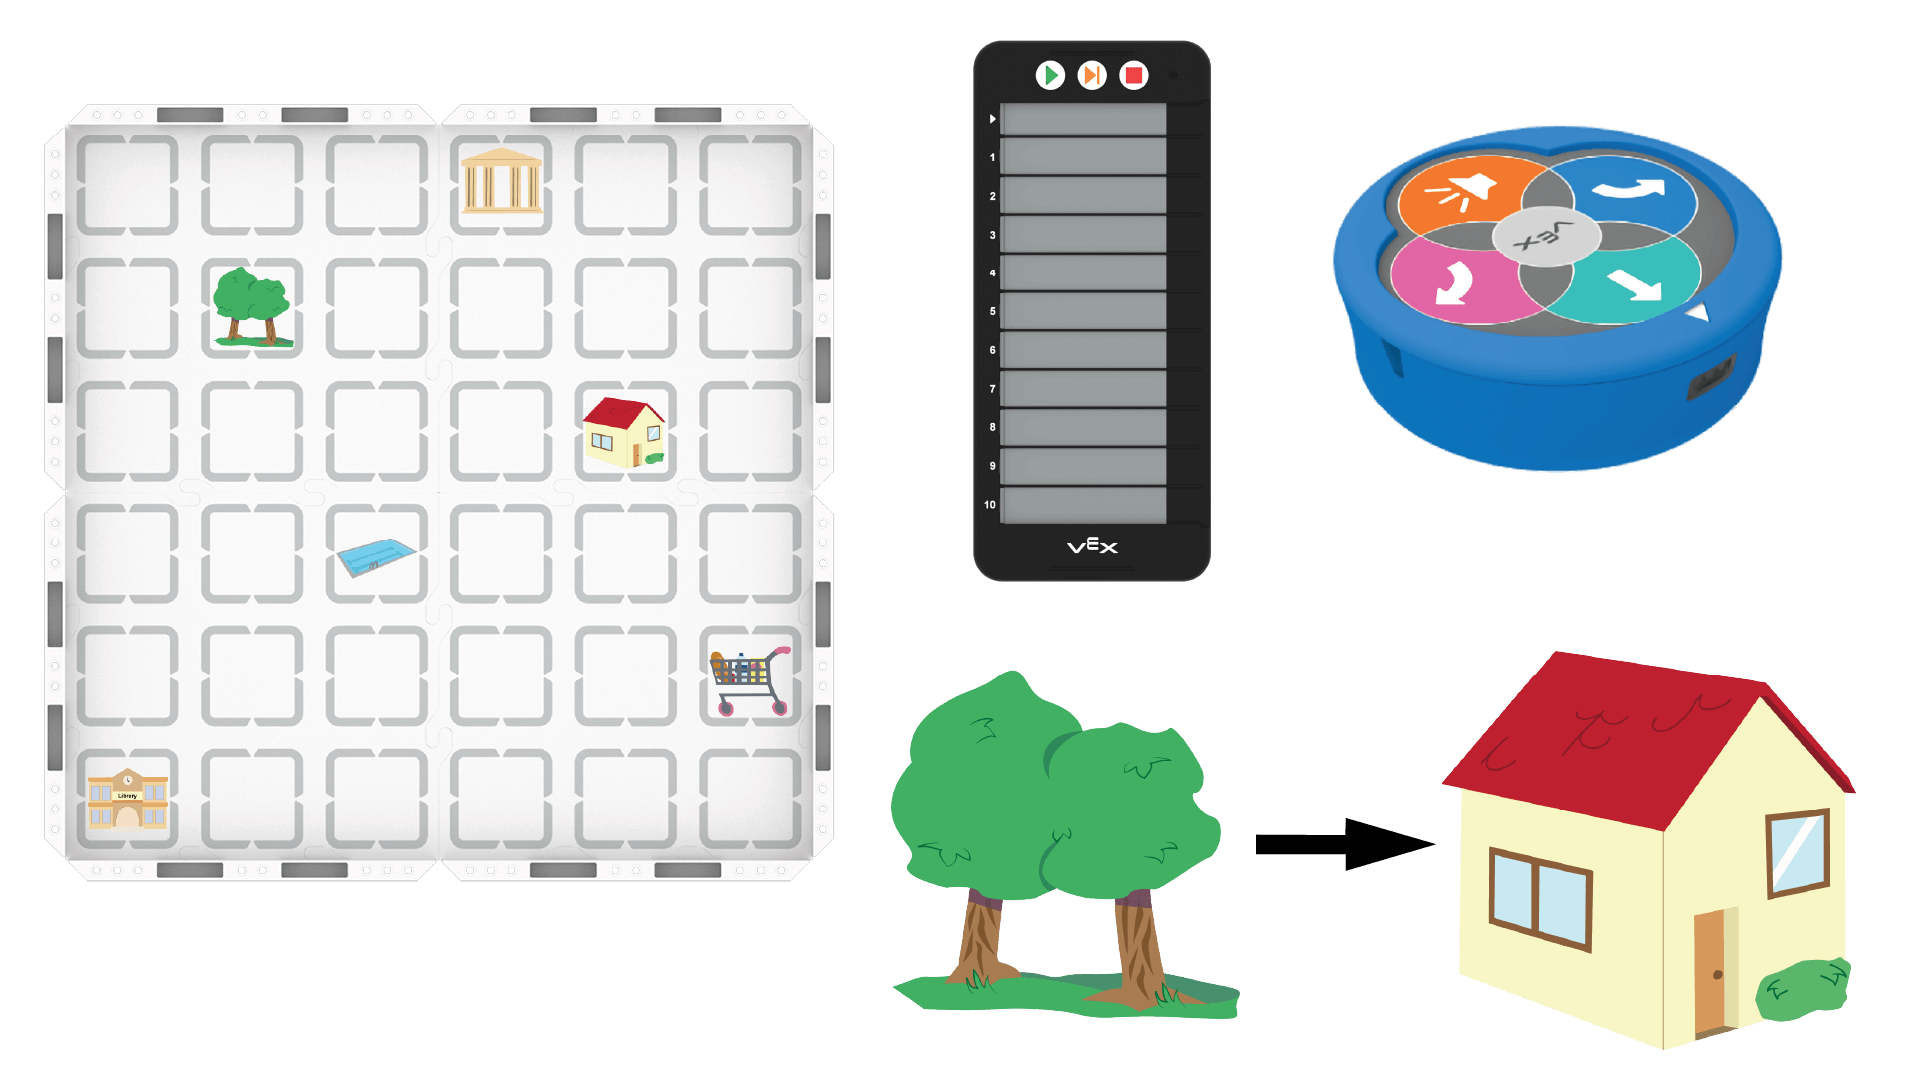
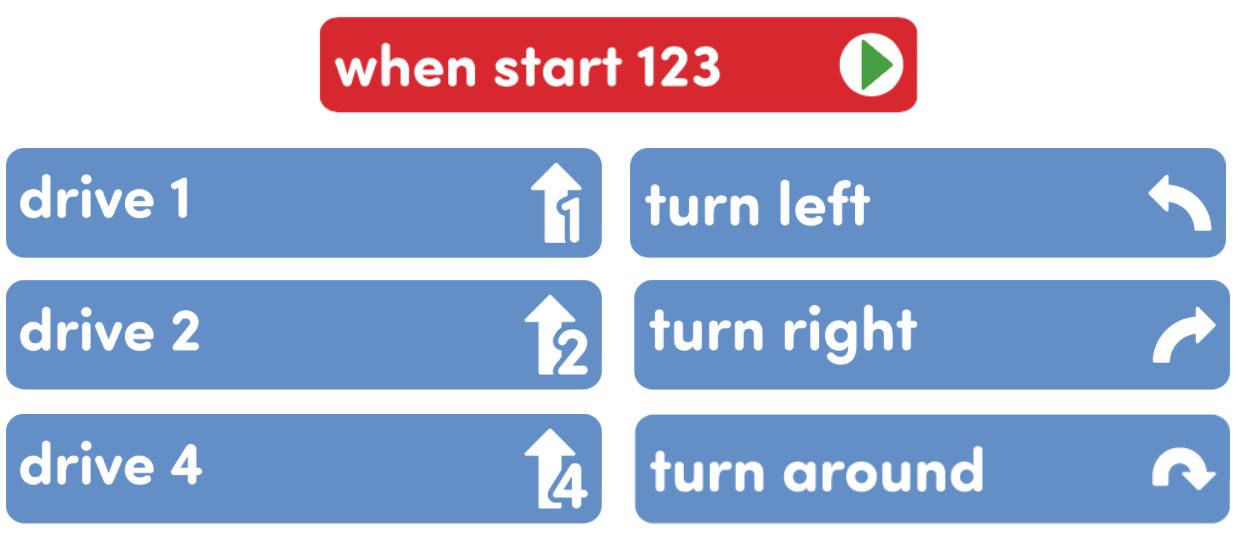
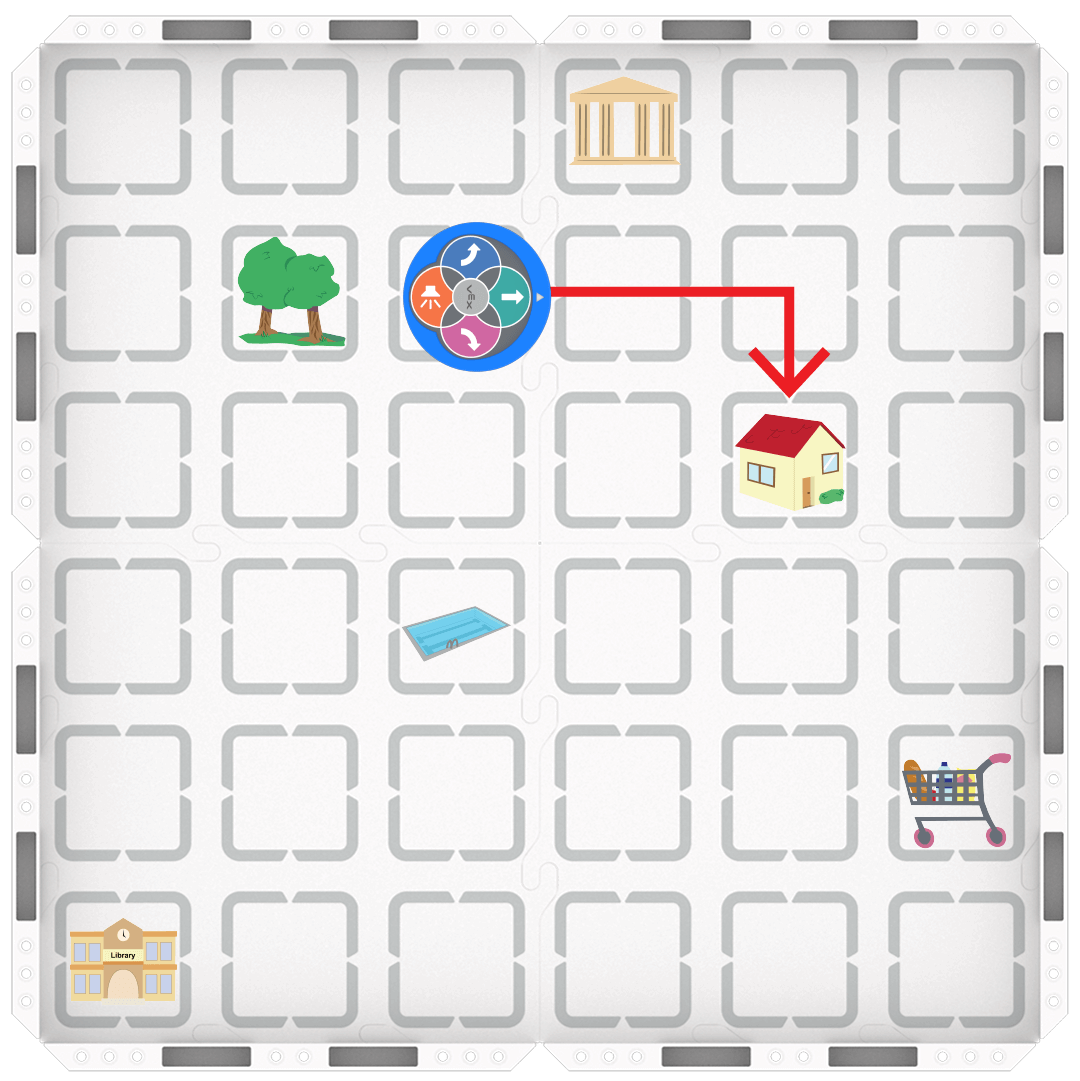
- InstructInstruct students that they will be coding the 123 Robot to move from the park to the house on the class map. They will use the Coder cards and Coder to create their project. The class will work with the same challenge, but each group will create a their own project. Groups will test their projects on the class map, troubleshoot and revise their projects as necessary. Make sure that students can explain the goal of the activity before breaking out into groups. View the animation below for an example of how the 123 Robot could navigate from the Park to the House, with three Drive 1 cards, a Turn Right card, and then a Drive 1 card.
In this animation, the Coder on the left has a project that reads When start 123, Drive 1, Drive 1, Drive 1, Turn right, Drive 1. When the project is started, the robot drives forward for 3 steps, turns right, and drives forward one additional step to reach the House. The 123 Robot begins on the Park, facing to the right.
Video file- Each group will need a 123 Robot, a Coder, access to a 123 Field map, Map Challenge Prompt- park to house and a set of Coder Cards as listed in the Environment Setup.
Lab 3 Materials Needed - ModelModel how to work with the map set-up to create a project that drives the 123 Robot from the park to the house on the class map. Students will first need to plan their projects. Then, they will test the project to see if it drives from the starting point to the endpoint on the prompt.
- Each group should have the following Coder cards as described in the Environment Setup section:
- One "When start 123"
- Four "Drive 1"
- One "Drive 2"
- One "Drive 4"
- Four "Turn left"
- Four "Turn right"
- One "Turn around"
Coder Cards Needed - First, have students mark the start (the park) and final destination (the house) on the map.
- Show students how to plan their projects by decomposing the path into smaller action steps to plan the route for the 123 Robot. First the robot needs to move forward 3 spaces on the map. Then it needs to turn right. Finally, it needs to drive forward on more space.
- Then, show them how to identify the Coder cards for each of these steps, lay out the cards needed in order on the table.
- Once the groups are satisfied with their project, they can wake the 123 Robot and connect the Coder. Model how to connect the 123 Robot to the Coder.
- First, wake the 123 Robot by pushing the wheels along a surface until you hear the startup sound.
- Then, turn on the Coder by pressing the Start button.
- Once the Coder and the 123 Robot are turned on, connect the 123 Robot to the Coder. Do this by pressing and holding the Start and Stop buttons on the Coder, and the Left and Right buttons on the 123 Robot for at least 5 seconds, until you hear the connected sound, and the indicator lights flash in time, as shown in the animation below. Turn on sound for this animation.
- For more information about the Coder, see the Using the VEX 123 Coder VEX Library article.
Video file- Model for students how to insert the Coder cards into the Coder. Highlight the importance of the sequence of the Coder cards in their project.
- Once connected, have students place the 123 Robot on the map and start their project by pressing the Start button on the Coder to watch the 123 Robot drive to the destination on the map.
- If students finish early, give them another set of Map Challenge Prompts to work with in order to practice sequencing and testing projects on their map.
- Each group should have the following Coder cards as described in the Environment Setup section:
- FacilitateFacilitate a discussion with the students that encourages them to share their thinking by asking questions such as:
- What does your 123 Robot have to do first? What is the next step?
- How far does your 123 Robot have to move?
- Does your 123 Robot need to make any turns? If so, what direction?
- Is your 123 Robot moving in a way that you didn’t expect? How can you change your project to fix this?
How Far Does your 123 Robot Need to Move? - RemindRemind students that it will likely take several tries to get their project to drive the 123 Robot to the house successfully. Trial and error is a part of coding!
- If your first try didn't work as planned, that is okay! Making mistakes is a part of coding. The key is to figure out what the mistake was and try something different with the next try.
- AskAsk students, are there any other times when the sequence of steps is important? What about when they brush their teeth, or sharpen their pencils? Can they describe these steps in order?
Mid-Play Break & Group Discussion
As soon as every group has completed at least 1 challenge, come together for a brief conversation.
Have students share their projects with the class by having the 123 Robot execute the project on a map, and by showing their projects on their Coders.
- Can you describe your 123 Robot’s path?
- How were some of the projects different? How were they alike?
- How did you know when the 123 Robot had to move forward or turn?
- What would happen if you changed the sequence of the Coder cards in your project? Would your 123 Robot end up in the same place?
Part 2 - Step by Step
- InstructInstruct students that they will be following the same steps to code their 123 Robots, but this time they will be using different Map Challenge Prompts. They will work with their group to plan and code the 123 Robot to move from the start to finish according to their prompt. View the animation below for an example of how the 123 Robot could navigate from the Park to the House, with three Drive 1 cards, a Turn Right card, and then a Drive 1 card.
In this animation, the Coder on the left has a project that reads When start 123, Drive 1, Drive 1, Drive 1, Turn right, Drive 1. When the project is started, the robot drives forward for 3 steps, turns right, and drives forward one additional step to reach the House. The 123 Robot begins on the Park, facing to the right.
Video file- Students will need a set of Map Challenge prompts in addition to the materials from Play Part 1. For younger students, you may want to just give them one additional prompt instead of the set.
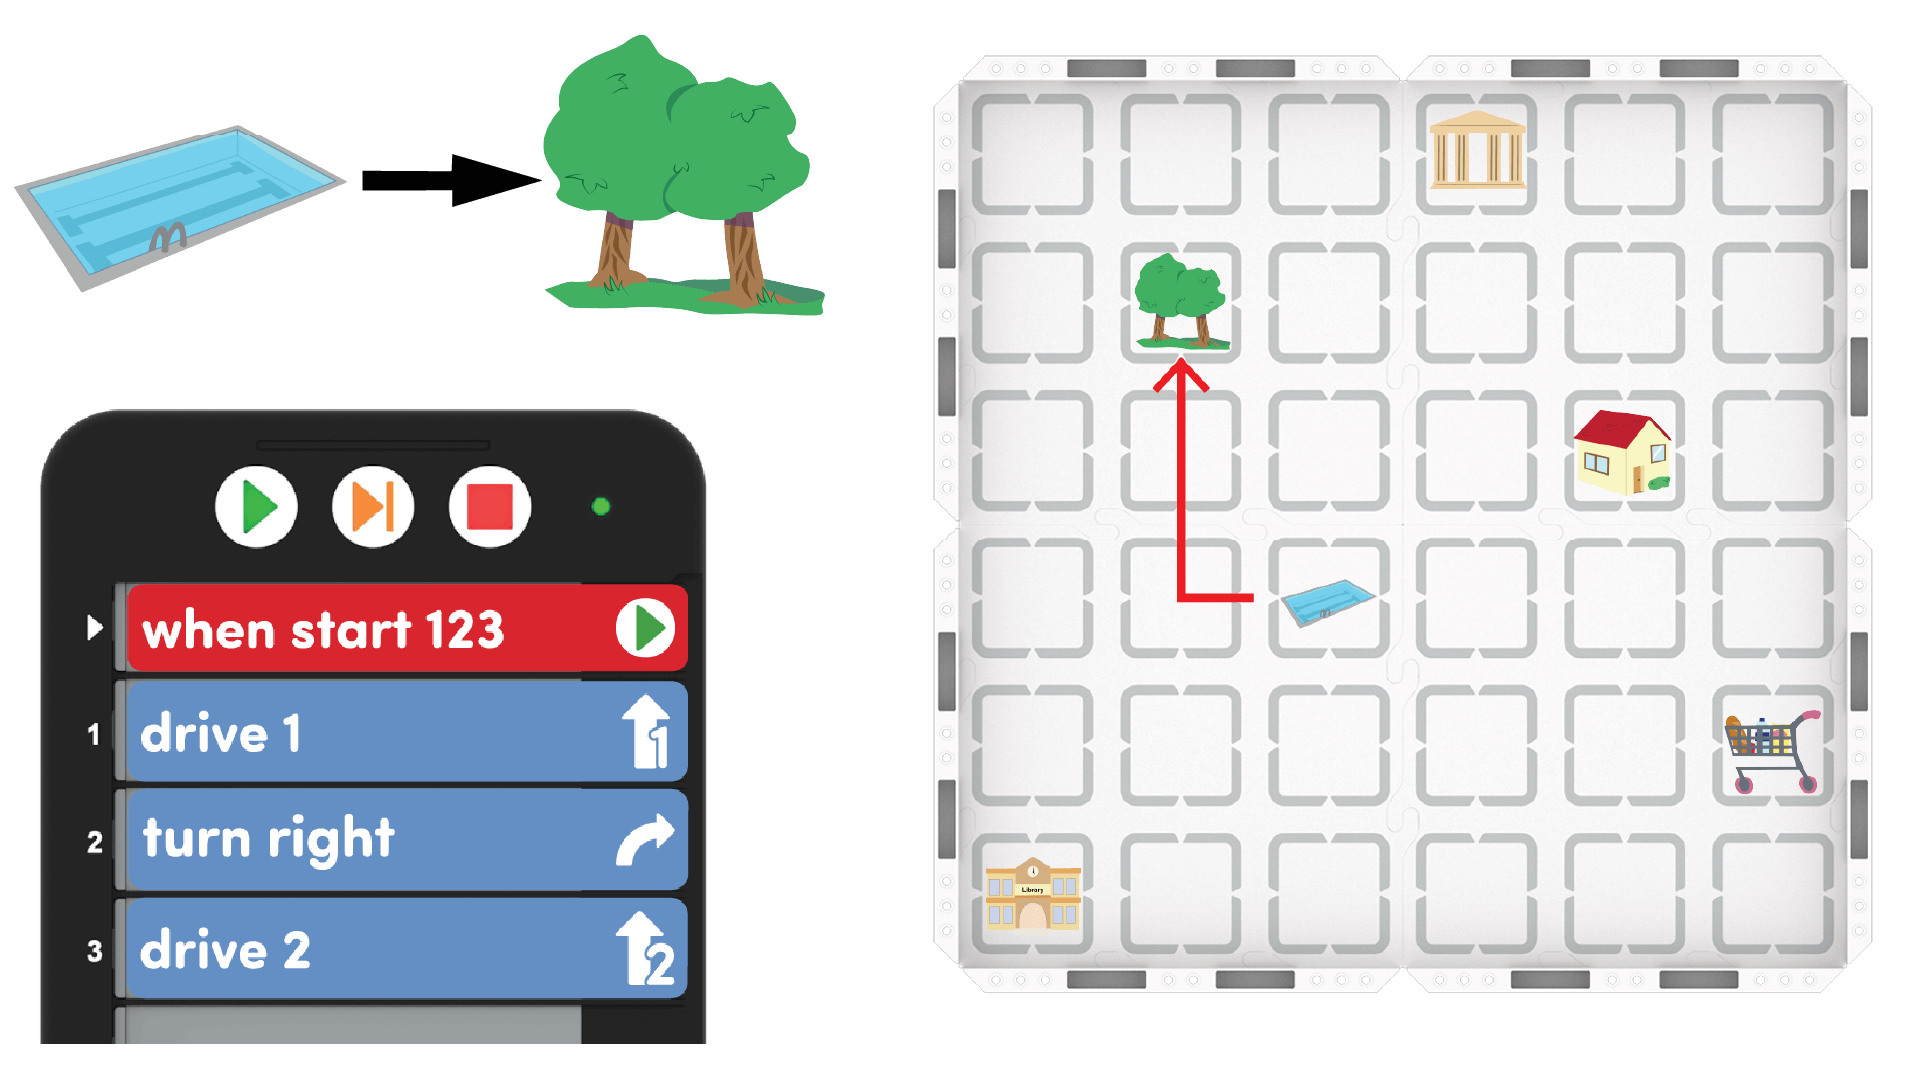
Creating a New Map Challenge Project - ModelModel for students how to read the prompt, then start planning their project. Once they are satisfied with their plan, they will test their project on the map. If you are not able to print promps for the groups, have students design their own on index cards based on the class map.

Make Your Own Prompts - Review how to decompose the steps for driving the 123 Robot from the starting point to the endpoint.
- For example, ask the students what steps would be needed to get from the park to the library (Drive forward one space, turn left, drive forward four spaces)
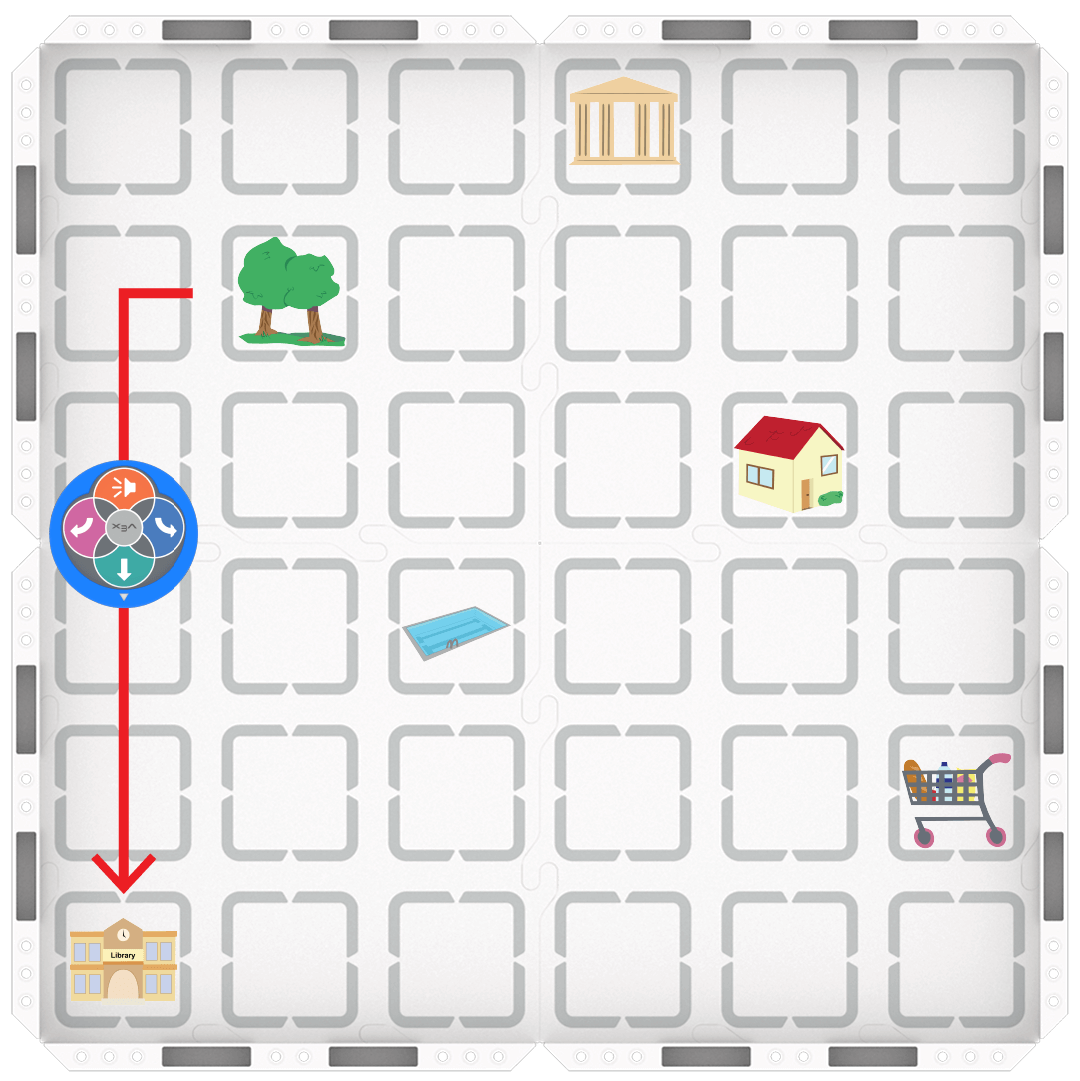
Park to Library - Have them convert these steps to Coder cards and place them in the Coder.
- When they think they have it, have them hold up the Coder with the cards to show you and the class.
- Help students make corrections if necessary - use this as a chance to demonstrate how to move the Coder cards around to change the sequence and revise the project.
- Then, have students test their projects.
- Once they have tested their projects and they are able to successfully code the 123 Robot to drive to the destination on the prompt, invite students to create and test a project with different Map Challenge Prompt.
- If students finish early:
- Ask students to change their project using fewer Coder cards, "Now, can you make a solution that has 5 cards?"
- For an added challenge, ask them to add a 3rd point in their challenge. "Now can you make a project to have the 123 Robot drive to 2 different places?"
- Review how to decompose the steps for driving the 123 Robot from the starting point to the endpoint.
- FacilitateFacilitate discussions around how to decompose and sequence their projects.
- How did you choose the path for your 123 Robot?
- Does your 123 Robot need to make any turns? If so, what direction?
- Can you create another sequence that will work for the same challenge?
- RemindRemind students to investigate the code when their 123 Robot moves in unexpected ways. It will likely take more than one try to drive the 123 Robot to its destination. Trial and error is a part of coding!
- Students may need to wake the 123 Robot if it times out. Remind students of the steps to wake the robot by pushing the wheels along a flat surface as shown here. Turn on sound for this animation to hear the indicator sounds of the 123 Robot. For more information about the 123 Robot, see the Using the VEX 123 Robot VEX Library article.
Video file - AskAsk students if they have ever heard of robots using maps? Have they ever heard of self-driving cars? How do they think a self-driving car might use a map?