
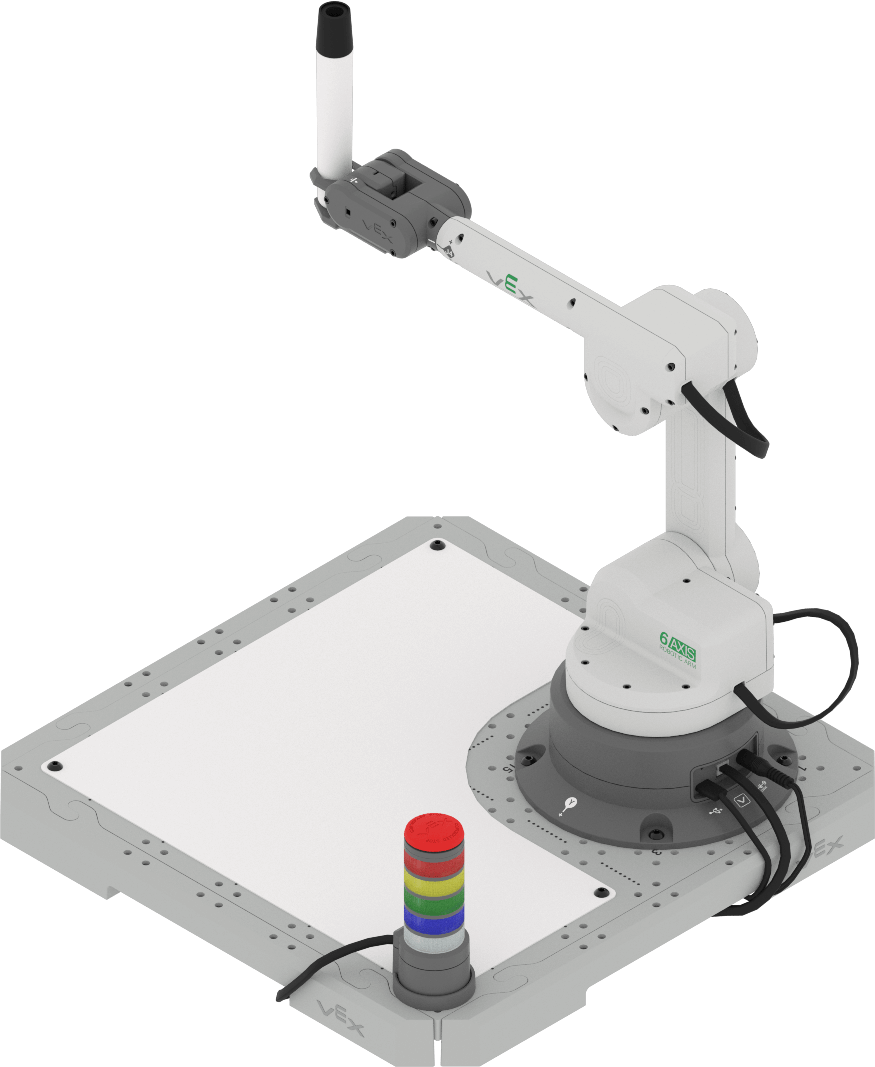
In the previous Units, you have had the Magnet Pickup Tool attached to your 6-Axis Robotic Arm and used that to pick up and move Disks on the CTE Tile. In this Unit, you will change the end effector to the Pen Holder Tool and use a dry-erase marker to draw on the Tile with the Dry-Erase Surface.
In this Lesson, you will:
- follow build instructions to change the end effector and add the Dry-Erase Surface.
- learn about how to use the Pen.
- draw a line on the Tile.
Watch the video below to see the 6-Axis Arm draw a diagonal line across the Whiteboard surface using the pen.
Changing the End Effector
In the previous Unit, you learned about different end effectors that can be used with the 6-Axis Robotic Arm. Follow along with the steps below to change your build.
Coding the Pen
In order to code the 6-Axis Arm to move the Pen and draw on the whiteboard, there are some things we need to consider and build into a project. In this Lesson, you will get started coding the Pen.
Setting the End Effector in VEXcode
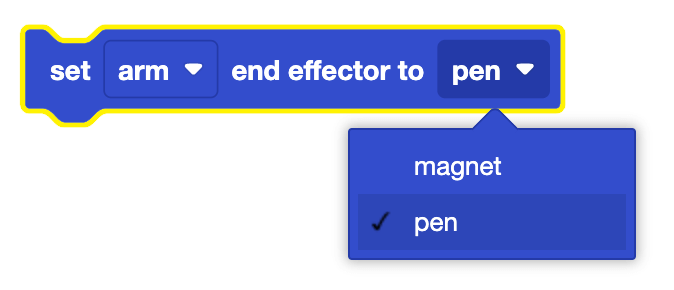
In the projects in this Unit, you will notice a new block, the Set end effector block.
The Set end effector block is used to communicate to the 6-Axis Arm what end effector is being used so that it can set the new Tool Center Point (TCP). The end effector can be changed by using the dropdown option on the block.
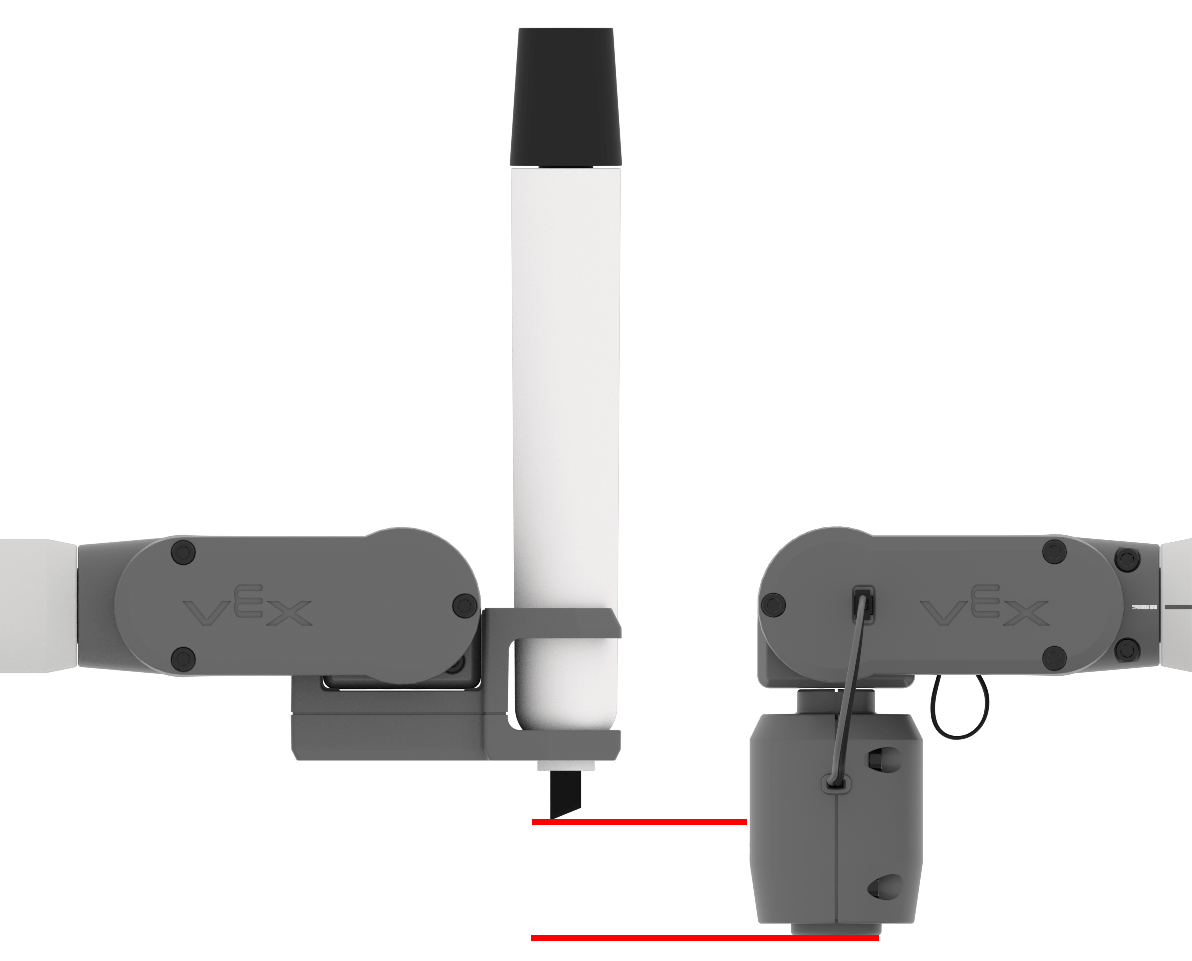
In Unit 1 you learned that the (x, y, z) coordinates of the 6-Axis Arm are determined using the distance from the origin to the TCP.

The TCP of the Pen is at a different z-value than the Magnet. If the Set end effector block is not used to adjust the end effector, the 6-Axis Arm may provide inaccurate coordinates or move to an unintended location.
Drawing a Line
Now that you conceptually understand the parts of the project, follow the steps below to create and run the project and see a line drawn on the whiteboard.
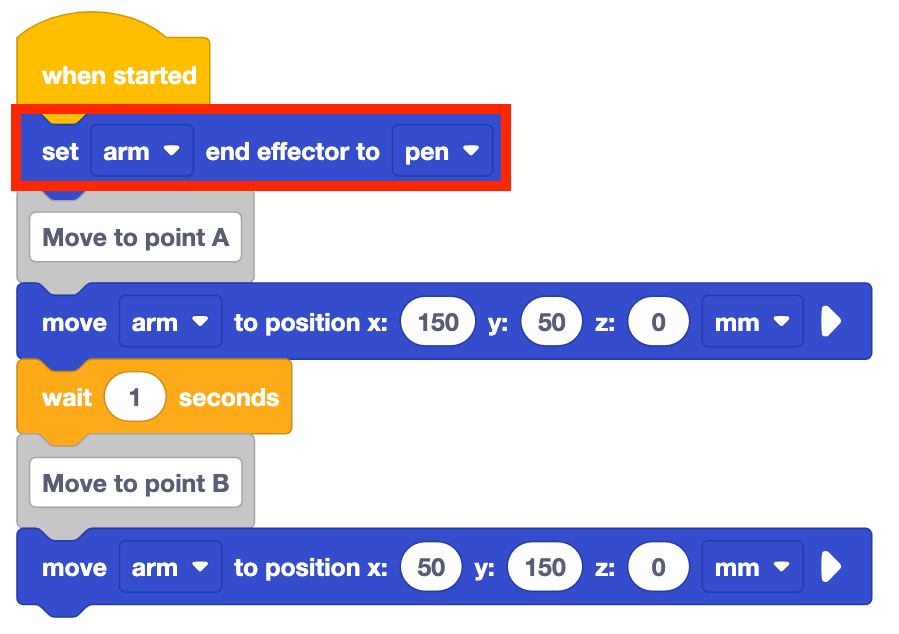
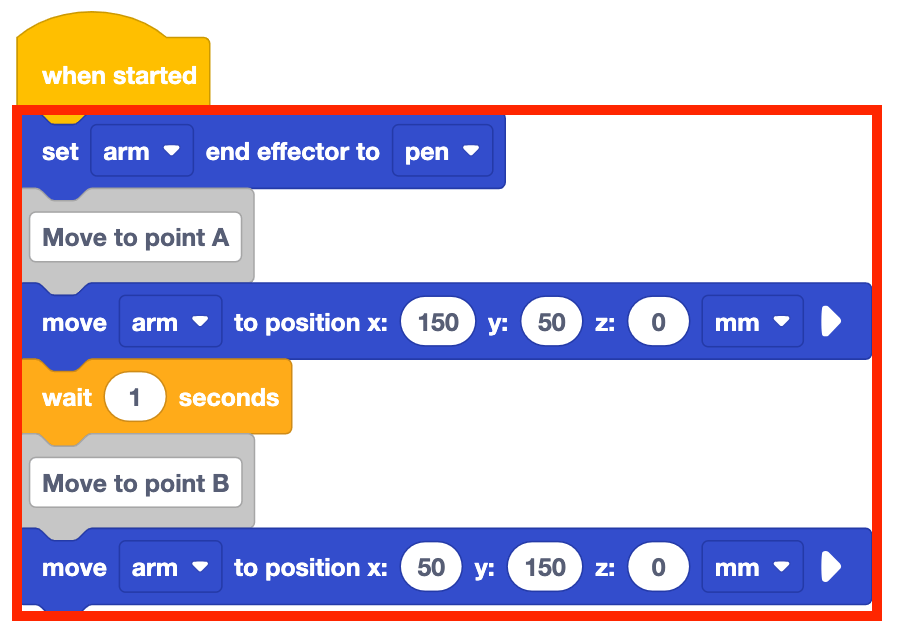
Open a New Blocks Project and recreate the project shown here.
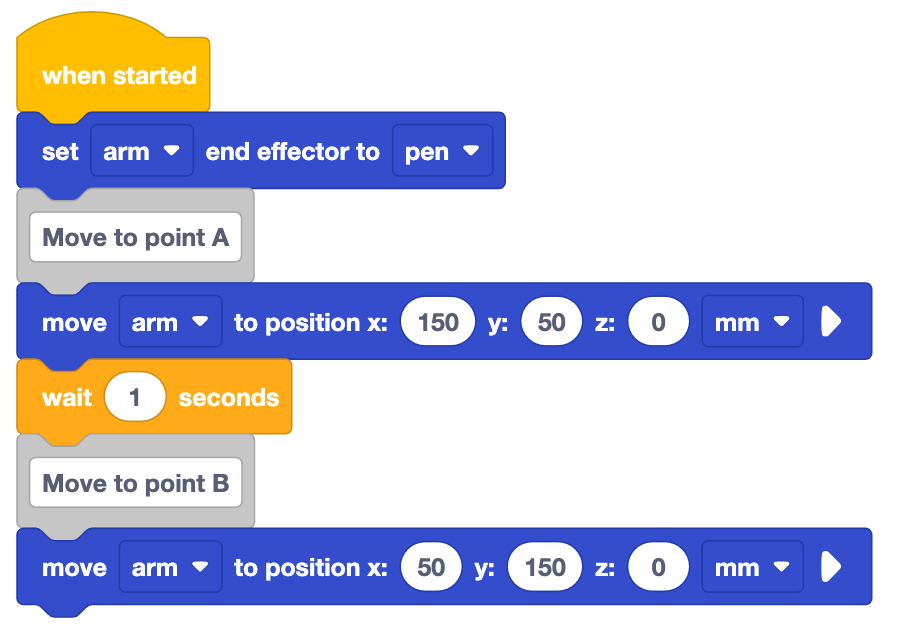
Look at the blocks in the project. How do you think the 6-Axis Arm will move based on this project? Record your prediction in your engineering notebook.
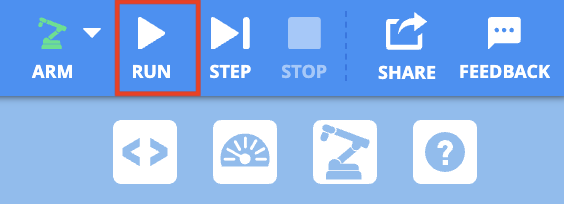
Be sure the 6-Axis Arm is connected to VEXcode. Run the project.
Observe as the 6-Axis Arm uses the Pen to draw a line from the first coordinate to the second on the whiteboard.
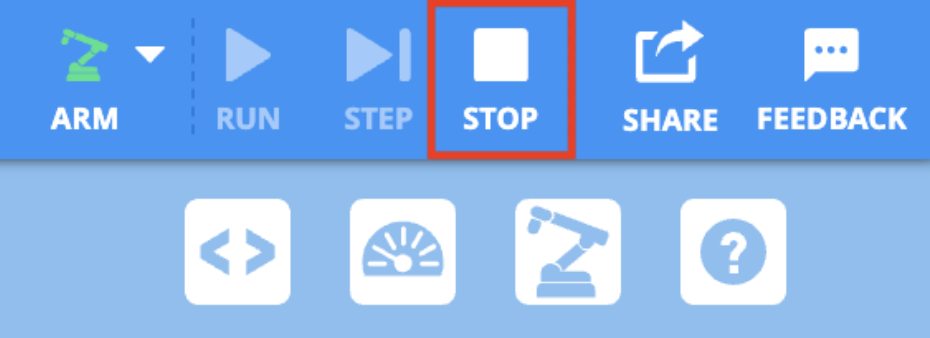
Stop the project once the 6-Axis Arm has stopped moving.
How does the movement of the 6-Axis Arm compare to your prediction above? Record these comparisons in your engineering notebook.
Check Your Understanding
Before moving to the next Lesson, ensure that you understand the concepts in this Lesson by answering the questions in the document below in your engineering notebook.
Check Your Understanding questions > (Google Doc / .docx / .pdf)
Select Next > to learn about coding the movements of the 6-Axis Arm to avoid obstacles.