
Practice
In the Learn section, you learned how to plan the path you want your robot to take by decomposing behaviors. You also learned how to code your robot's arm and claw to move using the [Spin] and [Spin for] blocks in VEXcode IQ. In this practice section, you will begin to apply that learning in the Autonomous Movements practice activity.
In this activity, you will create a VEXcode IQ project to stack one IQ Cube on top of another, and score an additional cube in the scoring zone. Follow along with the video below to decompose the behaviors for the activity. Then you can use those behaviors to begin creating your project for the Autonomous Movements practice activity.
Now it's your turn to complete the Autonomous Movements practice activity!
In this animation, the robot drives to the first cube, picks it up, then drives to the matching scoring zone and places the cube on the cube secured to the Field. The robot then moves the other cube into the scoring zone. This animation shows just one example of how a project can be created to complete the Autonomous Movements practice activity.
Use this document as a reference to complete the practice activity. Google Doc / .docx / .pdf
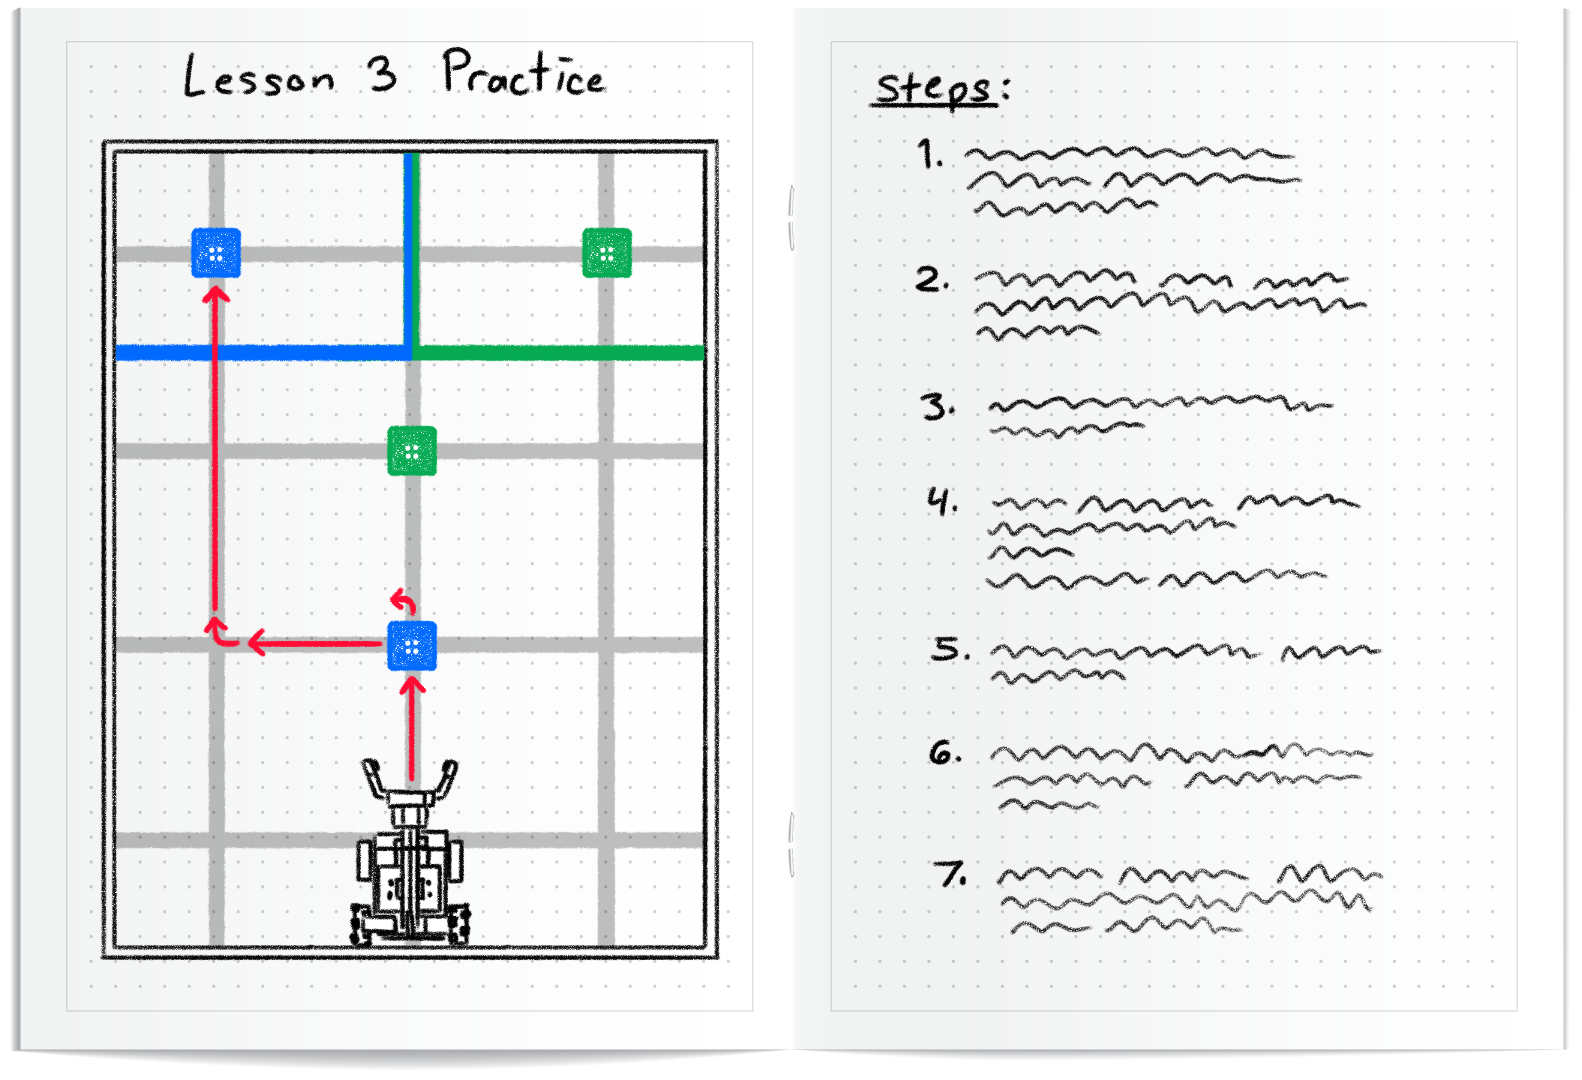
As you complete the Autonomous Movements activity, document your projects and tests in your engineering notebook.
- Draw a sketch to show how your robot should move to complete the activity
- List the steps needed to create a project based on your sketch
- Document the changes you make after each iteration
See the image on the left for an example of how you can record your project ideas and tests.
Prepare for the Challenge
In Compete (on the next page), you will code your robot to stack one cube and score another in the Coding for Cubes Challenge. The fastest time, wins! Learn how to compete in the challenge, check your understanding, then practice for the challenge.
Watch the animation below to see an example of a Clawbot successfully scoring both cubes. A timer and a Brain icon are at the top of the The Clawbot starts in the middle of the right wall of the Cube Collector Field, facing the center where a green and blue cube are placed on the intersecting Field lines in front of it.
After a countdown, the robot drives forward, pushing the green cube into the green scoring area. It picks up the blue cube with the claw, and stacks the cube on the cube in the blue scoring zone. Once the blue cube is stacked, the timer stops.
The goal of this challenge is to score both cubes in the scoring area, with one stacked, in the fastest time.
Follow the steps in this document to learn more about how to complete this challenge. Google Doc / .docx / .pdf
Check Your Understanding
Before beginning the challenge, ensure that you understand the rules and setup of the challenge by answering the questions in the document below in your engineering notebook.
Check Your Understanding questions Google Doc / .docx / .pdf
After completing the questions, try practicing the challenge.
Select Next > to compete in the Coding for Cubes Challenge.