
Previously in this Unit, you have learned to do the following:
- Identify the robot behaviors needed in order to create a VEXcode project to solve a task.
- Modify robot behaviors.
- Code the 6-Axis Robotic Arm to move along the x, y, and z-axes.
You will complete one additional activity in this Unit with the 6-Axis Arm putting all of these skills together.
Putting It All Together Activity
Watch the animation below to see how the 6-Axis Arm could move in order to complete the activity. In this animation, the 6-Axis Arm begins in the safe position, then moves down on the z-axis to touch the Tile to the left of the first Cube obstacle. It then moves up, over, and down, to touch the Tile between each of the remaining Cubes, sequencing movement on the x, y, and z-axes as needed to reach each location without touching the Cubes.
- Setup: Place 3 Cubes on the Tile:
- Cube 1 on Tile location 27
- Cube 2 on Tile location 29
- Cube 3 on Tile location 17
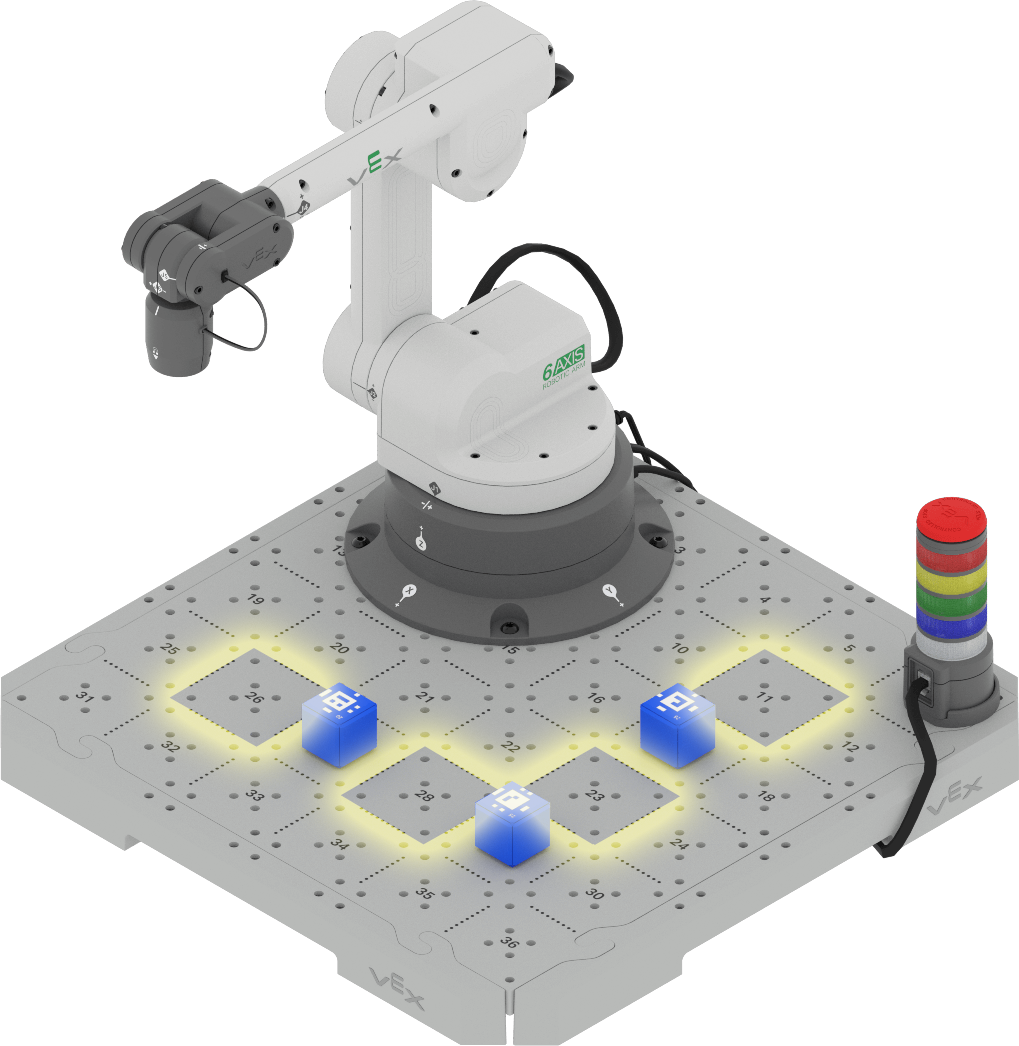
Activity: Create a project for the 6-Axis Arm to touch down on Tile locations 26, 28, 23, and 11 without bumping any of the Cubes.
- Begin by loading the project you created in Unit 3 Lesson 5. Rename the project. You can now modify this project to complete the activity.
- Once you have created your project, be sure to save it.
- Run the project to test it. Be sure the 6-Axis Arm is connected to VEXcode. Did your project successfully move the 6-Axis Arm to touch down on all four Tile Locations? If not, continue to modify your project and test it until you are successful.
- Document your project by recording it in your engineering notebook.
Wrap Up Reflection
Now that you have coded the 6-Axis Arm to move to specific Tile Locations, it is time to reflect on what you have learned and done in this Unit.
Rate yourself as a novice, apprentice, or expert on each of the following concepts in your engineering notebook. Provide a brief explanation for why you gave yourself that rating for each concept:
- identifying the robot behaviors needed in order to create a VEXcode project to solve a task.
- modifying robot behaviors.
- coding the 6-Axis Arm to move along the x, y, and z-axes.
Use this table to help you determine which category you fall under.
| Expert | I feel that I fully understood the concept and could teach this to someone else. |
| Apprentice | I feel that I understood the concept enough to complete the activity. |
| Novice | I feel that I did not understand the concept and do not know how to complete the activity. |
Then, reflect on the learning targets you co-created with your teacher for this Unit. Have you learned what you set out to learn? Why or why not? What were you most successful with? Why? How do you think you can build on your progress moving forward?
Each person in your group should complete their self-reflections in their engineering notebooks. Once everyone in your group has completed their self-reflections, check-in with your teacher and let them know you are ready for your debrief conversation.
Debrief Conversation
Using your reflections and notes in your engineering notebook, rate yourself on the Debrief Conversation Rubric (Google Doc / .docx / .pdf). For each of the topics, rate yourself as Expert, Apprentice, or Novice.
Ask your instructor if you need any clarification on what is expected of you during this self-assessment.

Select < Return to Units to go back to all Units.