
In our previous Units, you controlled the movement of the 6-Axis Robotic Arm using the Teach Pendant. This allowed you to jog the 6-Axis Arm along each axis.
Using the Teach Pendant is helpful for learning about the basic movements of the 6-Axis Arm, however as activities become more complex, it can be difficult to remember all of the movements and time-consuming to manually jog to each coordinate needed to complete the activity.
To alleviate some of the limitations of the Teach Pendant, we can use block-based coding. This Lesson will focus on how to open, run, and stop block-based projects.
In this Lesson, you will learn about:
- Using the Signal Tower as a controlled stop.
- How to open a project.
- How to run and stop a project.
- How to edit parameters in a project.
At the end of this Lesson, you will open, run, and stop a project to show different colors on the Signal Tower.
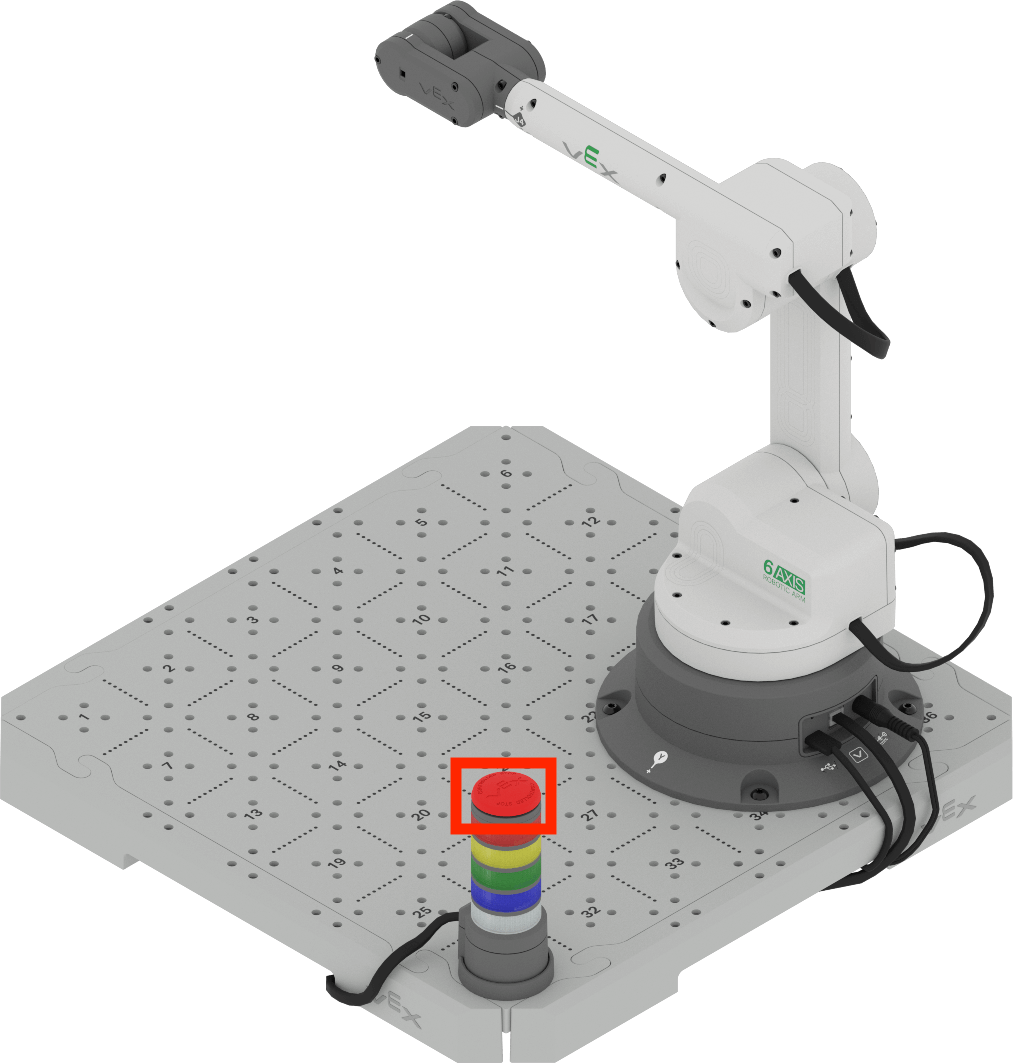
Signal Tower as a Controlled Stop
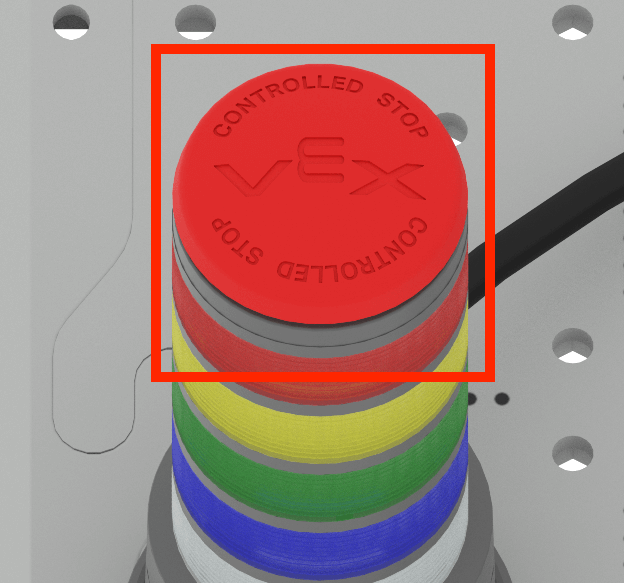
The Controlled Stop in an industrial robotics setting is an important safety feature. It helps to keep both workers and a robotic arm safe and operational, by preventing collisions with obstacles, or other unwanted human interactions. The Controlled Stop on the 6-Axis Arm functions in the same way.
Pressing the Controlled Stop button will cause the movement of the 6-Axis Arm to stop immediately. In this Lesson, you will learn how to code the Signal Tower to show different colors and test the functionality of the Controlled Stop button.
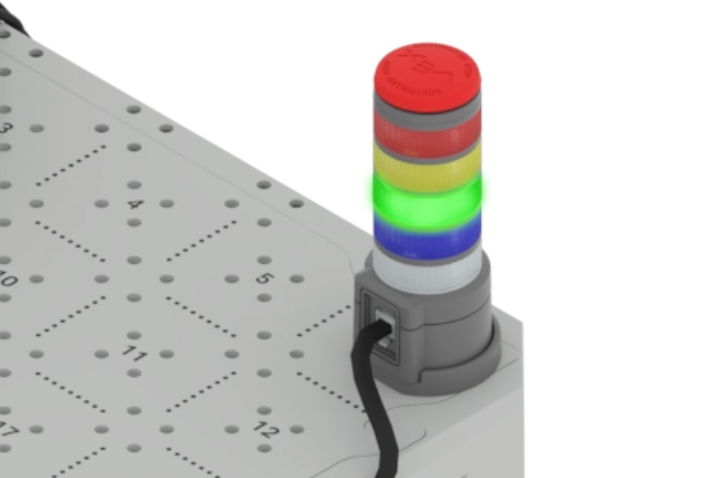
The Signal Tower is made up of many different colored lights and was added to your build in Unit 1.
It can be coded to change colors depending on the actions of the 6-Axis Arm, or the Controlled Stop button on the top can be used to stop the movement of the 6-Axis Arm.

The Signal Tower can be used to trigger a Controlled Stop when a project is running.
When a project is started, the Signal Tower will show green, as shown in this image.

When the Controlled Stop button on the Signal Tower is pressed, it will trigger a controlled stop of the 6-Axis Arm. The Signal Tower will then blink red.
View the video below to see a project running, and the change that occurs when the Controlled Stop button is pressed. In this video clip, the Signal Tower glows green, then a hand presses the Controlled Stop button, and the green light goes out and is replaced by a flashing red light on the Signal Tower.
Running a VEXcode Project
Many of the projects you will work on in this course will be built from new projects. In this Lesson you will learn how to open a new project, add a block, change a parameter, and run the project in VEXcode.
Open a New Blocks Project by following the steps in this video.
Select the File option in the Toolbar to open the File menu, then select New Blocks Project. A pop up window appears with the option for EXP Brain or 6-Axis Arm. Select 6-Axis Arm. The new project is then opened.
Once you have opened a new project, you can drag blocks from the Toolbox into the project.
Drag a Set signal tower block from the Toolbox into the Workspace, and attach it to the When started block.
Follow the steps in this video to add the block to your project. In this video clip, the Set Signal Tower block is selected in the Toolbox, dragged into the Workspace, and attached to the When started block.
Parameters are any inputs in the blocks, including drop downs, like those used here to change the color of the Signal Tower lights.
Follow the steps in this video to set the parameters of the Set signal tower block to white and blinking. In the video clip the color parameter is selected first, and white is selected from the drop down. Next, the second parameter is selected and blinking is chosen from the dropdown. The block then reads ‘Set signal tower to white and blinking’.
Note: The colors on the Signal Tower are standardized across industries. You will learn more about what each color signifies in a later Unit.
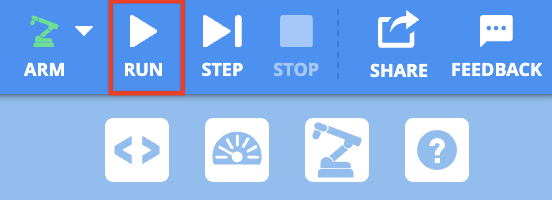
Then connect your 6-Axis Arm to VEXcode EXP and run the project.
To run the project, select the RUN button.
Note: When a project is started, the 6-Axis Arm may move in order to begin the project from a safe position.
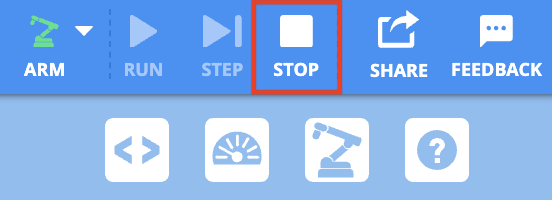
While the project is running, press the Signal Tower Controlled Stop button. You should see the Signal Tower blink red after the Controlled Stop button is pressed.

Then stop the VEXcode EXP project by selecting the STOP button.
Activity
Now that you have opened, edited, and run a project, you can practice changing parameters and predicting what will happen when the edited project is run. Follow the steps below to complete the activity.
- Modify the code of your project by changing parameters of the block.
- What do you predict will happen when the project is run? Document this in your engineering notebook.
- Connect your 6-Axis Arm to VEXcode EXP and run the project. While the project is running, press the Controlled Stop button then stop the project.
- Note: The 6-Axis Arm may move when the project is run, to begin at the safe position.
- Record in your engineering notebook what happened when the project was being run.
- What colors did the Signal Tower display? Were they solid or blinking? What happened when you pressed the Controlled Stop button on the Signal Tower?
- Then compare your prediction to your observations of what happened when the project was run.
- When you are completed with the activity, rename and save the project to your device.
Check Your Understanding
Before beginning the next Lesson, ensure that you understand the concepts in this Lesson by answering the questions in the document below in your engineering notebook.
Check Your Understanding questions > (Google Doc / .docx / .pdf)
Select Next > to learn about computer science fundamentals.