
In the previous Lesson, you analyzed a VEXcode project in which the 6-Axis Robotic Arm drew a triangle. In this Lesson, you will learn:
- How to code the 6-Axis Arm to draw the triangle from the previous Lesson.
- How to add comments to a project in VEXcode.
- How to code the 6-Axis Arm to draw multiple triangles.
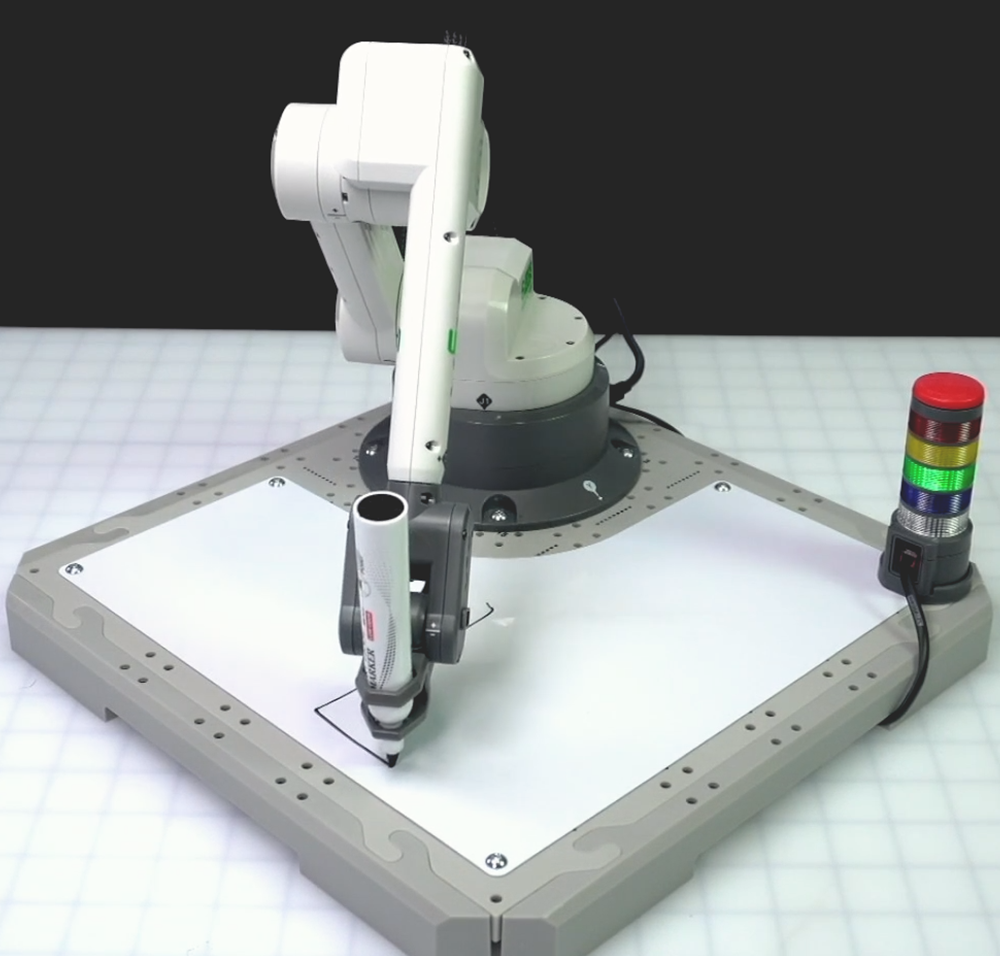
At the end of this Lesson, you will add on to your project so that the 6-Axis Arm draws a second triangle on the Whiteboard. Drawing multiple triangles using the Pen Holder Tool highlights how the 6-Axis Arm moves in multiple axes.

Draw a Triangle
Now we are going to build the project to draw a triangle from Lesson 1. We will break the project down into individual blocks and explore how to code the 6-Axis Arm to move along multiple axes.
Follow the steps in this video to open a New Blocks Project. In the video clip, File is selected in the Toolbar, and then New Block Project is selected. A dialog box pops up with two options, EXP Brain on the left, and Arm on the right. The Arm option is selected, and a new project opens in the Workspace.
Follow the steps in this video to add a Comment block to your project. In the video clip, the Comment selector is chosen to the left of the Toolbox. Then a Comment block is selected in the Toolbox, and dragged into the Workspace and attached to the When started block.
Comments explain what each part of a project is intended to do.
As you begin to build more complex projects using more blocks, comments can help you to keep track of where you are in a project. This can also make it easier to troubleshoot when the 6-Axis Arm is not behaving as intended.
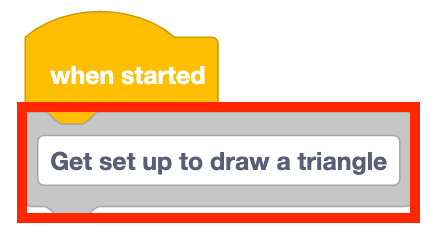
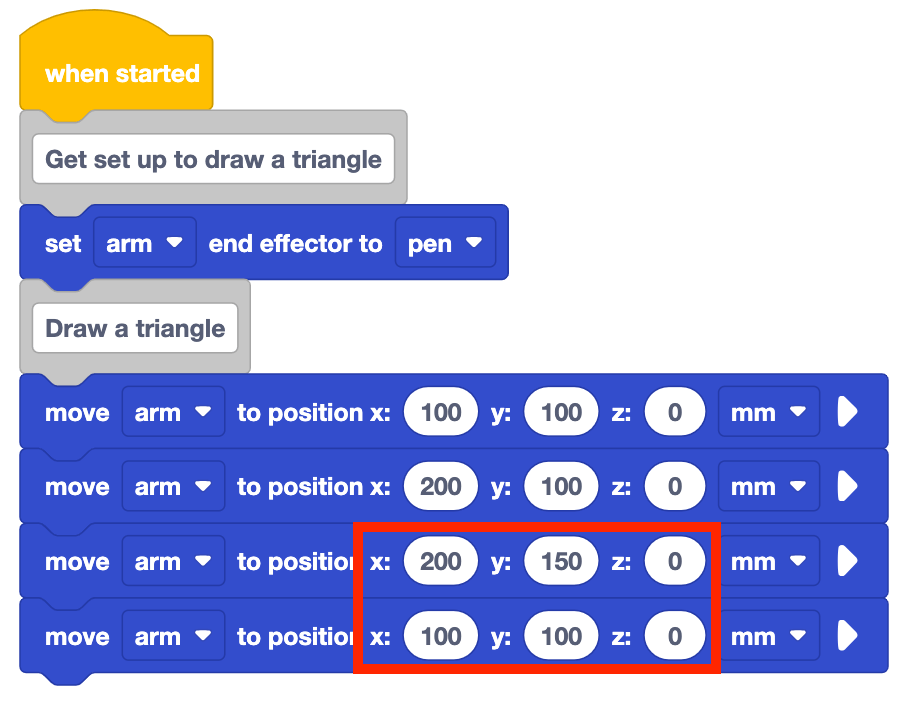
Type "Get set up to draw a triangle" in the Comment block.
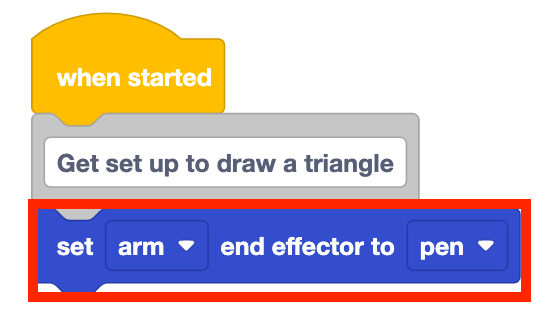
Add a Set end effector block to your project. Set the parameter to 'pen'.
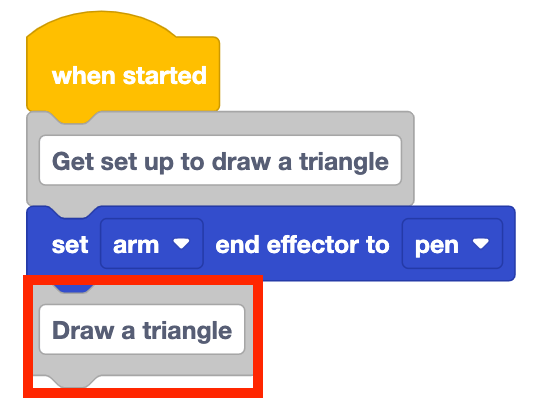
Add another Comment block to your stack. Type 'Draw a triangle' in the Comment block.
This will show that the blocks following the comment will have the 6-Axis Arm draw the triangle.
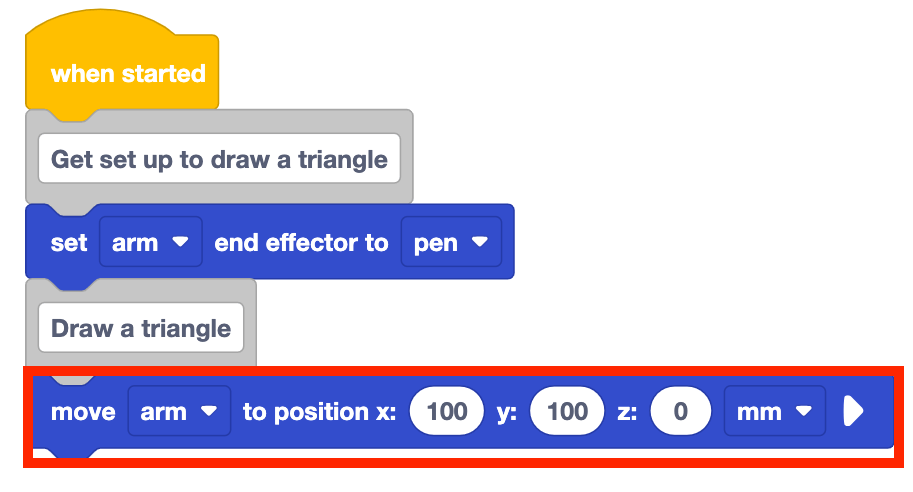
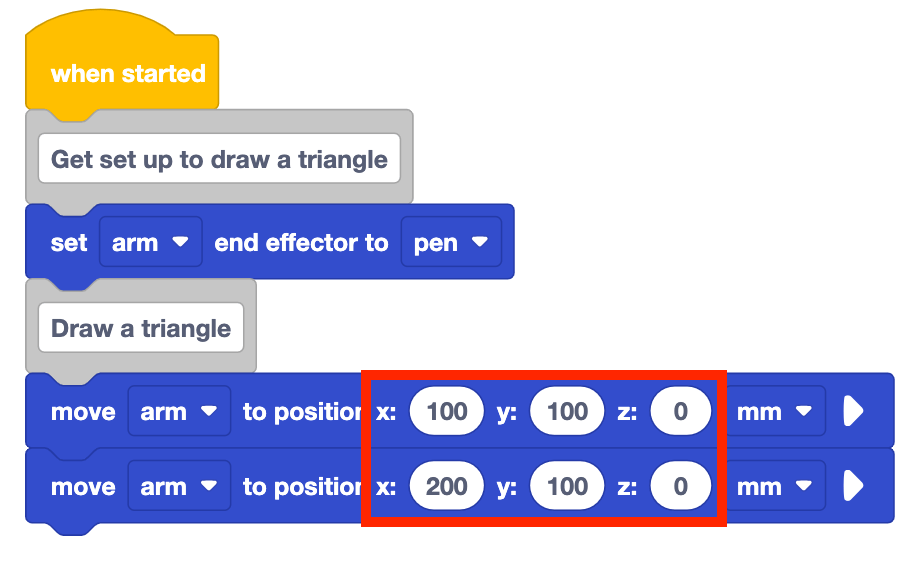
Add a Move to position block to your project. Enter the coordinates (100, 100, 0) into the parameters of the block.
This coordinate will move the 6-Axis Arm to the first point in the triangle.
Add another Move to position block to the project. Enter the coordinates (200, 100, 0) in the parameters of the block.

Notice that the x-coordinate has changed from 100mm to 200mm. This moves the 6-Axis Arm along the x-axis in the positive direction for 100mm, completing the first side of the triangle.
The y-coordinate remains the same, as the 6-Axis Arm has not moved at all along the y-axis. The z-coordinate also remains the same, set to 0mm, so the Pen touches the Whiteboard and draws a line.
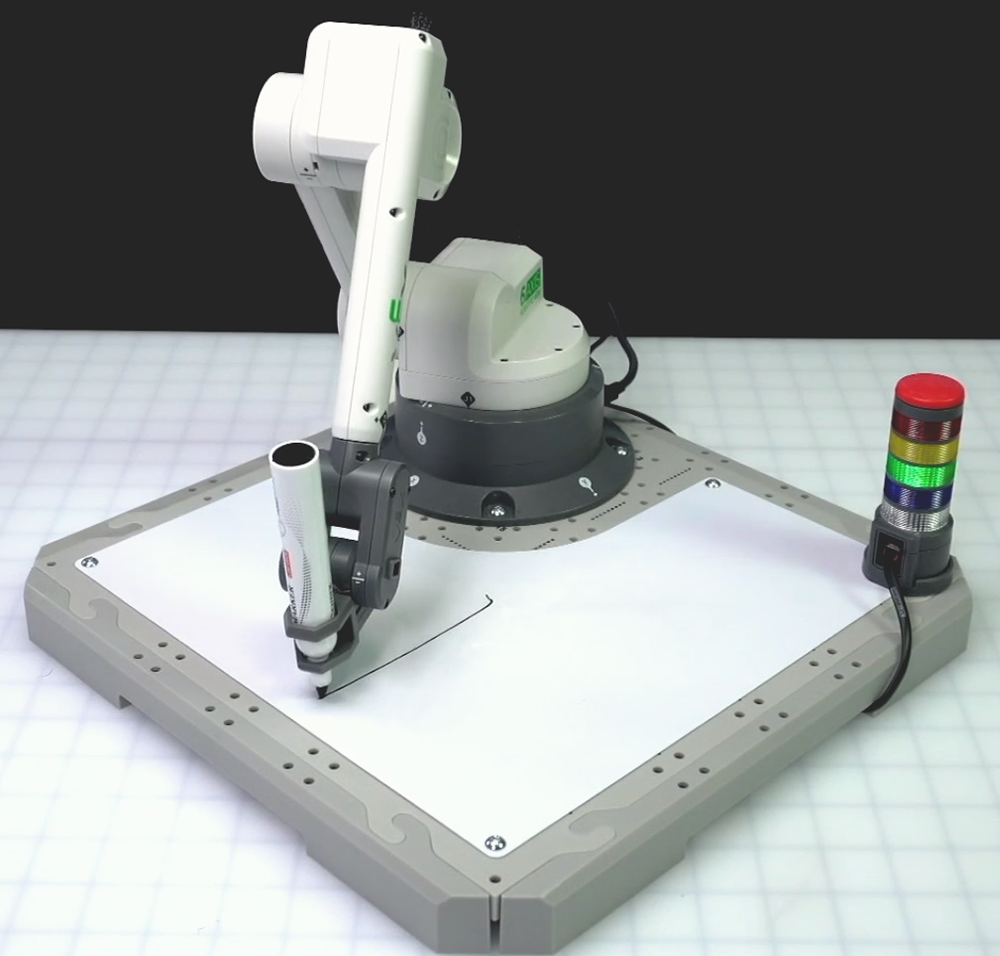
Be sure the 6-Axis Arm is connected to VEXcode. Run the project to test it.
Stop the project when the 6-Axis Arm has finished moving.
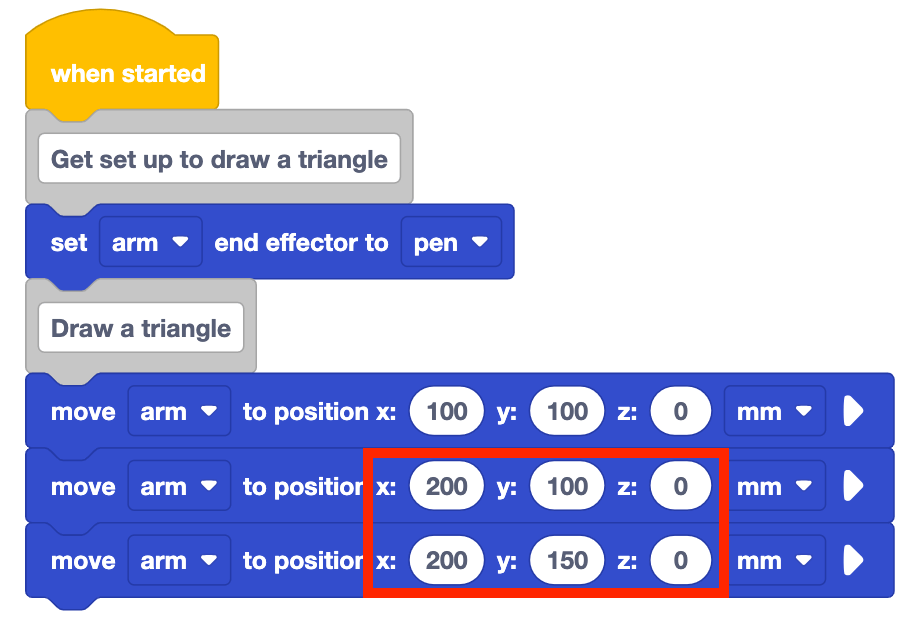
Add another Move to position block to the project. Enter the coordinates (200, 150, 0) into the parameters of the block.
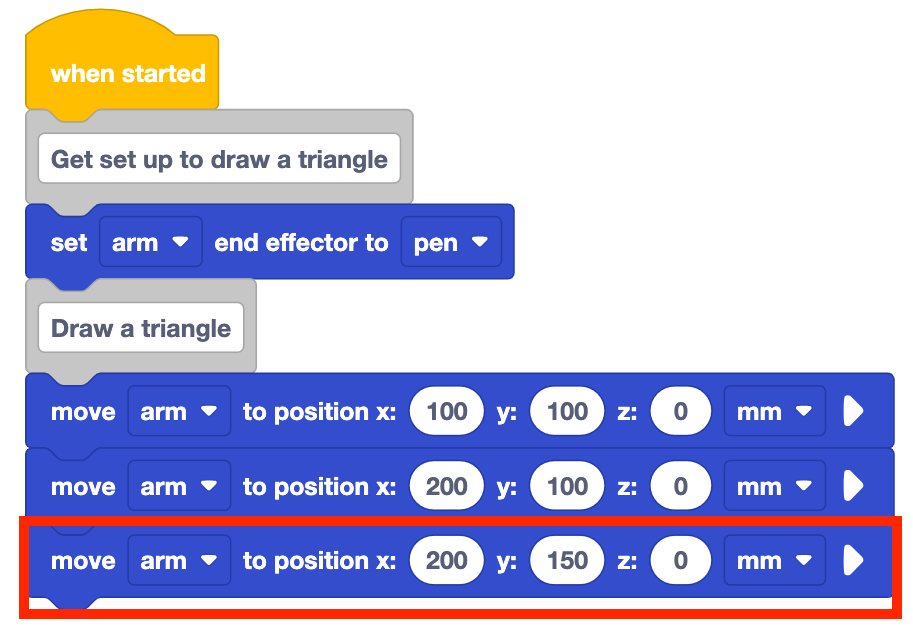
This will code the 6-Axis Arm to draw the second side of the triangle.
Notice that the x-coordinate and the z-coordinate remain the same, but the y-coordinate moves 50mm in the positive direction. The 6-Axis Arm only needs to travel along the y-axis to draw this side of the triangle.
Erase the Whiteboard. Run the project to test it.
Erasing the Whiteboard between each run can help you to clearly see what the Pen is drawing each time you test the project.
Stop the project when the 6-Axis Arm has finished moving.
Add another Move to position block to the project. Enter the coordinates (100, 100, 0) into the parameters of the block.

Notice you are changing both the x and y-coordinates to make the third side of the triangle. The 6-Axis Arm will draw a diagonal line connecting the third point of the triangle back to the starting point.
Your project moves along multiple axes in a coordinated way to draw the third side of the triangle successfully.
Erase the Whiteboard. Run the project to test it.
Stop the project when the 6-Axis Arm is finished moving.

Be sure to rename and save your project to your device.
Activity
Now that you have practiced coding the 6-Axis Arm to draw a triangle with the Pen, you will add on to your project so that the 6-Axis Arm draws an additional triangle on the Whiteboard.
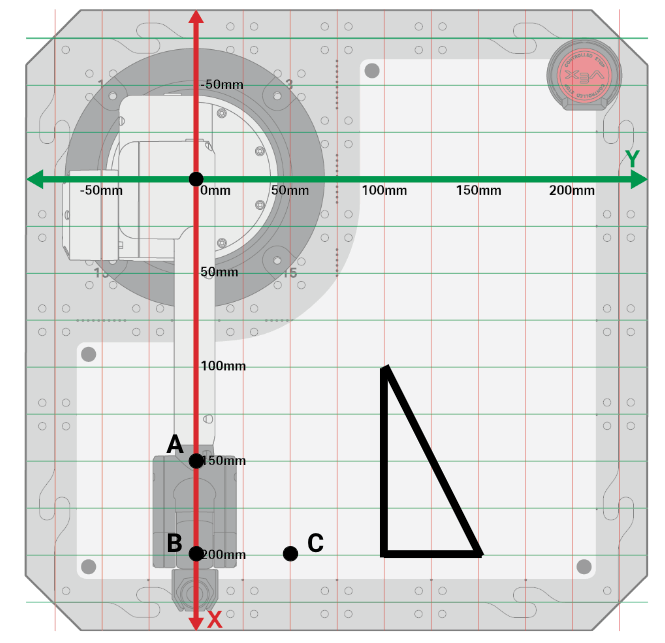
Your second triangle will have the following points.
- A (150, 0, 0)
- B (200, 0, 0)
- C (200, 50, 0)
Activity: Build on to your project to have the 6-Axis Arm draw a second triangle on the Whiteboard. Use comments to organize this project.
- Add onto your Lesson 2 project and create comments describing each behavior you want the 6-Axis Arm to complete to organize your code.
- Add accompanying Move to position blocks to your project for the 6-Axis Arm to draw the second triangle.
- Run the project to test it.
- Did you project draw a second triangle on the Whiteboard? If not, continue to modify your project and test it until you are successful.
- After you have completed the project, rename and save the project to your device.
- Document your project by recording it in your engineering notebook.
For Your Information
As you build your project to draw a second triangle on the Whiteboard, you may find yourself with an unwanted line, like this:
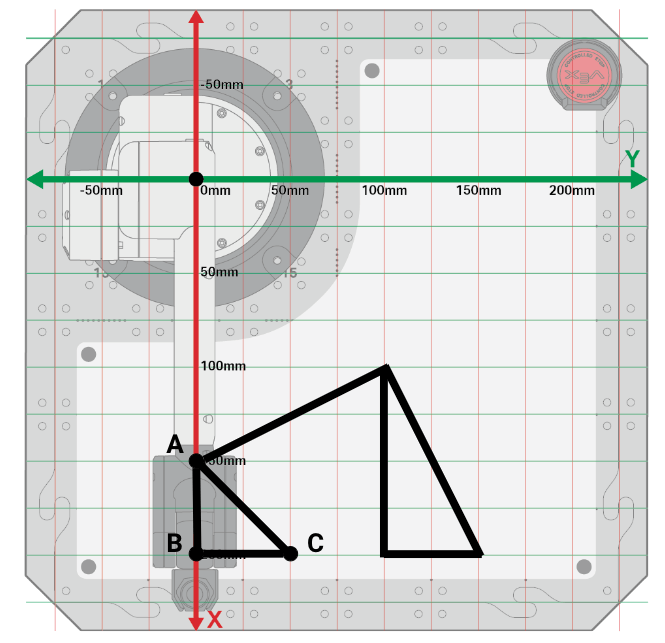
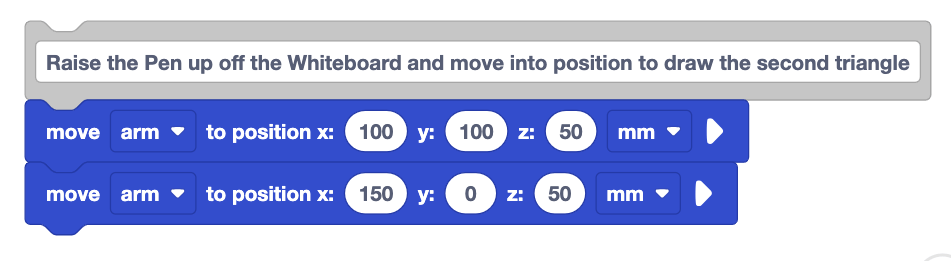
- This is because the Pen remained on the Whiteboard when you moved from one triangle to the next. You will need to add blocks to raise the 6-Axis Arm by moving it along the z-axis. To do this, you will need to use two Move to position blocks – one to raise the arm, and the next to move it above the start of the second triangle.
Check Your Understanding
Before moving to the next Lesson, ensure that you understand the concepts in this Lesson by answering the questions in the document below in your engineering notebook.
Check Your Understanding questions > (Google Doc / .docx / .pdf)
Select Next > to complete the Mid-Unit Reflection.