
Learn

Before you can drive the TrainingBot in the Figure Eight Challenge, you first need to learn how to drive the TrainingBot using the Controller. 

Driver Control Program

There is a program already built into the Brain that allows you to drive the TrainingBot using the Controller without having to write any code. View the animation below and follow along to run the Driver Control program on the Brain.

The steps to open the Driver Control program on the Brain include: 

  1. Press the Drive icon on the Brain screen to select the Drive program.
  2. Press the 'Run' icon to run the program.
  3. To stop the program, select the 'Stop' icon. 

Open Lesson Summary Google / .docx / .pdf


Video file

Controller Configurations

There are four different configurations of the Driver Control program on the Brain: Left, Right, Split, and Dual drive. Follow the steps in the animation below to learn what each of the four configurations are, and how to select them on the Brain.

View the animation to see how to select a Controller configuration for the Driver Control program on the Brain. The steps include: 

  1. Press the 'Drive' icon to select the Drive program.
  2. Select the 'Controls' icon to view the configuration options. 
  3. Select 'Left,' 'Dual', 'Split', or 'Right' to view each of the Controller configurations. 

Open Lesson Summary 
Google / .docx / .pdf

Video file

Each of the four driver control options allows you to control the BaseBot using the joysticks in different ways.

Configuration Description Joystick Controls
Brain screen reads Controls at the top, and lists the available control schemes from left to right: 'Left', 'Dual', 'Split', and 'Right'. The left control scheme shows control of ports 3 and 4 on the left joystick. At the bottom two buttons read 'Controller 1 Map' and 'Controller 2 Map', respectively.

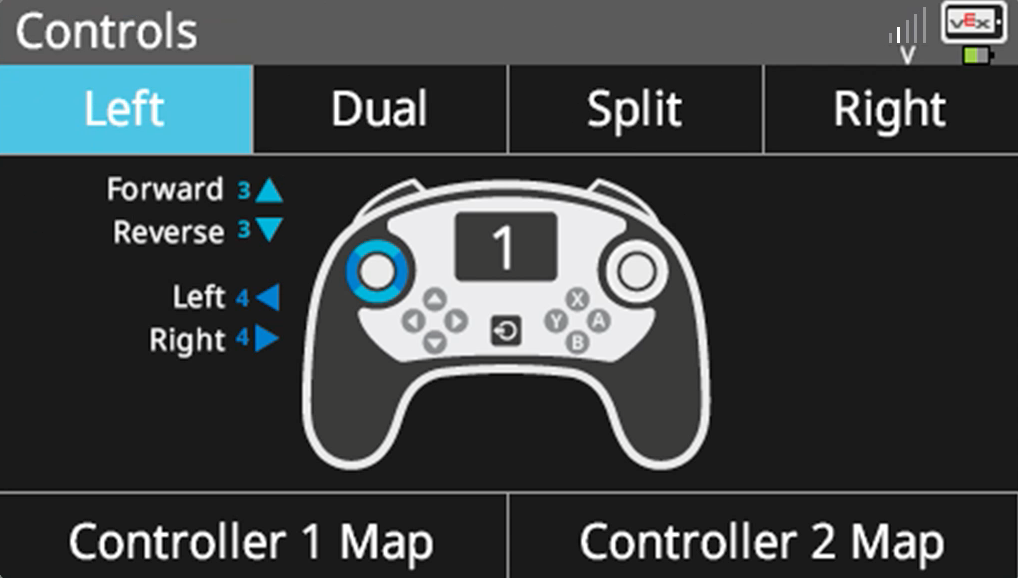
Left

Drive the robot forward, reverse, left, and right all using the left joystick.

Left joystick diagram for driving forward, reverse, left, and right using the left joystick on the Controller.
Brain screen reads Controls at the top, and lists the available control schemes from left to right: 'Left', 'Dual', 'Split', and 'Right'. The Right control scheme shows control of ports 2 and 1 on the right joystick. At the bottom two buttons read 'Controller 1 Map' and 'Controller 2 Map', respectively.

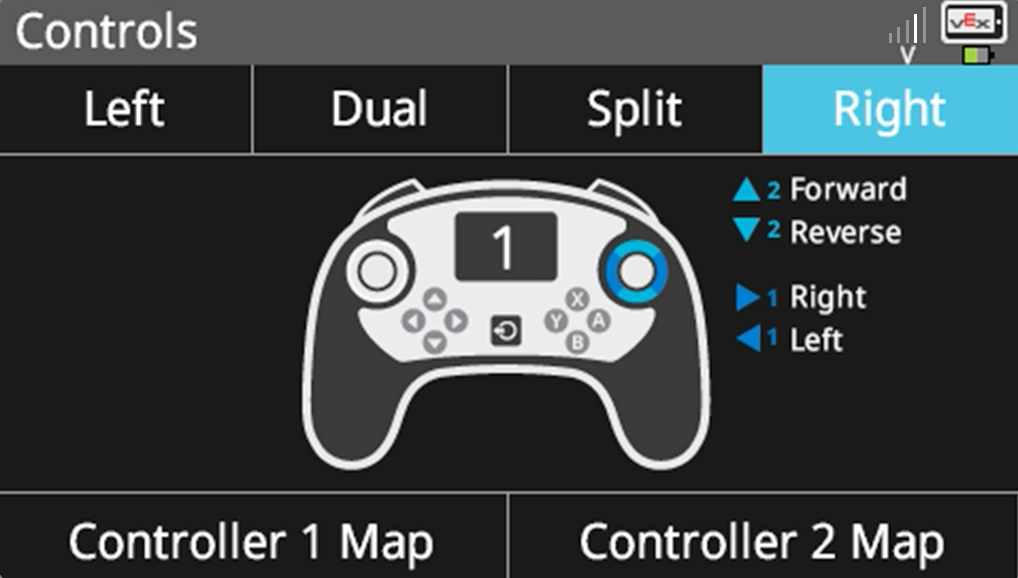
Right

Drive the robot forward, reverse, left, and right all using the right joystick.

Right joystick diagram for driving forward, reverse, left, and right using the right joystick on the Controller.
Brain screen reads Controls at the top, and lists the available control schemes from left to right: 'Left', 'Dual', 'Split', and 'Right'. The Split control scheme shows control of ports 3 and 1 split between the left and right joystick. At the bottom two buttons read 'Controller 1 Map' and 'Controller 2 Map', respectively.

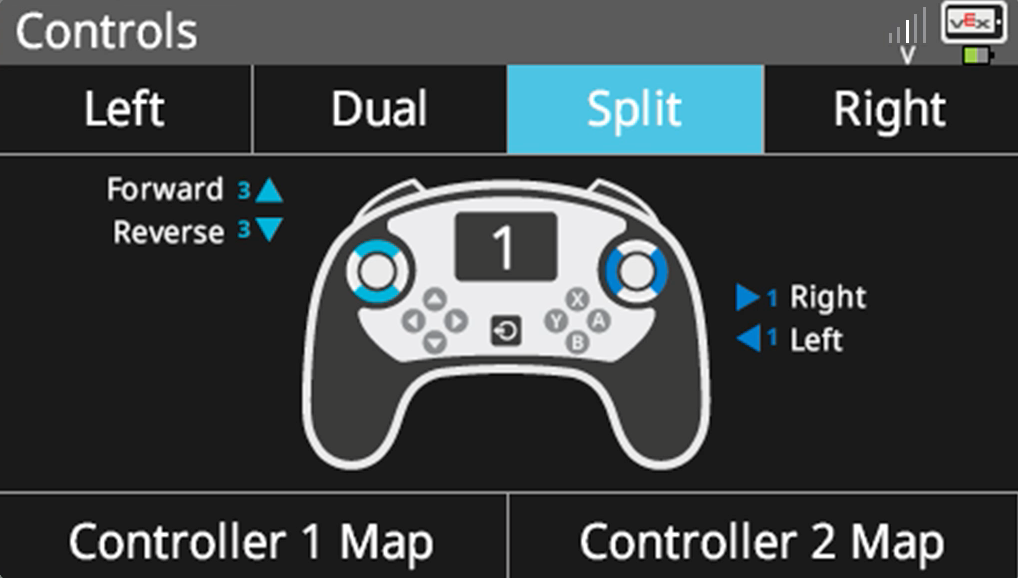
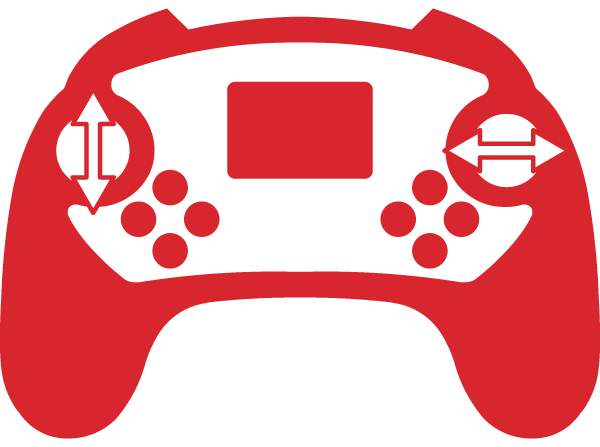
Split

Drive the robot left and right using the left joystick, and forward and reverse using the right joystick.

Split joystick diagram for driving with forward and reverse on one joystick, and left and right on the the other.
Brain screen reads Controls at the top, and lists the available control schemes from left to right: 'Left', 'Dual', 'Split', and 'Right'. The Dual control scheme shows control of ports 3 and 2 split between the left and right joystick. At the bottom two buttons read 'Controller 1 Map' and 'Controller 2 Map', respectively.

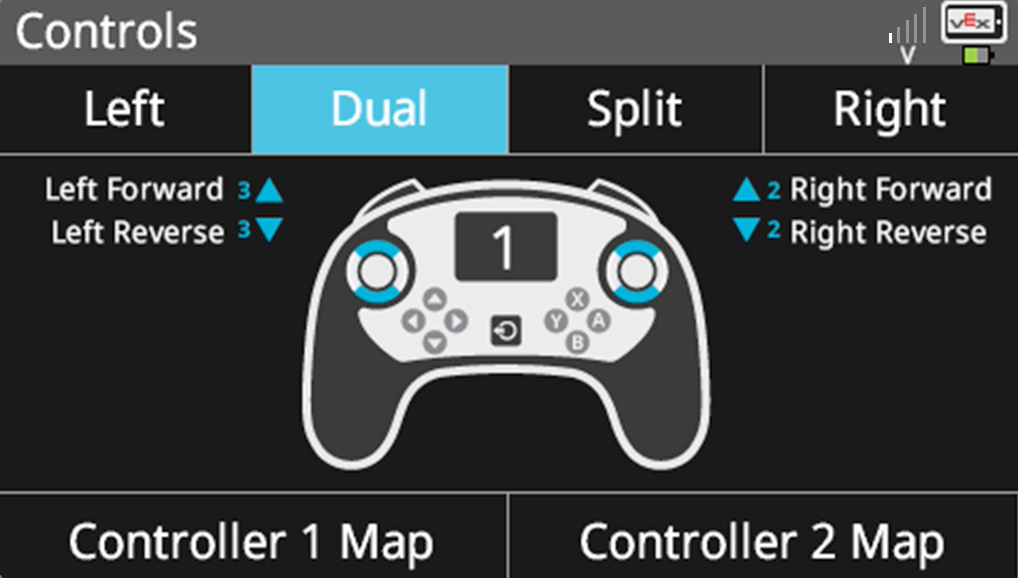
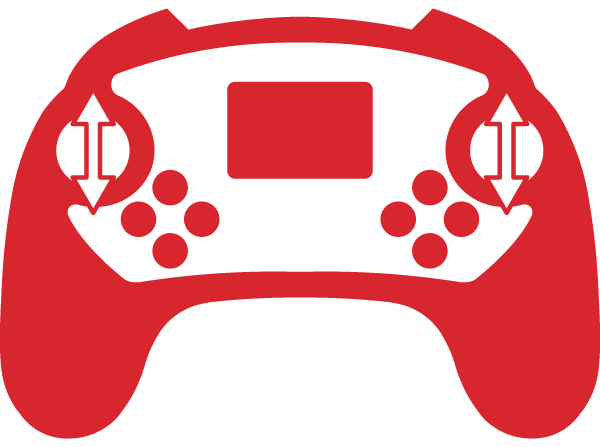
Dual

Drive the left motor of the robot using the left joystick, and the right motor of the robot using the right joystick.

Dual joystick diagram for driving with forward and reverse on both joysticks of the Controller.


Check Your Understanding

Before moving on to the Practice section, ensure that you understand the concepts covered on this page by answering the questions in the document below in your engineering notebook.

Check Your Understanding questions Google / .docx / .pdf


Select Next > to practice using the driver control program with your robot.